Everything Rentari does,
and how to use it.
A complete reference to every capability of the platform, with step-by-step walkthroughs and real screenshots. Read the whole book right here, search it, or filter it down to the part of the product you actually run.
Rentari is an all-in-one, AI-driven property-management platform for self-managing landlords, rental property investors, and property managers of every size. This book is a complete reference to every capability, 460 features across 29 product areas, plus step-by-step walkthroughs grounded in the real screens you see throughout these pages.
Getting Started
The fastest path from a new account to a property that is listed, leased, and collecting rent.
Create your account and verify
This walkthrough shows a new landlord how to create a free Rentari account and confirm their email. Signup is account-first, so your account is created the moment you submit name, email, and password, then you confirm your email (and add your phone later) to unlock money features.
- 1Open the signup page. Go to /register (or click Create free account on the /get-started page, which sends you to /auth?intent=signup). You land on the single email-first auth screen shared by login and signup.
- 2Enter your email and continue. Type your email in the Email address field and click Continue. Rentari checks whether the email already exists; a new email slides you into the signup panel instead of the login panel.
- 3Confirm the Landlord role and your name. In the role pills, Landlord is selected by default (the house icon), so leave it selected, then fill in First name and Last name.
- 4Create a password. Enter a password in Create password. The strength meter enforces the policy of at least 8 characters using at least three of lowercase, uppercase, number, and symbol; a weak password bounces you back with an error.
- 5Accept the required agreements. Check the Terms of Service box and the Fair Housing box. Both are required, so the form will not submit until both are ticked.
- 6Optionally add your mobile phone. US mobile phone is optional and marked so. If you add it, you can also tick the separate SMS consent box for account and login texts. You can skip this and add it later, since Rentari verifies your phone in Settings before any bank connect or payout.
- 7Pass the human check and create the account. Complete the Cloudflare Turnstile verification, then click Create free account. Rentari creates your account, signs you in with a session cookie, and lands you directly on /dashboard with your onboarding checklist.
- 8Confirm your email from the inbox. Open the confirmation email Rentari sends in the background and click the verification link (it opens /auth/verify-email). You see an Email confirmed page that marks your email verified and redirects back to your dashboard. The link is single-use and expires after 24 hours; request a fresh one from Settings if it lapses.
- Account-first means signup never waits on an email or SMS code, but connecting a bank or receiving payouts requires a verified phone, which you add and verify later under Settings.
- The email verification link is single-use and expires in 24 hours. If you double-click it or it expires, request a new one from /dashboard/settings.
- Landlord accounts require 2FA at login (not at signup). In local dev the bypass code is 000000, and the seeded demo at /api/v1/demo/start is read-only so it cannot exercise real signup.
Explore instantly with demo mode
Demo mode drops you into a fully seeded sample portfolio with no signup so you can click through Rentari's real dashboards before creating an account. Anyone can do it straight from the marketing site.
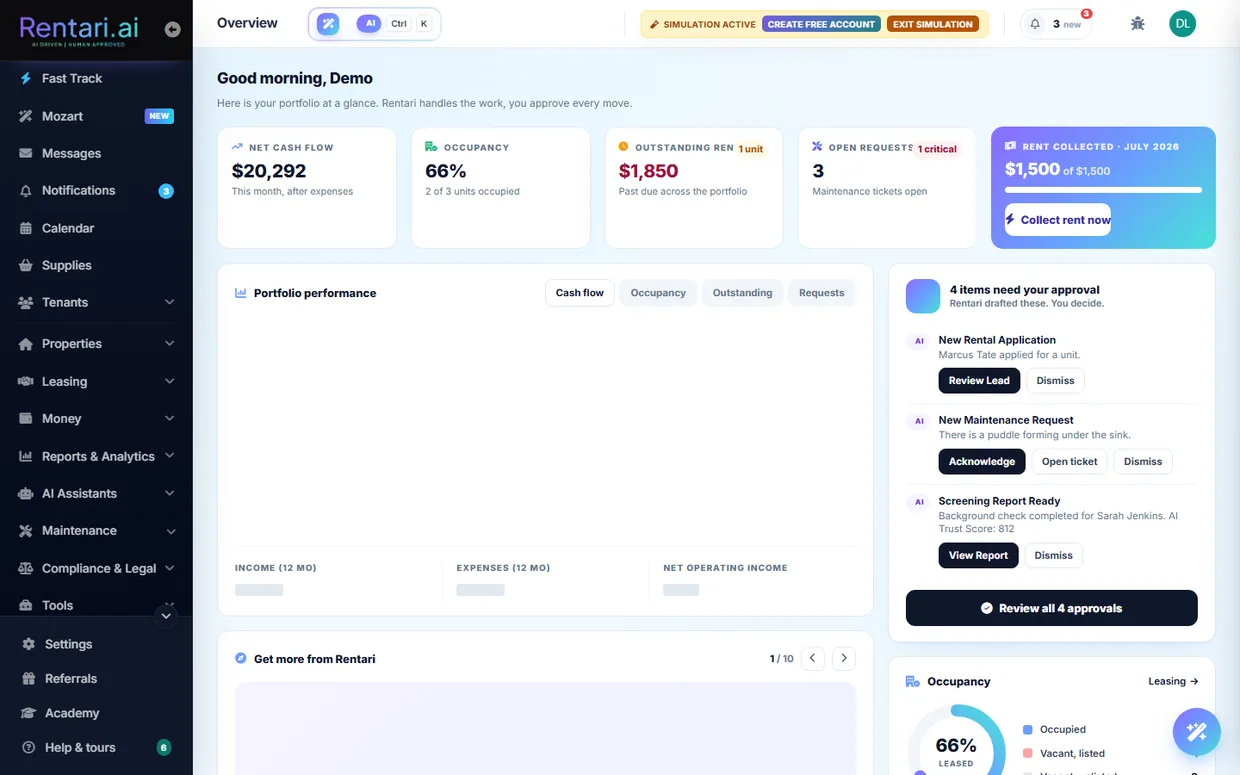
- 1Open the live demo. On the homepage or Get Started page, click the "Try the live demo" (or "Open the live demo") button, which links to /api/v1/demo/start. The server instantly creates a temporary demo_ landlord account, sets your session cookies, and redirects you to /dashboard?demo=1 with no email, password, or credit card required.
- 2Land in the seeded portfolio. You arrive on the landlord dashboard already populated with two properties (123 Main St, St. Louis and 800 Oak Dr, Clayton), three units, two active-lease tenants (Sarah Jenkins and Michael Ross), twelve months of rent and expense history, maintenance tickets, and leasing leads, so every screen shows real-looking data.
- 3Spot the amber demo chip. An amber "sample data, read-only" indicator chip sits in the top navigation whenever demo mode is on, confirming you are exploring seeded data and not a live account. Its Exit button is your way back out.
- 4Click through the dashboards. Browse freely across Rent Collection, Maintenance, the Leasing pipeline, Accounting and Tax, Trust Accounts, the Calendar, the AI Copilot threads, and the vendor and renter directories. Every GET page renders with the pre-seeded demo records so you can see how each feature behaves.
- 5Watch AI proposals without committing. Demo mode is read-only: any non-GET action (saving, sending, deleting) is blocked with an HTTP 403, so AI Copilot suggestions and approval cards are shown for review but nothing is ever written or sent. You always see the proposal before it would commit.
- 6Try the tenant and vendor views. To see the other roles, open /api/v1/demo/tenant/start, which seeds a demo tenant and lands on the renter portal at /dashboard/renter, or /api/v1/demo/vendor/start, which seeds a demo contractor and opens the vendor dashboard at /dashboard/vendor.
- 7Exit the demo. Click Exit on the amber demo chip (or visit /api/v1/demo/stop) to clear the demo session cookies and return to a normal dashboard, from where you can create a free account to keep your own real data.
- Demo mode is strictly read-only. Buttons that would save, send, or delete return a 403 by design, so you cannot break anything or accidentally message a real person.
- No signup is needed and the sample data lives in an isolated demo_ account, separate from any real portfolio, so nothing you click affects a live landlord.
- Starts are rate limited to 10 per hour per IP address. On a shared office or mobile network you may briefly hit the limit and see a "try again in an hour" toast.
Add and manage properties and units
Add a rental to your portfolio so you can start collecting rent, generating leases, and screening applicants. As the landlord you enter the property once, set up its units, and verify ownership before you list it.
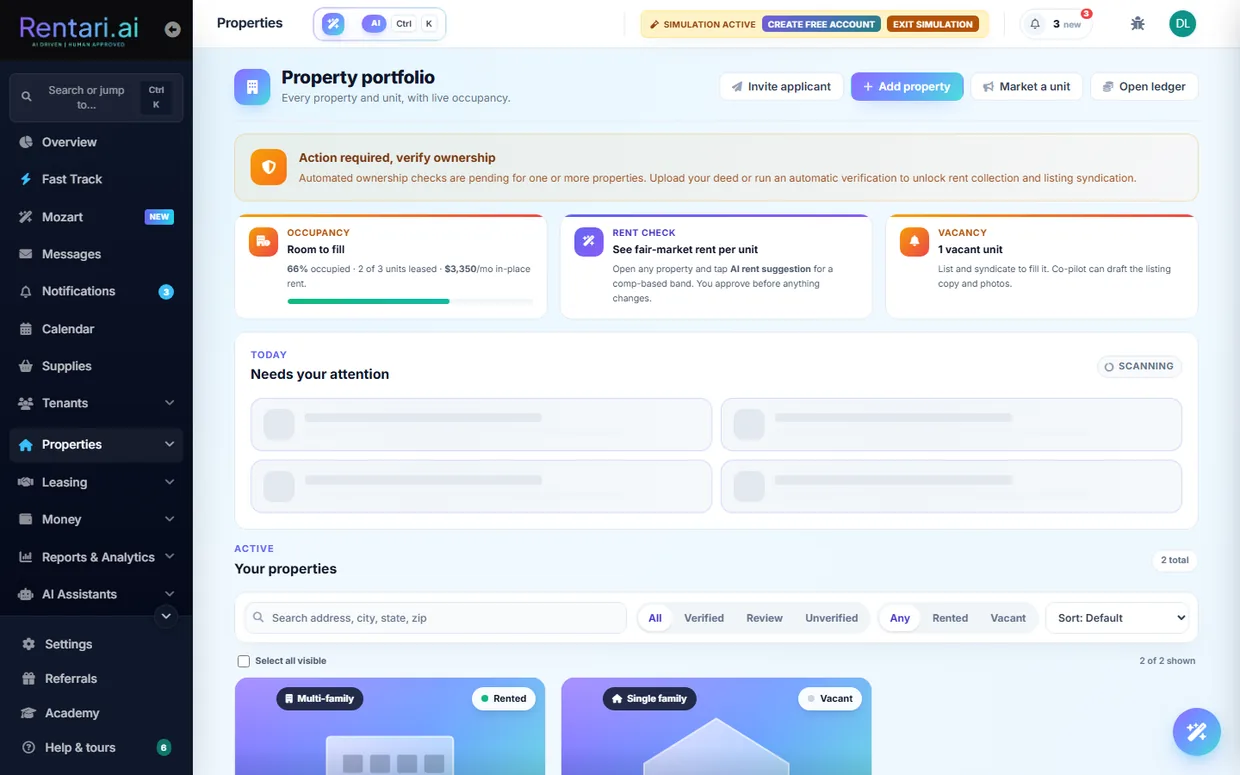
- 1Open the Add Property form. From the Properties nav group click Add property, or go to /dashboard/add-property. You land on a single-scroll form with a progress ring and section chips across the top: Location, Structure, Details, Amenities, and Photos.
- 2Optionally auto-fill with AI. At the top, click the Auto-Fill Property with AI dropzone and upload a listing PDF or insurance document. The AI reads it and pre-fills the fields for you, which you can review and correct before saving, so nothing commits until you save.
- 3Enter the location. In the Location section start typing the Street Address and pick the match; the city, state, and ZIP prefill from public records. Confirm the City, ZIP, and State fields are correct.
- 4Set the structure and unit count. In Structure choose the Property Type (Single Family Home, multi-family, or condo) and set Number of units. Entering more than 1 switches the form to multi-unit mode and gives each unit its own card of leasing fields.
- 5Fill in the leasing details. In Details enter Beds, Baths, Rent, and Security Deposit, plus any application or lease admin fees. Click the Suggest link next to Rent for an AI market estimate and the wand next to the description to have AI rewrite it; both only fill the field when you accept the proposal, so you stay in control. Watch for the amber deposit-cap hint, which is advisory only.
- 6Add amenities and photos. In Amenities set square footage, year built, pet, laundry, and parking, and tick the amenity checkboxes. Then in the Photos section upload listing images for the unit.
- 7Set ownership and authority. In Ownership and Authority, turn on the manage on behalf of an owner toggle if you are not the deed holder, so verification matches the owner's deed and leases name the owner as landlord with you disclosed as manager of record.
- 8Save the property. Click Save Property at the bottom. On success you get a Saved confirmation with a Back to properties link that returns you to /dashboard/properties.
- 9Verify ownership, then manage the property. Reopen the saved property and use Verify Ownership to auto-check public records or upload a deed; verification is required before a listing can publish. From /dashboard/properties you can search, filter by verification or occupancy, and open any property at /dashboard/properties/{id} to edit details, add or remove units, and attach documents.
- AI rent estimates and description rewrites are proposals only. The value fills the field just when you accept it, so review before you save.
- Ownership must be verified (auto-check against public records or an uploaded deed) before a listing can publish to the marketplace or syndication partners.
- In demo mode the dashboard is read-only, so saving a new property is blocked; use a real landlord account to add properties.
Invite your team (managers and co-owners)
As the portfolio owner, invite the people who help run your properties and set exactly how much each one can see. Managers handle day-to-day operations while co-owners also see financials, and only you can manage the roster.
- 1Open Team settings. Go to /dashboard/settings/team. At the top you see your own Account owner row with full access, then a Team members section and a Pending invites section below it.
- 2Start an invite. In the Team members header, click the Invite member button (the user-plus icon). A modal titled Invite team member opens with an Email field and a Role dropdown.
- 3Enter their email. Type the person's email address into the Email field. They will get an email with a one-click join link and must confirm their email before they can act.
- 4Pick the role. In the Role dropdown, choose Manager (operations only, no financials) or Co-owner (operations plus financials). The helper text confirms managers edit properties, leases, and maintenance, while co-owners also see rent, payouts, and refunds.
- 5Send the invite. Click Send invite. The modal closes, a confirmation toast appears, and the invite shows up in the Pending invites section with the role and an expiry date.
- 6Manage a pending invite. In Pending invites, use Revoke next to an email to immediately stop that join link from working if you sent it to the wrong person or no longer need it.
- 7Adjust or remove active members. Once someone accepts, they appear in Team members. Use Make co-owner or Change to manager to switch their access, or Remove to revoke it. Each action asks you to confirm in a branded dialog before it takes effect.
- Only the portfolio owner can invite people or change roles. Managers and co-owners can open this page but see a read-only roster with no action buttons.
- Role changes take effect immediately: promoting to co-owner grants access to rent, payouts, and refunds, and changing back to manager removes it.
- Pending invites expire after seven days. If someone does not accept in time, revoke the old one and send a fresh invite.
Migrate an existing portfolio
Bring your whole portfolio over from another tool without re-keying anything. You upload your existing leases or a rent-roll export, review every property, tenant, and lease term that Rentari reads, then approve before anything goes live.
- 1Open the Migration Hub. Go to /migration. The hub opens on "Bring your whole portfolio over in minutes" with two paths: upload lease PDFs on the left, or import a rent-roll export from your current software on the right.
- 2Pick a source and upload. For scanned leases, click "Select PDFs or ZIP" and choose your .pdf or .zip files. For a clean export from another platform, click "Upload CSV" or open the structured CSV importer link, which takes you to /dashboard/migration/csv. There you select your platform tile (Buildium, AppFolio, TurboTenant, or Other / spreadsheet), optionally click "Download template CSV" for the exact column names, then drop your file (one .csv up to 10 MB, or 1 to 10 lease PDFs up to 25 MB each).
- 3Let the AI read your documents. After upload, Mozart analyzes the files and extracts every property, tenant, email, monthly rent, and lease end date. On the CSV path you click "Preview import" (or "Read my leases" for PDFs) instead, and the wizard shows exactly how many properties, units, tenants, and leases it will create before committing anything.
- 4Verify the extracted data. On the "Verify Extracted Data" table, check each row. Highlighted or flagged cells are low-confidence reads or missing fields, and rows with missing data are unchecked by default. Use the pencil icon to edit any cell inline, the trash icon to drop a row, and the checkboxes to include or skip rows. A tenant email is required to bring a tenant and lease over; the property and unit still import without one.
- 5Approve and import. When the rows look right, click "Import Successful" trigger by pressing the import button ("Import these records" in the CSV wizard, or the import button in the hub). Nothing is written to your portfolio until you click this. Duplicates of records already in your account are skipped automatically.
- 6Preview and send tenant invites. After import, the hub shows a preview of the tenant welcome email ("Set Up My Account"). Review it, then click "Send Invites to All" to email your tenants, or "Skip for Now" to invite them later. Invites only go out when you click Send, so confirm the list first.
- 7Roll back a batch if something looks wrong. Open the CSV importer at /dashboard/migration/csv and scroll to "Past imports". Each import is logged as its own batch. Click "Roll back" next to a batch and confirm in the branded dialog to remove only the rows that batch created. Anything you have since edited, or that gained related records, is kept.
- The migration tools are landlord and manager only, and the demo account is read-only, so imports and invites are blocked in demo mode. Sign in with a real operating account to run a live migration.
- Coming from DoorLoop or a format that does not match a platform tile? Use the AI-assisted importer at /migration, which reads any format and maps the fields for you.
- Every import is a separate logged batch with one-click rollback, so it is safe to import in small test batches first and undo cleanly if a file was mapped wrong.
Who Rentari is for
One product, five very different jobs. A landlord who owns four units and a manager who runs four hundred for other people need opposite things from the same screens, so Rentari gives each of them their own sign-in, their own navigation and their own limits. There are six roles in total: landlord, property manager, co-owner, tenant, vendor and owner. What follows is what each one sees, what each one cannot see, and the capabilities that exist only for them.
The self-managing landlord
You own the units and you do the work. This is the default account, and everything in this book is available to you unless it is marked otherwise. You sign in at /dashboard and land on a portfolio home that opens with what needs you today rather than a static welcome screen.
A landlord account carries full authority: create properties and leases, move money, send notices, dispatch vendors, and approve anything the AI proposes. There is nothing another role can do to your portfolio that you cannot.
A setup checklist on your dashboard tracks what is genuinely done from your real portfolio rather than from boxes you ticked, links each remaining step straight at the page that does it, and demo mode lets you look around a seeded portfolio first. Demo mode is read only, so nothing you click there can change real data.
The property manager
You manage buildings you do not own, usually across several legal entities, with staff and with owners who expect to be paid and reported to. Managers and co-owners work inside the portfolio of the landlord who invited them, so the work lands on the owner's books and not on a separate island.
Invite team members, have them accept by token, change roles, revoke an invite, and remove people. A manager and a co-owner both operate on the parent portfolio, and both can countersign a lease.
A co-owner carries financial authority alongside the owner. A manager runs the operation but is blocked from writing the owner's acquisition figures (purchase price, closing costs, down payment, capital invested), because those drive the owner's equity and return calculations and are not an operational input.
Run multiple entities (separate LLCs), set the active and default one, deactivate an entity, and transfer properties between them. Paired with sets of books, each entity reports on its own rather than dissolving into one portfolio total.
The capabilities a solo landlord rarely opens and a manager lives in: the accounting back office, owner statements and distributions, your own maintenance staff roster, saved table views and custom fields, scheduled report delivery, and per-entity books.
The tenant
Your residents sign in at their own portal and see only their own tenancy. A tenant can never see your portfolio, another resident, or your finances.
Their lease and its plain-English summary, rent and balances, payment history and receipts, autopay, maintenance requests, documents, move-in and move-out, renewals, pets, insurance, and Luna to ask questions of. Everything is scoped to their identity.
Plenty of residents will not keep a portal login, so the important paths work without one: pay rent from a secure link, report a repair from a QR sticker on the unit, answer a maintenance call, sign a lease, and upload a requested document, all with no account and no password.
The vendor
Contractors get a portal of their own, scoped to the jobs you send them. A vendor sees the work, not your portfolio.
Assigned tickets and their detail, photo upload and messaging, materials logging, on-site check-in, availability and a calendar feed, bids on open jobs, invoices, earnings and payouts, reviews, and their public directory listing.
A vendor joins from a tokenized invite link, then supplies a W-9 and proof of insurance. Insurance expiry is tracked and a lapse suspends them, and a suspended vendor can appeal rather than being locked out with no recourse.
The owner or investor
If you manage for other people, your owners are the fifth audience. They are not operators and they do not want a dashboard of tickets. They want to know what came in, what went out, and when they get paid.
An owner signs in to their own home: statements with headline figures, a single statement in full, a downloadable PDF, and the documents you shared with them. Document access is scoped to the owner, so each one reaches only their own.
The owner acknowledges a statement, and that acknowledgement is what releases the distribution draw. The money follows the paperwork rather than running ahead of it.
Invite an owner and they get a tokenized page showing the property, their ownership percentage and your company name, then accept as an existing user or register a new owner account. Their profile holds a tax ID for 1099 purposes, encrypted at rest.
The Complete Feature Reference
Every capability of the platform, 460 features across fifteen areas. What each thing does, who it is for, and where AI is involved.
Properties and portfolio
Model your buildings and units, prove ownership, and watch the health of the whole portfolio.
Create, edit, and delete multi-unit buildings and their units with beds, baths, sq ft, rent, amenities, and pet/parking policy, with bulk delete, per-unit inline edit, and duplicate-safe idempotent create. A deferred 'Load more' cards feed renders the properties grid, and lightweight property/unit pickers feed other forms (maintenance, invite) so work attaches to the right unit.
AI Suggests rent, amenities, and description, and can prefill fields from an address.
A landlord-scoped inventory at /dashboard/properties, on the Live listings tab, showing every unit you have published, its status, and the live public URL a renter would land on, so you can see what the market can actually find without leaving the dashboard.
The landlord home renders a stack of live widgets (portfolio health, compliance, agenda, money, NOI, payout, deposits, vacancy, insurance, bank feed, expiring leases, inquiries, days-on-market, maintenance, and open tenant questions), with a seeded simulated version for demo accounts. The landlord can reorder, hide, and save which widgets show, persisted per user.
AI A Mozart brief widget summarizes the top actions.
A prioritized queue of portfolio items that need action (vacancies, expiring leases, open balances, unverified ownership) surfaced on the properties dashboard, with a cached narrative grouped into up to five action cards, each pointing at one next step.
AI Gemini groups rule-based candidates plus ledger anomaly signals into short action cards; the landlord decides.
One search box that queries across properties, units, tenants, and leases and returns typed results for jump-to navigation.
Name and reuse a filtered table. Any dashboard table that keeps its filter state in the URL (properties, tenants, tickets, accounting, leases, leads, vendors, AP bills, runbook runs) can save its current search, filters and sort as a named view, shown as a chip row above the table.
Prove ownership against ATTOM public deed records with a per-tier monthly cap and a usage/remaining-calls surface, a one-time $10 Stripe overage to unlock one more attempt, and a bulk run that verifies many selected properties at once. When public records fall short, the landlord uploads a deed, LLC papers, or management agreement (PDF or image, up to 15MB) to a private vault, setting the property to pending internal admin review.
A per-property health snapshot that combines rent-vs-market, expiring leases, vacancies, notice units, and open maintenance into structured signals plus a short narrative, reading your sample portfolio instead when the simulation chip is on.
AI Gemini writes a narrative over deterministic per-unit rent, vacancy, and lease signals.
A daily green/amber/red portfolio health score across compliance gaps, overdue maintenance, insurance, and payment trends, with an explain endpoint. A companion lease maturity waterfall buckets active leases by expiry (0-30 / 31-90 / 91-365 / 365+ days) and rates how much rent is at renewal risk soon.
Per-property equity, collection rate, deposits held, rent owed now, and loss to lease, each computed from the real ledger rather than an estimate, alongside the asset register and insurance status. Portfolio-level charts sit on the Properties page and an expiring-leases gauge on Renewals.
Upload property images in batches (up to 20 per request, 25MB each), delete individual photos, and set a cover, stored securely. A server-side pull can also seed a unit's listing photos from public street-view images.
Attach and manage property-level documents (deeds, insurance, HOA rules, inspection reports, appliance manuals) up to 25MB, with view, download, and delete. Files stream back through a same-origin, ownership-checked route rather than a public storage URL.
On the property detail page, add and delete free-text notes, and keep a per-property to-do checklist whose items can be created, toggled complete, and deleted.
Track appliances (make, model, serial, warranty) and utility meters per property, and log meter readings over time. The register feeds the Appliances inventory and Meter readings reports.
Create, edit, and delete optional tenant benefit packages per property (renters insurance, liability, pest control, air filter, or bundled), mark each required or optional with a monthly premium, and view a portfolio-wide revenue and coverage summary.
A rent-roll migration hub with a CSV wizard (upload, preview, confirm, invite) plus a separate path that extracts and imports leases from uploaded lease documents. Past import batches are logged and a whole batch can be rolled back, deleting exactly the rows it created.
AI Extracts structured properties, units, leases, and tenants, plus lease terms, with confidence scores.
Create and edit multiple legal entities (separate LLCs), set the active and default entity, deactivate an entity, and transfer properties between entities.
Suggests a market rent for a unit from the landlord's own portfolio comparables (same beds/ZIP) plus specs, showing a percent change versus current and a confidence score; one click applies it. Pro-gated.
AI Gemini comps analysis and narrative, with a heuristic fallback.
On move-out, auto-drafts a fresh listing description, spins up make-ready maintenance tickets (deep clean, paint), and sends the outgoing tenant a move-out checklist.
AI Generates the listing copy.
A full calendar with event CRUD, recurring events, per-event reminders by email and in-app, and color/category, plus one-click sync from the portfolio (lease start/end and rent-due, open maintenance, compliance windows), an upcoming feed, and a subscribe link so your Rentari schedule stays live inside Google Calendar, Apple Calendar, or Outlook. The subscribe URL uses a dedicated, rotatable calendar token rather than your session, so it can be revoked without signing you out. Synced events update in place when a lease term or a maintenance visit moves, and retire when a ticket is completed or cancelled. A resident only ever sees their own lease and unit, plus genuinely building-wide events. One-way, read-only import from Google Calendar and Microsoft 365 is built but not yet turned on; Rentari never writes to your outside calendar.
A by-the-bed leasing workspace for student properties, so each bed is leased, tracked, and billed on its own.
An SCRA early-termination calculator for military tenants that computes a compliant termination date and any prorated refund.
A common-area-maintenance reconciliation workspace for commercial leases, allocating shared costs across tenants.
A community lot-rent roll for manufactured-housing parks, tracking lot rent across the whole community.
A property-returns workspace for investors, surfacing equity, cash flow, and yield per property.
A dues and special-assessment tracker for condo and HOA operators.
A facility occupancy and delinquency tracker for self-storage units.
A critical-date tracker for corporate lease occupiers that flags option, expiry, and notice-window dates.
A waitlist and rent-geared-to-income tracker for social-housing programs.
A care-level billing calculator for senior-living communities.
A membership and revenue tracker for coworking spaces.
Define a field once for a given record type, then fill it in per row across your portfolio. You can rename, reorder, and retire your own definitions, so you track the details your business cares about without waiting for them to be built in.
Record the building policies you actually hold, with carrier, coverage, and days to expiry on one page. Add, update, and remove policies as they renew, so your own coverage sits alongside the rest of the portfolio rather than in a folder somewhere.
Two-way sync between your Rentari calendar and Google Calendar or Microsoft 365, with connect, disconnect, and a manual Sync now. It is built but dormant: it stays inactive until calendar sync is enabled and a provider connection is configured, so treat it as unavailable by default.
Live Listings is your listings inventory, scoped to your own portfolio. The per-unit marketing composer is where you pick a unit and work up its listing, and where the AI listing writer and the per-channel rewrites come in.
Leasing and e-signature
Build state-compliant leases, send them for signature, and manage every amendment and renewal.
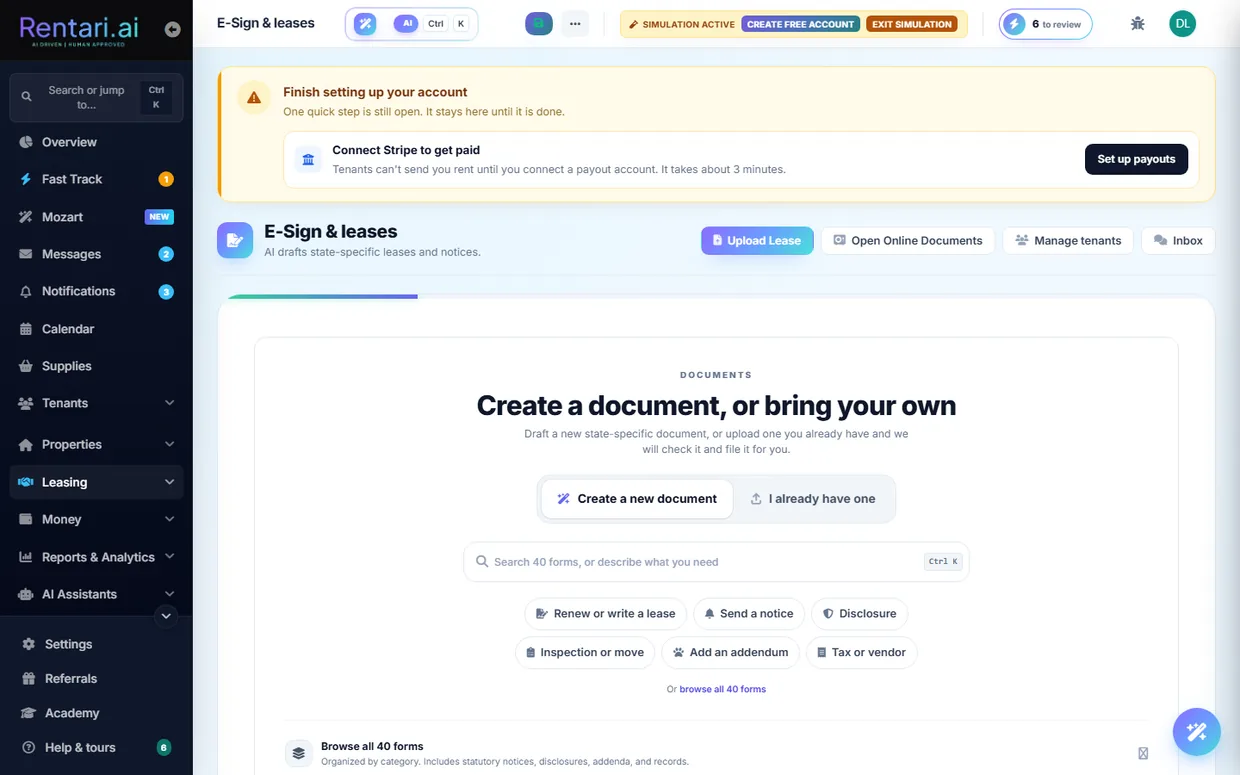
Renders state-specific leases and standalone documents for any state from a rules matrix, with an optional-addenda picker, a pre-flight compliance check, a watermarked HTML preview, and emailing the finished document to the tenant.
AI Drafts addenda, clauses, notices, and plain-English content.
Power-user 80+ field lease editor with autosave draft CRUD and a saved, named draft and template library (save-as, restore, delete). Includes applicable-addenda lookup and a live compliance check for the studio.
AI Suggests draft names.
Write a notice, tenant agreement or owner agreement once and send it many times. Templates live inside Document Studio through a two-step builder, are stored inline as HTML so they cost no storage quota, and can be duplicated and edited. A template's payoff is starting a Studio draft from it, so there is one signing path rather than two.
Send a lease to every signer it actually has, up to three parties plus the landlord's countersignature. Approving a household carries the whole household into the signer list rather than making tenant one a co-tenant of her own lease, and a co-signer is labelled by friendly role. Signing works on a phone, where the lease itself is shown rather than just the signature rail. Each signer gets their own audit trail and the countersigned PDF files itself into the vault.
A dedicated full-page signing surface at /dashboard/sign that renders a lease's HTML in a paged viewport and lets the landlord sign or initial anchor fields with a signature pad, then dispatch to tenant recipients. It detects pre-dispatch, countersignature, and awaiting-tenant states so a lease cannot be accidentally re-sent.
A full-screen studio that renders an uploaded PDF Rentari did not generate and lets the landlord drag signature, initial, and date fields onto it for tenant, guarantor, and landlord signers before sending for signature. It injects invisible anchor tokens at the placed coordinates so the standard signing engine handles dispatch, signing, and stamping.
Before sending for signature, audits the rendered lease against a state-rule matrix plus an AI opposing-attorney pass, returning severity findings that block send and warnings the landlord must acknowledge. A separate endpoint answers free-text questions about a specific lease, grounded in its text.
AI Deterministic rule matrix plus a Gemini auditor over the lease body; grounded, never legal advice.
A tenant requests a change to a pending lease and the landlord views the requests, compares versions side by side, and dismisses or publishes a new revision or counter-offer. Each round becomes a new lease version.
AI Pre-fills amendment context and counter-offers.
A renewals hub and per-lease renew flow turn an expiring lease into a new term with a configurable rent increase, with optional auto-offers. The tenant accepts, declines, or counters, including on a no-login magic-link decision page.
AI Drafts renewal terms and a suggested end date.
Runs the executed or pending lease through AI to produce a short tenant-readable summary of rent, deposit, term, pet and occupancy rules, the maintenance split, and things to ask before signing. Cached per lease version.
AI Generates the summary with anti-hallucination grounding.
One-click drafts of a custom addendum, clause rewrite, custom house rule, termination notice, pay-or-quit notice, and welcome packet.
AI Yes, all of these.
The applicant pipeline as a filterable, sortable lead list with the stage on every row (new inquiry, touring, applied, lease sent), plus a drag-and-drop Kanban board on the leasing pipeline page (Invited, Applied, Needs review, Approved). One-flow household invite (primary plus co-applicants and co-signers), resend of invite/payment/Checkr links, email de-dupe, approve-to-lease, and delete. Accepting an invite auto-creates a lead (identity-gated when the landlord requires it), and a Stripe checkout charges the screening or credit fee before a screen runs.
AI Ranks the top leads to work next with a short rationale.
A magic-link application page where an applicant fills the form, pays application fees at checkout (and can resume a cancelled checkout), adds co-signers by token, and submits, with an HTML preview and a view of the completed application. Applicants can also add a current or previous landlord's contact, which seeds a former-landlord reference the landlord can later send.
A per-applicant hub listing every former-landlord reference on a lead with status, at-a-glance flags (paid on time, would rent again, lease violations), and full questionnaire answers. The landlord adds a prior address plus the former landlord's contact, sends a no-login HMAC-signed questionnaire link that expires in 21 days (resending bumps a reminder counter), and tracks each row through sent, opened (a read receipt), and completed, with an in-app notification and email nudge on completion.
Audit an uploaded lease for risky or non-compliant clauses, store the audits with redline context, view or download the file, and bulk-delete audits.
AI Gemini clause analysis with redline context.
A leasing analytics page showing which leads to work next, where leads convert, and which listings to review.
AI Lead-ranking rationale.
A lease list dashboard and per-lease detail view (plus a JSON leases endpoint) showing status, dates, and renewal pressure across the portfolio. The full version-hash chain is traceable so supersede history can be followed across amendments and renewals.
Publish showing windows from a Showing availability panel on the calendar, then let a prospect self-book from the public booking page. Windows belong to a specific unit, not just a property, so two units publishing the same hour no longer send a prospect to the wrong door, and the booking page keeps the unit the link asked for. A booking notifies the landlord in-app and by email and sends the prospect a confirmation; the landlord confirms or cancels tours from the same panel. Deleting a window with live bookings is refused.
Searchable library of standalone forms (notices, checklists, applications) with a watermarked preview for free and a clean PDF for paid, plus live fill and render-to-PDF.
AI AI form-filler pre-populates from landlord data.
A dashboard page for a lease Rentari did not generate. It is your entry point for recording an already-signed lease, and the terms are extracted from the document you upload rather than retyped by hand.
A signing link opens a session scoped to that one document rather than a full account login. If your link gets forwarded, the person holding it still sees only the document they were sent and cannot wander the rest of your portfolio.
Renewals auto-draft roughly 90 days out, and a clear-pass screening chains straight into a generated lease, so your only required touch is the countersignature. It drafts and stops: it never sends.
Save a document you have built in the Studio as a template, then start the next one from it instead of from blank. The library lives inside Document Studio, where the drafting, the signature request and the Create or Upload fork already are, so a template is a starting point you can rename, re-edit and delete rather than a second system to keep in step.
Choose the recipient when you start a draft, and the Studio carries that person all the way to the signature request. Opening the Studio from a tenant or from a lead brings that person with you, a saved draft keeps the recipient it was written for, and the lease you wrote for a tenant cannot be sent to somebody else because the field went blank on the way.
Upload a lease that was signed on paper or in another product and record it as a real tenancy. The unit, the tenant, the rent and the dates land in Rentari and the uploaded file is kept as the signed copy, so you get the ledger, the reminders and the renewal window without asking anyone to sign again.
Draft, out for signature, active, ending soon, ended: one resolver decides which state a lease is in, and every badge, gate and report reads that same answer. It is why a lease cannot show as active on the list and expired on its own page.
Tenants and lifecycle
The full resident journey, from move-in through daily living to move-out and deposit settlement.
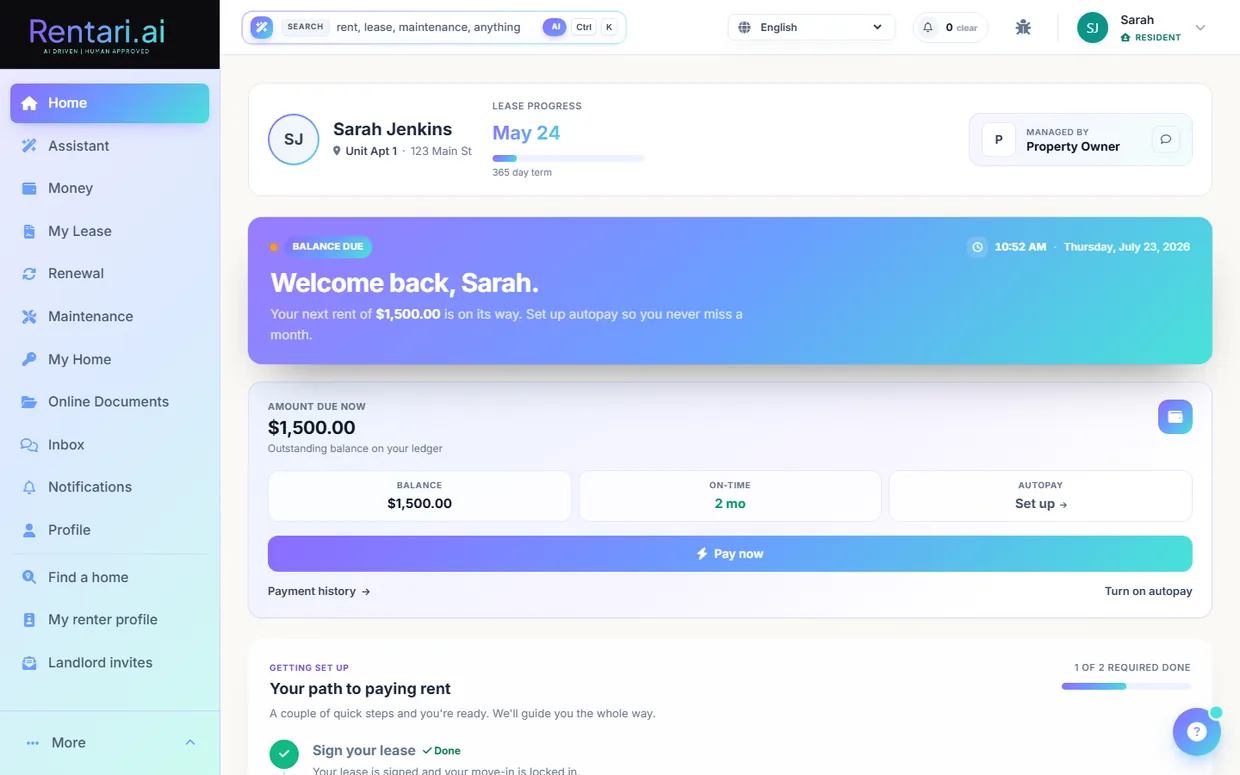
The tenant roster, built around the question a landlord opens it to answer, plus a per-tenant detail page showing contact, lease, rent history, emergency contact, employment and documents. The Active-leases table carries five columns that each earn their width: rent and payment state with the last six months drawn as a sparkline, the lease term and its lifecycle (an unstarted lease can no longer read as behind on rent), a needs-attention column that stays quiet when nothing is wrong and otherwise surfaces ID, deposit, signature or insurance gaps, and one contextual next step. The summary tiles lead with money, including rent uncollected, and the roster and the collections console read the same rent signal so they can never disagree. Invites and Background checks sit alongside as tabs. Tenants can self-update their own profile.
On lease execution, auto-creates the move-in ledger (deposit, first rent, fees), issues a compliance-doc checklist (ID, insurance, lead disclosure), collects the emergency contact, and nudges any identity blockers.
Tenant photo-documents the unit's pre-existing condition within 72 hours of lease start as the deposit baseline. The report becomes read-only once the window closes.
AI Photos compared by AI at move-out.
Landlord fills a per-property move-in guide (WiFi network and password, trash day, water/garbage setup, emergency contact). Once move-in is complete the tenant sees it, and every credential reveal or copy is audit-logged.
Tenant files intent-to-vacate (date, forwarding address, reason) and sees the state-law deposit-return clock. Landlord runs a move-out walkthrough with itemized condition items that feeds an itemized settlement PDF, and either side can dispute a line item or the whole settlement.
Landlord browses opted-in renter cards in a filterable grid (budget, beds, move-in date, employment, verified-only), opens a full renter profile, bookmarks renters to a shortlist, and invites one to apply to a chosen listing. Email and phone stay withheld until an invite is accepted.
Landlord adds a current tenant who never came through a lead, or sends a tokenized portal invite so the tenant claims their account and lease.
Adds an occupant or co-tenant onto an existing lease record.
Landlord counter-proposes or accepts an applicant's requested move-in date. The pipeline badge swaps between wants, counter, and accepted states, and the applicant is emailed each round.
Landlord requests extra documents (pay stubs, ID, references) from an applicant, who uploads them. The landlord can then list, view, stream, and delete the files.
Tenant files a mid-lease change request (add or remove a roommate, sublet, or free-form modification), tracks its status, and can amend or withdraw it before the landlord actions it.
AI Pre-fills amendment context.
Applicant or tenant declares a pet (species, breed, weight, vaccination records, history) with document uploads, and the landlord approves or declines. Service animals and ESAs route to the accommodation flow instead.
AI AI computes an advisory risk rating and note to anchor the landlord's decision.
Tenant requests disability accommodations (service animal, accessible parking, modified terms); landlord requests docs and approves or denies with reasoning, with a full audit trail.
Domestic-violence or sexual-assault self-certification (optionally anonymous) that triggers penalty-free lease termination on landlord acknowledgment.
Send email or SMS to all tenants (notices, reminders), export the tenant list to CSV, with a per-message audit log.
AI Template suggestions.
Tenant-side copilot that builds talking points and a draft renewal-request message from the tenant's own payment record, tenure, and maintenance cooperation.
AI Gemini writes tenant-friendly renewal talking points, with a heuristic fallback.
Tenant generates an AI rental-history reference letter (tenancy dates, payment record, cooperation) and a residency/occupancy certificate for schools, benefits, or visas.
AI AI drafts the letter body.
Tenant self-service to register vehicles (up to 2) and issue time-limited guest parking passes (QR or shareable link), plus a resident marketplace and a neighborhood info tab.
AI Extracts vehicle details from a photo.
Your roster groups a lease's signers into one household row, so a lease carried by a co-signer reads as a household rather than as a single tenant. You see who is actually on the lease at a glance.
Adding a tenant saves the person on step one, before you have picked a unit or written a word of a lease, so a name and an email are never lost because the lease step was abandoned halfway. Step two then has two endings: record a lease you already have, or send a new one for signature, both bound to the person step one just saved.
Maintenance and vendors
Intake, triage, dispatch, and close out work orders, with a full contractor network and IoT.
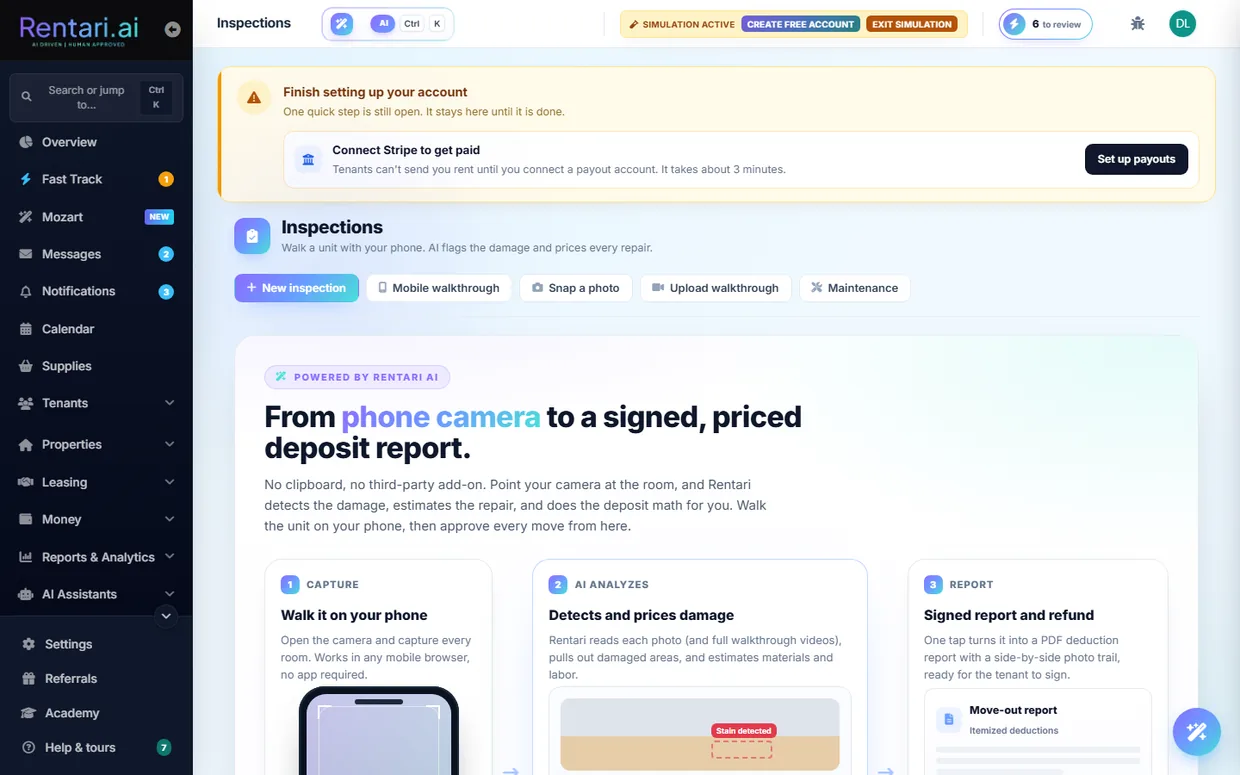
Create maintenance tickets from a form, the tenant app, an uploaded photo, a voice call, or inbound SMS, each scoped to a property, unit, and tenant with priority and permission-to-enter details. A duplicate check warns of recent open tickets on the same unit with overlapping title words before a second vendor is dispatched.
AI Classifies category, urgency and likely trade from the tenant's own words and photos, and follows the matching Luna Skills runbook rather than improvising. Every proposal waits for you to approve or decline it.
Assign a ticket to one vendor or send it to several for competing quotes; vendors accept, decline, express interest, or bid. Landlords see suggested vendors ranked by fit.
AI AI vendor recommendation ranks vendors by distance, category, ratings, and insurance.
Put a real window on a dispatched job. The tenant and the vendor each confirm it, and the ticket shows which side is still holding things up. Rentari chases whoever goes quiet, reminds both the day before the visit in the property's own local day, and asks the vendor for photos if a job closes without any. Either side can ask to move the appointment from their portal or by replying RESCHEDULE to a text, which puts it back on the landlord's board with the reason attached.
A shared thread among landlord, tenant, and vendor with photo attachments, read receipts, mark-as-read, and an open or close toggle on the thread.
The vendor closes a job with before and after photos and materials, then landlord and tenant each sign off. The invoice is parsed and reviewed before approval.
AI Invoice OCR extraction plus a reasonableness and fraud check, with before/after completion-photo QA.
A set of vendor-quality tools: multi-quote analysis, completion-photo verification, invoice-fraud detection, onboarding-compliance checks, an expiring-insurance digest, a performance scorecard, and quote benchmarking that flags a bid running well over the local median.
AI Gemini across quote analysis, photo QA, fraud detection, doc compliance, and scorecards.
A tokenized public invite link lets a vendor accept and join, then the platform collects the W-9 and insurance, tracks insurance expiry, and suspends the vendor on lapse.
AI Validates W-9 and insurance docs and flags expiring policies.
Landlord pays a vendor's invoice through Stripe directly from the platform.
Landlords send a connection request or bookmark a listed directory vendor; the vendor accepts or declines, which fills the vendor's landlord link so they become selectable in that landlord's dispatch flow. A connections inbox shows every request and invite with friendly status pills.
Landlord provisions a dedicated phone number where tenants call in maintenance issues; Luna triages the call, resolves the tenant by phone, and opens a ticket with a recording and transcript. Per-line self-service config covers greeting, hours, on-call number, callback SLA, tone, scripted questions, and an optional help-desk lane, all subordinate to a safety floor.
AI Voice AI intake with an emergency safety floor and Spanish support.
Conversational in-app maintenance intake that runs a deterministic life-safety scan, then does grounded multi-turn intake and produces a ticket proposal the tenant approves. It writes nothing on its own.
AI Safety keyword scan plus grounded conversational intake with a ticket proposal.
The vendor can generate a draft completion report for a ticket, shown in an editable field to review and edit before submitting the real completion.
AI Gemini drafts the completion notes, with a deterministic stub fallback when no AI credentials are present.
An opt-in background scan can auto-assign eligible open tickets to the best-fit vendor within a per-landlord dollar cost cap, so routine repairs move without manual dispatch.
AI Vendor-fit scoring picks the vendor, bounded by a cost cap.
Move-in, move-out, and routine unit inspections with itemized condition records, before and after photos, a generated PDF report, and per-line deduction dispute resolution that feeds the deposit math. A texted magic link opens a no-login mobile page where the tenant captures room-by-room photos or records a walkthrough video that flows back into the record.
AI Photo and video damage detection with cost estimates.
Turn an AI-detected inspection deduction into a real maintenance ticket scoped to the inspection's unit and tenant, with the landlord still choosing and dispatching the vendor.
AI Uses the AI-detected deduction as the ticket source.
Connect thermostats, smart locks, and leak or humidity sensors via Seam, with remote thermostat control, remote unlock, and a device and hub dashboard.
HVAC telemetry auto-opens a high-priority ticket on likely compressor failure and leak sensors auto-open emergency tickets. The AI Doorman scans smart-lock activity for anomalies and proposes PIN revocations.
AI HVAC rules plus a Gemini lock-activity anomaly scan.
Generate time-boxed smart-lock PIN codes for a vendor's arrival window, revoke them, and remotely unlock doors for a scheduled job.
Ticket board with volume, aging and SLA, a vendor leaderboard, and cost tracking by property and category.
Tenant creates maintenance tickets and tracks their status from the portal and the mobile API.
Read-only history of the star ratings and feedback the tenant left on signed-off maintenance tickets, plus a count of ratings still pending.
A public, browsable referral store of maintenance products across 14 curated categories with filter chips, keyword search, and per-category counts, also served at the root of shop.rentari.ai. Each outbound click is logged and tagged with the correct affiliate code before a redirect to the retailer, and a small endpoint decides whether to show the Supplies nav link. Rentari holds no inventory and takes no payment.
An embedded card of up to eight recommended supplies on maintenance tickets and turnover surfaces, mapping the ticket's triage category to the matching catalog category or a make-ready kit for turnovers. Renders empty when the catalog is off.
AI Reuses the maintenance AI-triage classification to pick which supply category to surface.
A conversational intake inside the resident portal. It runs a fixed life-safety check first, then asks grounded follow-up questions and hands back a proposed ticket for the tenant to approve. It writes nothing on its own, so a half-finished conversation never lands on your board as a job.
Put a sticker inside a cupboard door, on the fridge or by the breaker panel. Whoever scans it types what is wrong and it arrives on your maintenance board. No app, no account, no password. This is how you hear about the broken heater from the resident who was never going to keep a login.
Not every repair goes to an outside contractor. Keep a roster of your own people, add and edit them, and assign or unassign a ticket to a named person, with suggestions on who to send. Someone who leaves is deactivated rather than deleted, so their history on past jobs survives.
Set the dollar figure above which a job needs competing bids instead of a straight assignment, so small repairs move fast and expensive ones get priced properly.
Assigning a vendor is not the end of the job. Schedule the actual visit window, tell the tenant, and follow up afterwards so a booked appointment does not quietly become a missed one.
A dispatched vendor is expected to accept. If nobody accepts within the window, the ticket is handed on rather than sitting there looking assigned, so a silent contractor cannot stall a repair indefinitely.
Assigning a vendor is not the end of the job, so the appointment lives on the ticket too. Propose an arrival window, let the tenant and the vendor confirm it or ask to move it, cancel it, and send a reminder before the day. Whoever proposes a window counts as having confirmed it, and a ticket with no tenant or no vendor only waits on the parties that exist. The vendor's ETA and the moment they arrive are stamped on the same ticket, and the Kanban board, the maintenance hub, the vendor schedule and your calendar all read it, so three people work off one schedule instead of two text threads.
Rent, payments and accounting
Collect rent, hold deposits as protected escrow, and keep tax-ready books that map to your Schedule E lines automatically.
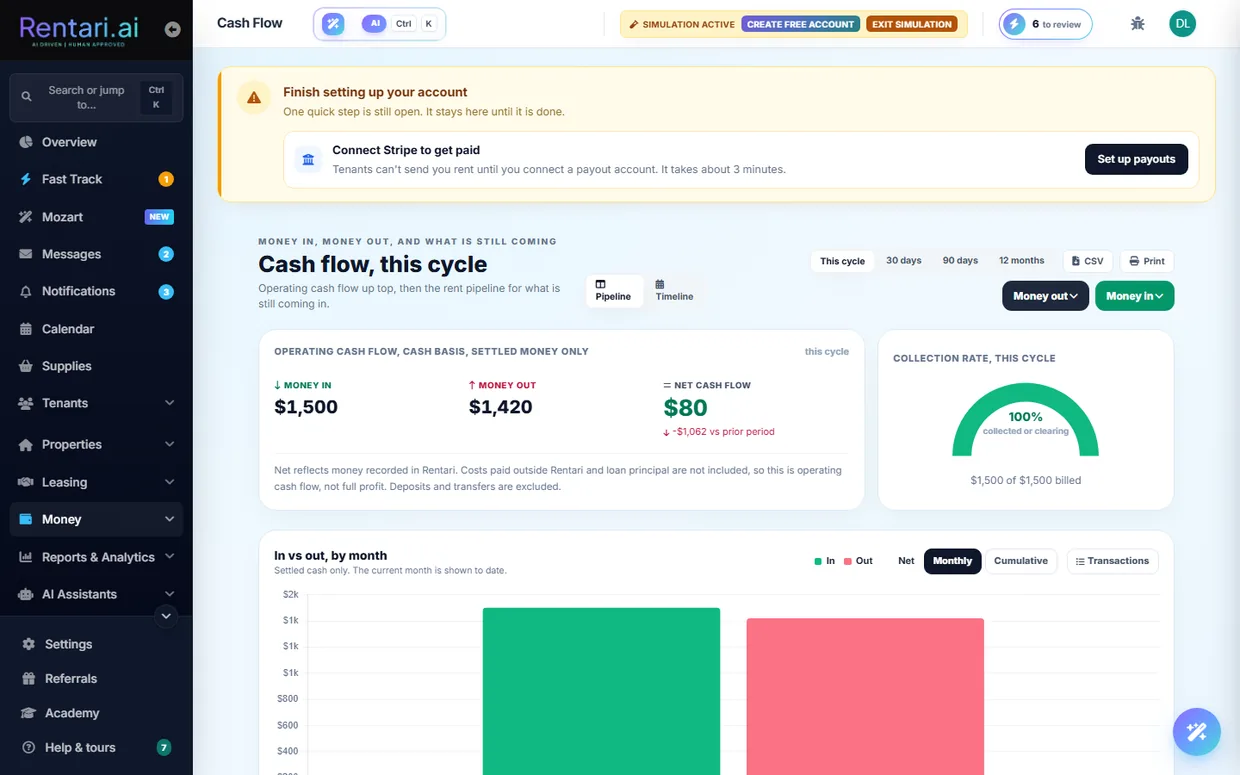
Tenants pay rent online by ACH or card from the Money page, with landlord-controlled partial-payment acceptance and a confirmation screen. A Rentari platform fee applies to each payment and is shown before the tenant confirms: 3.49% on a card, the same on debit and credit, and $6.00 flat on ACH. The tenant reviews and consents to the card fee once (a signed consent nonce is recorded).
Tenants enroll in recurring ACH autopay via a setup intent, and can toggle it from their portal. Landlords send tokenized autopay invite links (auto-sent on lease execution), check invite status, and can cancel a tenant's autopay.
When a tenant's bank sends a rent debit back, the rent charge reopens and carries the reason with its bank code (Insufficient funds R01, Account closed R02, Invalid account number R04). The tenant is told by email, in-app and by text with the reason and the fix. A $50 Rentari.ai returned-payment fee is added to the tenant's balance, capped at the state maximum: it is Rentari.ai's fee, never the landlord's income, and never charged for a card decline or a payment the tenant disputed with their bank. The landlord is transferred the rent alone and sees the fee on the tenant's ledger marked as Rentari's.
List, add via Stripe setup intent, set default, and delete saved cards and bank accounts.
Record a cash, check or offline rent payment against a lease straight to the ledger, and reverse a manually recorded payment.
Every lease bills rent one of two ways, and picking one switches the other off so a tenant is never billed twice for the same month. Billed from the lease is the standard route: Rentari.ai posts the rent from the lease amount on the due day every month, the tenant can turn on autopay, and adding a rent charge by hand is refused because it would duplicate. Billed from charges hands the month to you: you create each rent charge yourself, one at a time or as a recurring monthly charge, Rentari.ai posts nothing automatically, and autopay is off for that lease. Choose it when the rent is not the same figure every month. The choice lives on the lease page, switching only affects future months, and anything already on the tenant ledger is left exactly as it is.
Post a one-off charge to a tenant, add a manual charge line, or split a single charge such as a utility bill across multiple tenants atomically.
Create, list and cancel recurring non-rent charges (for example parking or pet rent) that post on a schedule.
Send a rent-due reminder to one tenant or bulk-remind every tenant with an outstanding balance. Tenants grant or check SMS consent so text reminders can be sent under TCPA.
Authored, five-stage rent-collections templates: balance posted, due date, still outstanding, past due, and immediate action. Each stage carries email and SMS toggles, an authored subject and body with placeholder tokens and conditional blocks, a days-after-due threshold, a minimum-balance guard so tiny balances are never chased, and an eviction-lease toggle. Company-level rows cascade to every property and per-property rows override them. Authored at /dashboard/collections.
Charge a prospect a holding or reservation fee, then convert it to rent or deposit, forfeit it, or refund it.
Request, collect, hold and settle a security deposit, with the state cap checked at entry and an itemized settlement at move-out. When a deposit lands or needs attention the landlord is told by email, SMS and the in-app inbox rather than having to notice it. A first-month proration too small for the processor minimum is carried onto the first full month's rent rather than dropped.
For the states that require it (Massachusetts, New York, DC, New Jersey, Connecticut, Illinois, and more), interest accrues on a held security deposit automatically each year, prorated by the days it was held, and posts to the ledger as its own line. The accrued interest is added to the refundable amount at move-out, so the deposit return is complete and documented.
Attach, list and remove third-party payers (guarantor, housing authority/subsidy, employer) on a lease, each covering a fixed monthly amount or a percentage of rent.
Computes prorated first-month rent and a late-fee policy, then persists the result to the lease by updating late-fee fields and creating a prorated-rent ledger row. Has its own calculator UI.
Previews the Stripe processing fee and platform fee for a given payment amount and method before charging.
For one income ledger row, shows a live five-step timeline (tenant paid, Stripe fee, platform fee, funds clear, payout to bank) with actual amounts, dates and statuses pulled live from Stripe.
List Stripe disputes and submit evidence to contest a chargeback from the dashboard.
Payments-only activity feed with CSV export, tenant payment history with downloadable receipts, and printable receipt pages.
One view of where every rent dollar is right now: a rent-collection board and a bucketed cash-flow pipeline (Expected / Processing / Settled / Late), plus an add-charge page and a rent-pay confirmation view.
A My Money page with KPIs and charts of the tenant's own rent and fee history, plus a finance page showing due, processing and paid balances, an autopay toggle, and downloadable receipts as PDF or Stripe receipt links. Scoped strictly to the tenant's identity.
Accounting dashboard with manual ledger entries, edit and delete, bulk category assignment, and per-row expense insights.
AI AI expense insights and duplicate detection per row.
One set of books per legal entity you report separately. A solo landlord has exactly one, created as "Default" the first time anything asks for it; a management company running several LLCs gets one Book per entity, so a balance sheet or P&L can be produced per entity instead of only for the whole portfolio. Books are additive and read-side only: the Ledger stays canonical, so nothing tenant-facing depends on them. The chart of accounts nests under a book and keeps its Schedule E mapping.
Every Ledger row projects into a balanced double-entry journal, following its source row when that row changes rather than leaving a stale copy behind, and refusing an approved entry that would land in the books unbalanced.
Snap or upload a receipt to auto-extract merchant, date, amount and category and create an expense.
AI Gemini receipt OCR and field extraction.
Review unattributed transactions and apply AI-suggested categories in bulk to clean up the books.
AI AI category suggestions for uncategorized rows.
Auto-maps expenses to IRS Schedule E lines with an on-screen summary and CSV/PDF export, plus a per-year Schedule E view.
Generate profit-and-loss, cash-flow, rent-roll and owner-statement reports, each with CSV and PDF export and a columnar owner-statement variant.
A gallery of about 45 downloadable reports across financial (general ledger, trial balance, balance sheet, AR aging, delinquent, rent paid, income by unit or charge type, 1099, depreciation, security deposits), leasing and ops (lease details, current tenants, vacant units, work orders, open and completed tasks, screening usage, e-sign activity, audit log), and per-vertical or HUD tiles (HAP split, recert calendar, CAM roster, senior-care billing, occupancy by bed, HOA dues, lot rent, storage occupancy, coworking membership).
A report writer for the questions the ready-made reports do not answer. Pick one of nine datasets (ledger, payments received, leases, tenants, units, work orders, vendors, journal lines, applicants), tick the columns you want, then filter, sort, set the period, group and total. Grouping replaces the detail rows with one row per group. A live preview of the first 100 rows updates as you build, and a saved report opens in the same viewer as the ready-made ones with the same CSV export and print layout, where a full run returns up to 50,000 rows. Any custom field you have defined appears in the column list beside the built-in ones. A report can be shared with your team, and its access check runs every time it is opened rather than only when it was saved, so a shared report can never become a way around the permissions your team already has. Which datasets you can run follows the access your role already has: leases, tenants, units, work orders, vendors and applicants need operational access, while ledger, payments received and journal lines need financial access.
Have a report arrive instead of remembering to run it. Point a schedule at one of your saved reports, or at one of the 18 catalog reports that support scheduling, pick daily, weekly, monthly or quarterly, and list up to ten recipients: yourself, a teammate, or an outside address such as your accountant. It sends CSV, PDF, or both, and the PDF is capped at 500 rows and says so on the document rather than trailing off silently. The period always looks back at a completed one, so a monthly send on the 1st covers last month rather than the empty month that started an hour earlier. Permission is re-checked at send time against whoever created the schedule, so a schedule stops rather than keeping financial figures flowing to someone whose role has since changed.
Chart-based visual reporting view, with single-report and all-reports pages drawing from a shared visual-data endpoint and a theme switcher.
A financial overview page plus an analytics dashboard with export and an AI chat over the analytics data.
AI Analytics chat answers natural-language questions over financial data.
Capital-improvement register with straight-line depreciation, mid-month and half-year conventions, convert-expense-to-asset, per-property depreciation summary, capitalize candidates, and a cost-segregation advisory.
AI Repair-vs-capital classifier and capitalize-candidate suggestions.
Track mortgages, HELOCs and private loans with monthly P&I, year-by-year amortization schedules, a portfolio loan summary, and the Schedule E interest line.
Investor metrics per property and across the portfolio (real equity, NOI, cap rate, cash flow, DSCR, LTV and a taxable-income preview), with a returns calculator that prefills from the portfolio.
Owner and co-owner set a property's purchase price, closing costs, down payment and capex invested, which feed cash-on-cash and equity calculations. Managers are blocked from writing the owner's acquisition numbers.
Segregated trust and escrow accounting by state, with bank-statement reconciliation. The trust account takes its bank details from your connected Stripe account rather than asking you to retype them into a second form. Segregated trust accounts are presented as an obligation that binds licensed brokers, not a requirement placed on every landlord.
Export the ledger as CSV, PDF, or a QuickBooks-compatible file for a CPA or accounting software.
Shows supported accounting integration providers and connection status. Direct OAuth sync is not live yet; CSV export is the working path.
Link a bank, sync accounts and transactions, categorize each transaction, bulk-categorize and auto-reconcile into the ledger.
AI Auto-categorization of imported bank transactions.
Request and store a vendor W-9 with OCR extract and confirm, track vendors crossing the $600 YTD threshold, generate a 1099-NEC per vendor, and run a bulk year-end 1099 review across the portfolio.
AI W-9 OCR extraction.
Vendors see earnings, payout history, and per-invoice finance detail in the portal; landlords pay a vendor via Stripe checkout for a completed job.
A Bills queue at /dashboard/accounting/bills for bills you enter yourself, kept distinct from a vendor-submitted invoice on a work order. Paying a bill writes the expense Ledger row, and optionally a check record, so the books always reconcile. A bill can name the property and the specific unit, survives their deletion instead of vanishing with them, and its references are scoped to the landlord who filed it.
PMs generate monthly owner statements per owned property (gross income, expenses, management fee, ownership-share percentage and net draw). Third-party owners get a portal home listing their statements with KPI tiles, open a single statement's detail, download it as a rendered PDF, and acknowledge it, which is the gate that lets the PM release the distribution draw.
An owner creates or resumes a Stripe Connect Express account per property manager and completes hosted onboarding so it becomes the verified destination for distribution draws.
Every rent reminder used to end at a sign-in screen, which is exactly where collection quietly stops for a resident who never kept a password. A secure link now shows what is owed and takes the payment directly, with no account needed.
A single charge can carry its own itemized breakdown instead of arriving as one unexplained figure, so a resident can see what a bill is actually made of.
When a charge lands on a resident's account they are told it has been posted. The first they hear about a bill should not be the late notice.
Card and bank payments both have a minimum below which nothing can be charged, which a short first month can fall under. Rentari does not quietly drop that money. It is carried and added to the first full month's rent, so the amount shows up on a bill the resident can actually pay instead of disappearing.
One view of the connected payment account and its payout state. A manager sees the portfolio owner's account rather than their own, so the numbers match the books they are working in.
Keep your own taxpayer information on file, feeding the 1099 and year-end surfaces so tax season is not a scramble to find the same numbers again.
A scheduled scan looks over the ledger for entries that do not sit right, so an odd figure surfaces on its own instead of waiting for you to notice it.
A failed payment starts a recovery path rather than becoming a dead end, so a bounced rent payment gets chased properly and both sides know where it stands.
AI and intelligence
The two named assistants and the propose-only AI helpers woven through the product.
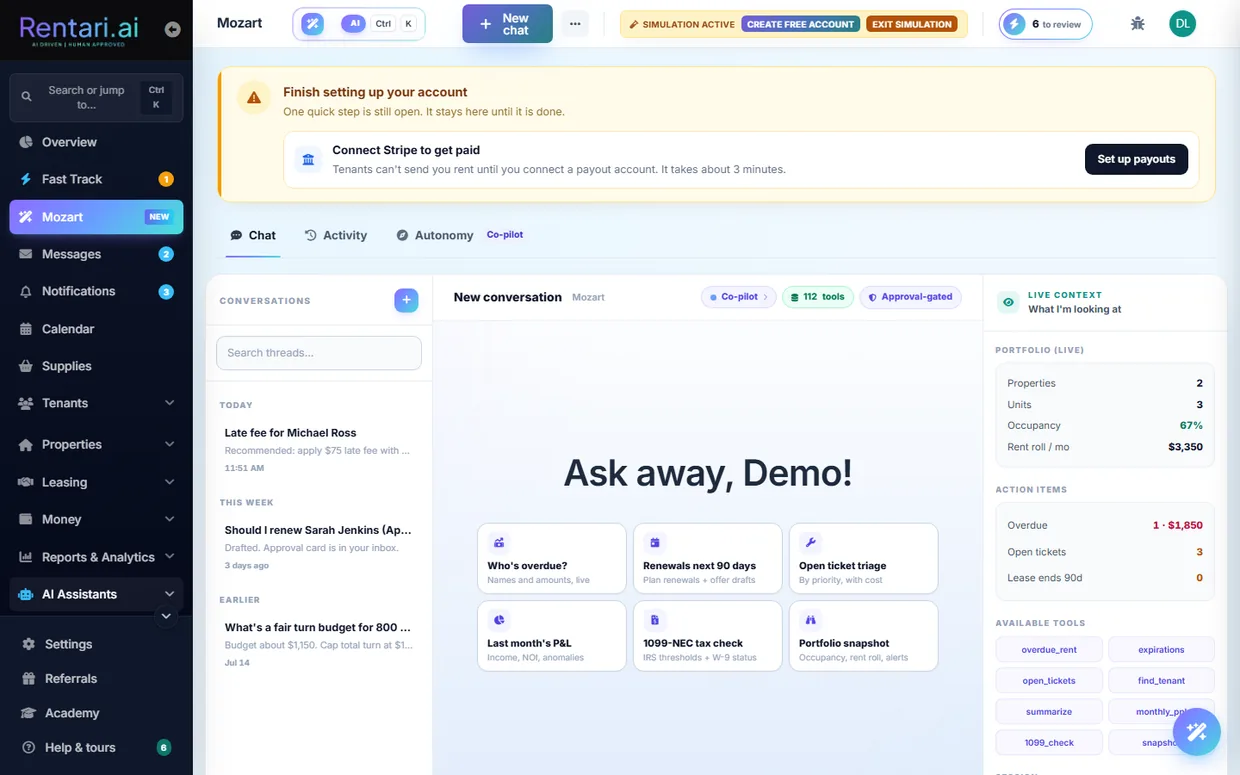
Reads the whole portfolio to answer natural-language questions and proposes structured actions (late notices, renewals, tickets, listings, messages) as approval cards, running multi-step plans that pause on low-confidence or Tier-3 steps. Keeps persistent chat threads, an activity and decision log of every proposed and executed action, and an editable memory of standing preferences injected into each prompt, and accepts photo attachments for vision reasoning.
AI Reads the whole portfolio, answers plain-language questions, and proposes structured actions as Approve, Edit or Decline cards. It plans multi-step work and pauses on any low-confidence or high-risk step. Reachable from the chat bar in the dashboard header on every page, as well as its own page.
In-app chat grounded in the tenant's own lease, payments, tickets, and insurance, with persistent conversations the tenant can list, reopen, and delete, plus free-text ask-my-lease Q&A and a cached one-glance lease cheat sheet. The tenant home page also lazy-loads a concierge summary and up to three suggestion cards after first paint.
AI Gemini with a hard anti-hallucination rule: an absent fact means not on file, so Luna abstains and routes the tenant to their manager rather than guess.
Authored operating procedures the assistant follows when triaging a matching ticket: diagnostic questions, tenant-safe steps, photo documentation, safety stops, and a three-tier escalation (emergency, high, routine) that also carries dispatch defaults. Rentari ships a seeded library of 15 scenarios, covering water leaks, no heat, no hot water, electrical hazards, blockages and overflow, pests, lockouts, no cooling, mold, oven and stove, dishwasher, disposal, lighting, doors that will not latch, and low water pressure. The library materializes per landlord on first visit, and you edit, version, toggle or add your own, set a default vendor and an escalation manager per runbook, and read the outcome scoring. Found under Luna Skills in the rail, at /dashboard/runbooks.
AI Follows the authored script instead of improvising, with a deterministic safety floor above the model and a kill switch. It runs over chat, voice and SMS on the tenant side.
Co-pilot, Mixed, and Autopilot control of how much AI runs without approval, with each feature carrying a risk tier and a hard cap that keeps four actions out of autopilot in every mode: the pay-or-quit notice, a renewal offer that changes the rent, a cosigner bill, and the move-out deposit letter.
Order Checkr criminal, credit, and eviction reports through a checkout flow, ingest report webhooks, and view a rendered screening report PDF plus a consolidated breakdown of every sub-score. Deferred checks use a self-hosted, HMAC-tokenized page where the applicant supplies SSN, DOB, and consent on Rentari's own domain.
Choose a screening package (credit, criminal, eviction, or a bundle) when screening an applicant, and optionally attach a full credit report per applicant for an added flat fee on top of the base background check.
Deterministic creditworthiness score from a Checkr report, weighting felonies, misdemeanors, evictions, sex-offender registry, MVR, and credit bands by recency and disposition, with a status-based fallback.
Per-applicant why-this-score panel with FCRA reason codes and factor weights, an AI adverse-action narrative attachable to a notice, and a recorded Approve/Decline override where Decline is Tier-3 and requires typing to confirm.
AI Gemini writes the FCRA-neutral narrative; the reason codes are deterministic.
Scores how well an applicant fits a unit across affordability, screening, and move-in timing.
Upload a bank statement or pay stub for neutral financial-behavior signals (recurring deposits, cadence, balances, NSF count) scored against claimed income and rent, plus paystub-fraud detection, a synthetic or duplicate-identity flag, an application-completeness checker with a drafted follow-up, and a state-legal prescreen-question generator. All propose-only and decision-support only.
AI Gemini vision reads the paystub and income documents (behavioral signals only, never source of income); identity and completeness checks are deterministic.
Scores inquiries hot, warm, or cold on intent signals such as move-in date and tour request, and drafts a Fair-Housing-guarded first reply that avoids protected-class proxies.
AI Gemini scoring and reply draft.
Ranks which leads need attention now, computes ROI by lead source, and diagnoses why each published listing is or is not renting from real funnel and price signals.
AI Deterministic scoring with AI rationale on priority leads.
Generates a Fair-Housing-compliant listing description (streaming) at unit or building scope, or rewrites existing copy, with a public no-login demo generator on the marketing site.
AI Gemini description writing with FHA guardrails and brand style rules.
Photo ranking and quality flagging, amenity detection and suggestion from the property profile, multi-channel rewrites for Zillow, Apartments.com, and Facebook, time-to-rent prediction, and vacancy-rescue suggestions.
AI Gemini vision and text.
Scans the web for cloned or scam copies of the landlord's published listings and flags each with source site, URL, and severity for manual review; nothing is auto-taken-down.
AI Gemini with Google Search grounding, then JSON classification against canonical listing facts.
Suggests a market rent for a unit, or a draft on the Add Property form, using the landlord's own portfolio comparables and property specs.
AI Computes a comps-based rent estimate with confidence.
Prefills bed, bath, sqft, and year-built on the Add Property form from grounded data: ATTOM parcel facts for paid plans and US Census ACS tract medians as guidance for free plans, with no invented fallback when both miss.
AI Gemini only summarizes grounded ATTOM, Census, and Rentcast data into one sentence and is forbidden from adding facts.
Lease summarization, risk preview, and ask-a-question over a lease; extraction from insurance, W-9, vendor-invoice, legal-mail, floor-plan, and application documents; multi-quote bid comparison; move-out reconciliation with a refund-letter draft; and dashboard tools to triage a maintenance photo, document move-in condition, and grade a listing photo 0-10 with reshoot tips.
AI Gemini vision and text throughout.
Upload move-in versus move-out photos to get a draft itemized deduction list with a state-aware normal-wear-and-tear check; draft only, no money moves.
AI Gemini vision compares photos and proposes itemized deductions.
Turns a signed lease into a tracked obligations timeline on the lease detail page, merging deterministic dated deadlines from lease columns and state rules with AI-extracted clause obligations, and surfaces deterministic compliance red flags.
AI AI extracts each stated obligation grounded in a verbatim clause quote, or drops it.
AI rent-roll import from PDF, CSV, or photo, natural-language portfolio Q&A, churn and retention-risk scoring, a weekly what-changed anomaly digest, and a strategy advisor covering concentration, renewal pipeline, and vacancy.
AI Gemini extraction and narratives over deterministic signals.
Schedule-E category and repair-vs-capital classification, natural-language Q&A grounded strictly in the landlord's own report data, and AI-written P&L and owner-statement narratives, plus recurring-expense clustering, ledger anomaly detection, audit-prep checklist, CPA handoff pack, 1099 prep, portfolio benchmarks, a 90-day cash-flow forecast, and an investor report.
AI Mix of rule-based checks and Gemini-written narratives, all with CPA caveats.
Ranks which tenants are likely to pay late this cycle, quantifies cash at risk, and builds a catch-up installment payment plan with an acceptance letter.
AI Late-risk scoring with an AI-polished payment-plan acceptance letter.
On the tenant finance page, computes deterministic payment stats and drafts one friendly nudge with a suggested action (pay now, switch to ACH, enable autopay) that the tenant confirms.
AI Gemini writes a single personalized nudge from deterministic payment stats.
A landlord types a natural-language query such as verified employed renter under $2000 moving in by August, and it is parsed into structured directory filters plus a one-sentence summary.
AI Gemini Flash translates the free-text query into structured search filters and an echo summary.
Translates a free-text vendor query such as insured plumber available now under $80/hr into structured directory filters plus a one-sentence summary, with per-IP rate limiting to guard token spend.
AI Gemini Flash parses natural language into specialty, city, state, availability, max-rate, and insured filters plus a request echo.
A conversational ask-the-product box in the help drawer that answers plain-English how-to questions using only the help registry, returns cited source articles, and abstains and escalates to a human when it cannot answer. Deliberately isolated from Mozart and Luna so it has no portfolio access and cannot leak account data.
AI Gemini Flash answers strictly grounded on ranked help content, abstain-first and capped, IP rate-limited, with no legal, tax, or financial advice.
A conversational coach that takes a plain-language question and recommends the one to three most relevant lessons from the catalog, redirecting off-topic questions, persona-aware and IP rate-limited.
AI Gemini Flash picks and ranks relevant lessons and writes a short tie-together reply, falling back to keyword scoring on failure.
Deterministic daily what-needs-you payload on the dashboard covering overdue rent, due-soon, tickets by severity, expiring leases, 1099 risk, pending countersignatures, and insurance.
AI AI-rendered wording over deterministic signals.
Suggests system preferences such as reminders and auto-renewal percentage from a portfolio snapshot.
AI Gemini suggestions over a snapshot.
One page with a card per AI feature showing live JSON responses, plus a thumbs, approve, edit, or decline feedback recorder and a feedback-mix readout.
Point your own AI client at your Rentari dashboard with a scoped API key. Twelve tools cover reading properties, tenants, leases, maintenance tickets and payments plus a portfolio summary, and writing updates to a property, tenant, lease or ticket and creating a ticket. Keys are Bearer credentials shown once at creation and stored only as a hash, carry test or live mode, explicit scopes, an expiry and a revoke, and require an approved access request first. A write tool refuses to run on a test-mode key. Managed at /dashboard/mcp.
On each page load a JS engine drains queued celebrations and fires confetti, coins, key-drop, streak, and similar animations after workflow climaxes like adding a first property, sending a lease, or receiving a payment. Backend endpoints queue them via a session bag or a per-user pending column that survives redirects, AJAX, webhooks, and cron.
One page that groups every tool you can run on a photo: move-out reconciliation, maintenance triage, move-in condition documentation, and listing-photo grading with a 0 to 10 score and reshoot tips. Each tool runs the same underlying analysis you get elsewhere in the product, gathered in one place instead of scattered across it.
Grades an uploaded document on legibility and completeness, so an unreadable scan or a missing page is caught at intake rather than after you have already relied on it.
Switch on simulation and you get a whole worked portfolio to explore: properties, tenants, leases, tickets and a year of ledger history, written as real records so every screen works on them rather than a handful of pages showing canned numbers. Mozart and the other assistants read the sandbox as well, so you can ask questions and watch actions get proposed before any of your own data is involved. Your real portfolio is untouched and the sandbox is cleaned up for you.
Communications
Every channel between landlord, tenant, and vendor: chat, inbox, SMS, voice, email, and push.
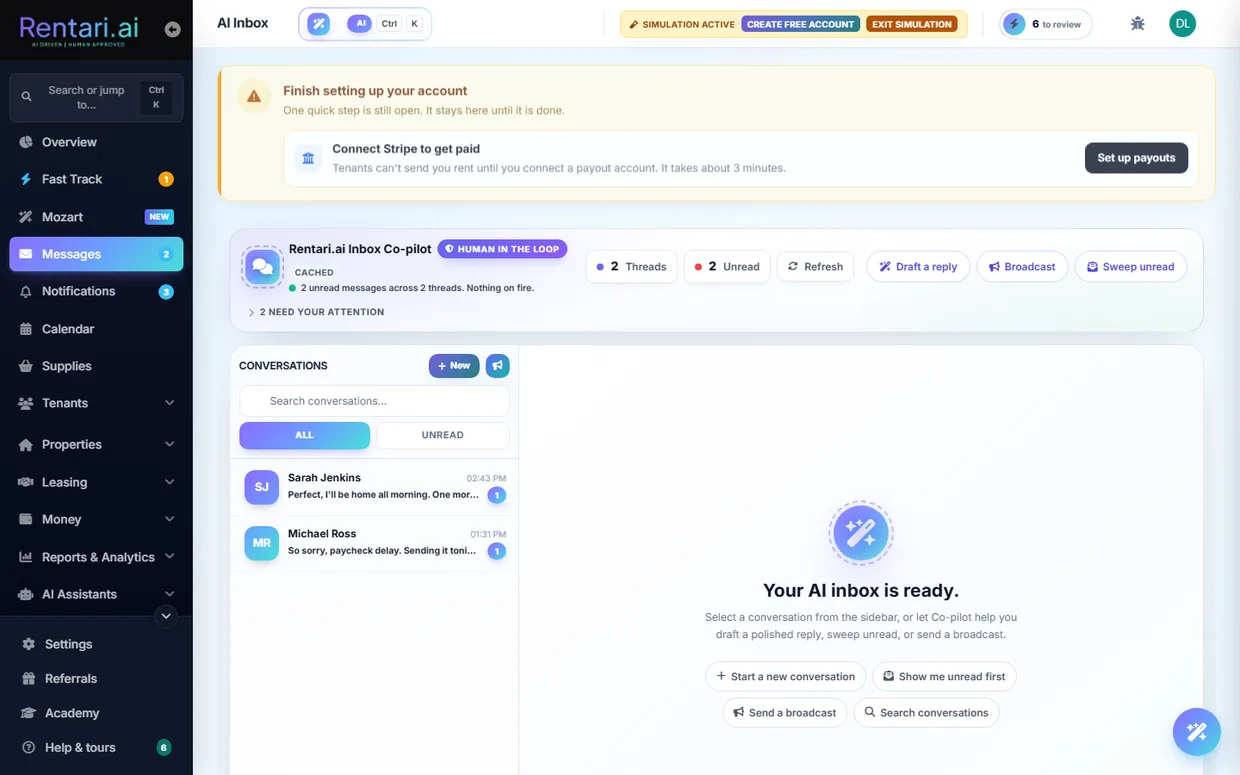
Unified inbox at /dashboard/inbox listing every tenant and prospect thread with unread counts, channel labels, urgency triage, and one-click reply. Also exposes an inbox brief that ranks the top unread threads with a one-line reason and a portfolio summary.
AI Gemini urgency ranking and suggested next step per thread, with a heuristic fallback.
Live two-way direct messaging over WebSockets with typing and read state. Backed by REST send, a conversation list, and paged history between any two users.
Pin, delete, mark read or unread, and export a full chat transcript, plus upload file or photo attachments to any message. Landlords can save canned quick replies to drop into conversations.
Inbox helpers: thread summarizer (a few bullets plus what the landlord still owes the other party), grounded draft replies, bulk-message personalizer from real lease data, tenant-FAQ auto-answer, sentiment and legal-risk flagging, hardship-narrative classifier with resources, and a per-tenant reminder-cadence recommender. Never auto-sends.
AI Gemini for summary, draft, personalize, and FAQ; rule-based for sentiment, hardship, and cadence.
Captures inquiry emails from Zillow, Apartments.com, and other portals into a unified lead inbox with a per-landlord automation mode (Off, draft-only Co-pilot, or auto-send Autopilot). Prospects reply via a tokenized magic-link conversation page with no account required.
AI Grounded reply generation from listing facts and public knowledge only.
Twilio inbound and outbound SMS routed to threads, with maintenance-by-text ticket creation, approval replies, delivery-status handling, and a pre-send eligibility check. Enforces TCPA consent and STOP, START, and HELP keywords.
AI Maintenance intent parsing from inbound texts.
Multi-role sender profiles (info@, billing@, support@, no-reply), white-label branding, transactional vs marketing handling, and a full branded template library. Includes an unsubscribe and preference center with RFC-8058 one-click unsubscribe and per-category opt-outs.
Web Push via VAPID plus native device and token registration for messages, tickets, leads, and expirations. Supports subscribe, unsubscribe, status, log-out, and a test send.
Pick a recipient group and send a broadcast email or SMS to many tenants at once, queued for delivery, with a per-message audit log and tenant-list CSV export.
AI AI drafts the bulk message body.
Generate a personalized email to one tenant with balance and lease placeholders resolved, for the landlord to edit and send.
AI Gemini writes a tailored subject and body from the tenant's real lease and ledger.
Choose which automated reminders go out, on what lead time, and over which channel. The automated tenant reminders sit in Settings where landlords look for them rather than on a separate page, and the reminder's status filter matches the tile that counts it.
Every notification the product raises, folded into the Inbox as an Updates tab rather than living on its own page, with the unread count carried on the rail. Read, dismiss, and jump straight to the record a notification is about.
Tenant messages their landlord and, as an applicant, continues leasing conversations with the leasing agent, with a contacts list.
Set a preferred inbox language so incoming and outgoing messages are auto-translated, with provenance recorded.
AI Message translation.
When Luna abstains it opens a durable tenant question; the manager answers it and can promote answers into a tiered property knowledge base (public, tenant, leaseholder, secret) at /dashboard/luna-questions.
AI Luna reads the knowledge base to avoid guessing next time.
Landlord announces that online rent payment is available, chooses recipients, and sends an email.
AI Gemini drafts and re-tones the announcement subject and body.
Phone line into Luna for maintenance triage with Spanish support and an emergency safety floor. See Maintenance section 4 for detail.
AI Yes.
Raise a support ticket from the chat widget for the Rentari team to follow up.
A header bug or idea widget on the landlord, tenant, and vendor portals lets any signed-in user submit a feature idea or bug report with severity, auto-captured page URL, and browser. Submissions are routed to the Rentari.ai team.
Toggle email notification preferences and screening-related notification preferences for the account.
Vendor views and updates their own SMS consent for dispatch texts, supporting TCPA opt-in and opt-out.
Newsletter subscription endpoint plus a general contact-form submission, including the brand-site contact path.
Iris drafts your reply to a prospect's latest message on a lead thread. A prospect is an unverified stranger, so Iris is grounded in the listing facts plus your public property knowledge only, and never reads your tenant-only or private notes. Each draft comes back with two flags: whether it needs you (Iris hit a fact it does not hold, or a decision that is yours to make), and whether every claim was grounded and nothing was left open. In co-pilot mode you see the draft, edit it, and send it yourself. Only autopilot may send on its own.
Remi answers Rentari's own company phone line. Remi greets you as Rentari, works out why you are calling (looking at the product, an existing customer, support, a partnership, or a general question), answers product and pricing questions from published information, and takes a message so your call goes somewhere. Remi is a different assistant from Luna: Luna is the per-building maintenance line that knows your tenants, their leases and their tickets, while Remi is Rentari's front desk and does no tenant lookup and opens no tickets.
One email each weekday morning that answers three questions without you signing in. Where the portfolio stands: units, occupancy, active leases, rent collected this month against what was billed, and the profile gaps that quietly stop money moving, such as an unfinished identity check or payouts that were never switched on. What moved since the last digest: payments that landed, tickets that opened, applicants who applied, leases that got signed. And what needs you today. Monday's edition covers Friday, Saturday and Sunday rather than the last 24 hours, so a weekend never falls in the gap.
AI A short written summary over the same deterministic signals behind the dashboard's Today's Brief. The numbers are counted, not generated.
Compliance and affordable housing
Stay ahead of deadlines and disclosures, run evictions by the book, and operate subsidized units.
One pane covering renewal-notice windows, SCRA-protected tenants, overdue deposit returns, annual disclosures, missing signatures and insurance gaps, with per-item state tracking and a summary endpoint.
AI No (rule checks).
Approve or decline AI proposals from an email magic link (no login) or in-app, bulk approve or reject, set global or per-feature pilot mode, and pause or resume automation.
AI Underlying proposals are AI-generated.
Search the full audit trail (signings, payments, SCRA attestations, deposit returns, FCRA disclosures, eviction filings) from a dedicated page.
Users run a Stripe Identity check with live document capture and a matching selfie from a branded landing page, then return to where they left off; the flow is idempotent so a pending session is reused rather than charged twice. A completion page polls live status across pending, verified, requires_input and canceled, gives a friendly reason for each failure, and a manual refresh reconciles cached state when a webhook is missed. On verification it emails a confirmation, fires an on-screen celebration, and retries the move-in ledger and monthly rent generation held back before verification cleared.
Identity verification is optional by default; a landlord can opt in per portfolio so tenants must verify before move-in charges post and accounted vendors must verify before dispatch, with a global env kill-switch to force it on org-wide.
On a successful tenant verification, the data Stripe extracts from the ID is auto-compared against the typed application (first name, last name, DOB) and mismatch flags are persisted on the matching lead for landlord review.
AI Deterministic auto-compare of extracted ID fields vs typed application data.
Send pre-adverse and adverse-action notices and run the FCRA-linted decline choke point for a screened applicant.
Extend a conditional approval before the criminal-history check and record a structured individualized assessment of any criminal flag, satisfying HUD 2016 guidance and Ban-the-Box laws (NJ, NYC, Cook County, Seattle, Oakland, DC).
Flags any lead or referral source whose approval rate runs well below the portfolio average as a self-monitoring disparate-impact signal, using no protected-class data.
A tenant submits a disability accommodation request (service animal, ESA, physical modification, policy change) and the landlord approves, denies, or requests verification with a full audit trail.
A covered HUD-assisted tenant submits an encrypted VAWA self-certification claiming protection and the landlord acknowledges receipt, writing a confidential audit row.
Public endpoint to report a suspected fair-housing or discriminatory listing violation.
On-demand CCPA/GDPR erasure of a specific lead's data, plus applicant self-withdrawal from the pipeline.
A central 50-state library of notice periods, late-fee caps, deposit-return windows, entry-notice hours, rent-increase caps, cure periods and statute citations, injected into every generated notice, disclosure and lease render so the document shows the correct state-specific values and cite.
State variants of leases and notices surface a real state-law facts panel (deposit, notice period, late-fee cap) plus a statute link pulled from the verified state-laws dataset, adding indexable state-unique content.
Governing-statute name and citation data for five non-residential verticals (manufactured/mobile-home lots, self-storage lien law, assisted living, condo/HOA, student housing) across 50 states plus DC, powering the per-vertical lease and forms documents behind the Markets pages, with a coverage lint that blocks silent over-claiming of state compliance.
Start eviction cases, generate jurisdiction-specific notices, record service, hearing, outcome or cancel, attach documents, and generate a downloadable evidence packet for a case. Tier-3 and typed-confirmation gated.
AI No (deterministic notice engine).
Before a filing, checks the ledger shows a real unpaid balance and that a pay-or-quit notice was logged at least the state cure period ago, plus a fair-housing reminder, returning blocking findings.
AI No (DB + state rules).
Public dashboard tracking state housing bills across 9 categories (deposit, eviction, habitability, fair housing, rent control, disclosure, fees, screening, other) with hero stat counters and per-state and per-category breakdowns, a detail page per bill (status, impact, confidence, attorney-review flag, effective date, full-text link, related bills), and a JSON API driving client-side filter, sort and free-text search. A signed-in landlord can subscribe to status changes on a bill.
AI Rule-based bill categorization and impact ranking (critical/high/medium/low).
For a signed-in landlord, tags each bill with how many owned properties sit in that state and renders per-property impact tiers (direct/monitor/none) from the bill category, lease counts, deposit-holding leases and vacancies. One click queues the bill's drafted lease addendum against every active lease in that state as pending rows the landlord must still approve, and the addendum can be downloaded as a dependency-free Word .docx with a not-legal-advice disclaimer.
AI Category-aware impact heuristic plus templated per-category lease addendum drafts.
When a sync creates a new bill, landlords with active leases in that state get an in-app notification linking to their compliance tasks.
Standalone legal notices: FCRA disclosure and summary of rights, HUD 5380/5382/50059/9886 and VAWA notices, a 1099-MISC vendor guide, privacy and terms (each with a changelog), and equal-housing.
HUD Total Tenant Payment calculator for affordable-housing units.
Servicemembers Civil Relief Act early lease-termination calculator that computes the SCRA termination and effective date from a notice date.
Manage social-housing schemes, an applicant waitlist and queue, rent-geared-to-income (RGI) calculation, and housing an applicant into a unit.
Track units in HUD programs and recertification due dates, list recert-due units, and produce a recertification document checklist and a caseworker export sheet with roughly 12 months of HAP history.
Look up published HUD FMR or SAFMR by ZIP and bedrooms and validate a unit's asking rent against payment standards (voucher rent check).
Audit a lease against Housing Choice Voucher requirements (24 CFR 982) and splice on the HUD Tenancy Addendum.
Track expected vs received Housing Assistance Payments, auto-generate deposits, post to the ledger, and reconcile mismatches.
Crowdsourced public-housing-authority directory (payment standard, inspection cadence, HAP day) with CRUD that overrides downstream surfaces once linked.
Walk a unit through the standard inspection checklist, record pass or fail with photos per item, and finalize a result.
Scan marketing or lease copy for discriminatory phrasing ("no Section 8") with jurisdiction-rated findings, per property or listing.
Insurance quote and bind endpoints in partner framing (no live carrier yet), plus tenant policy upload with a landlord approve or reject workflow and dashboard status.
AI Gemini policy extraction and summary.
The effective-dated compliance record at the center of the affordable-housing module. Approving a new certification supersedes the previous one and leaves it readable rather than overwriting it, so you can answer what was in force on a given date and compute the impact of a backdated income change on what is actually owed. A recertification queue sits where you already work, so units coming due surface instead of relying on a date somebody typed once.
Vacancy loss, unpaid rent and tenant damages are claimable against a HAP contract, and most of them are never filed because nothing reads a move-out, a written-off balance or a damage cost as a claimable event. The opportunities view walks your own ledger and lease history and surfaces the events that look claimable, showing the evidence it used. It is deliberately conservative: it proposes, it never files, and it never invents an amount it cannot evidence from a record you already have.
Discriminatory phrasing in listing copy is caught and corrected rather than merely blocked, so you get compliant wording back to review instead of a rejection with nothing to publish.
Tenant and vendor portals
The dedicated, role-scoped experiences for residents and contractors.
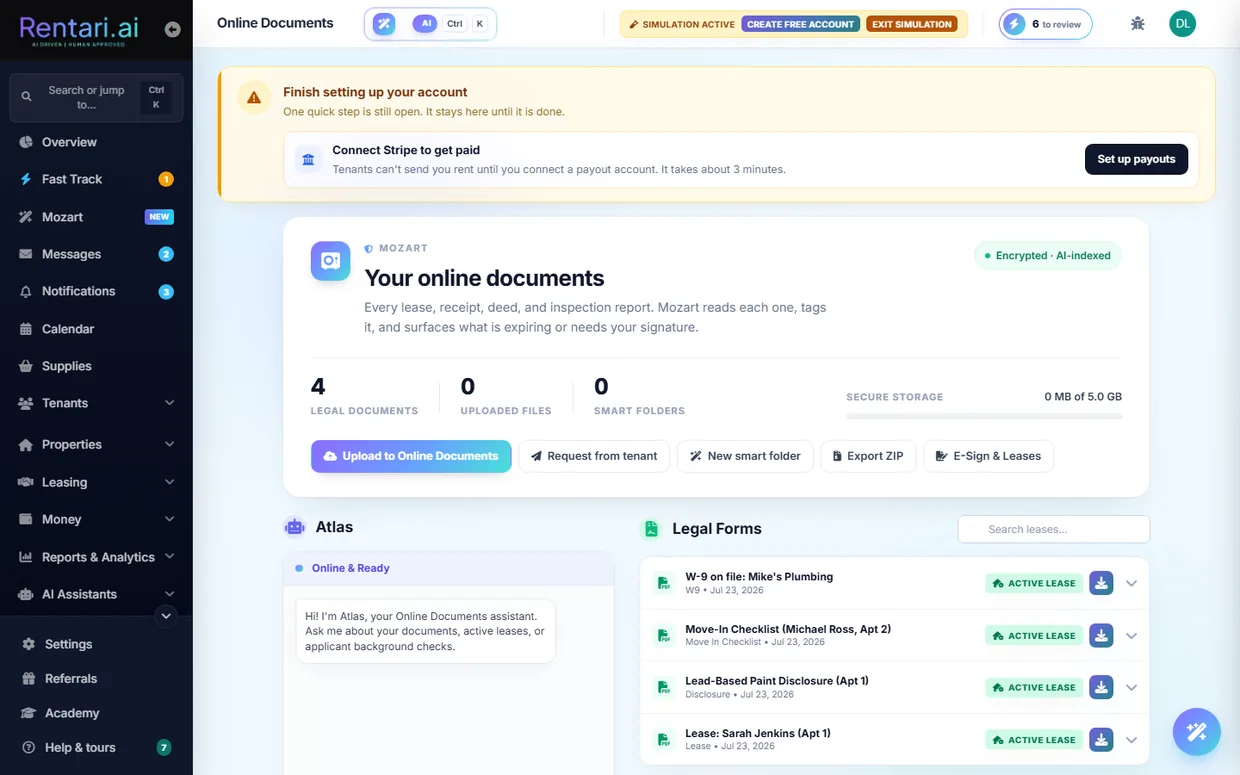
Vendor dashboard covering assigned tickets, ticket detail with photo upload and messaging, ticket state transitions, and materials logging. Includes a suspended-account view and a mobile PWA manifest.
Cloud document storage where tenants upload, view, and download their own files through authorized streaming, and landlords manage the full vault with version chains, share links, bulk move/delete/share, expiring and needs-attention queues, tenant document requests, and a year-end export.
AI Gemini RAG chat answers questions over document embeddings, with deep semantic search and smart-folder auto-classification.
Renters build and edit a directory profile (headline, bio, budget range, beds/baths wanted, move-in window, target areas, pets, employment, income, credit range) with a profile photo, prefilled from their tenant record, then publish or unpublish it to the landlord-only directory behind a minimum-data guard. A verified-ID badge is set honestly from Stripe Identity and is a trust signal, not a publish gate.
Vendors edit their public Find a Local Vendor profile (specialty, tagline, hourly rate range, service area, availability, insurance, gallery photos) and publish or unpublish it behind a specialty, tagline, and city gate. Saving converts rates to cents and geocodes the address, and gallery uploads enforce a per-vendor storage cap (50MB unlisted, 200MB listed) with a 30-day grace window.
Renters search vacant listings by price, beds, and verified-only filters, save favorites, and open a side-by-side compare view.
AI Gemini parses natural-language queries into structured filters and generates a per-listing 'why this fits' rationale for the renter's query.
Single-use, time-limited links let a guarantor pay through without an account, routing funds to the landlord's Stripe. A dashboard views invoices and resends or cancels them, alongside a cosigner-notices page.
Renters see all directory invitations with landlord name, message, listing details, and status, then accept or decline with an optional response. Accepting a listing-tied invite routes to the prefilled application and notifies the landlord.
Landlords and tenants review vendors after a job, and vendors can request reviews and publicly reply to them.
Vendors browse open bid opportunities and nearby jobs and submit competitive bids from the portal.
Vendor sets availability and subscribes to a personal .ics calendar feed of assigned jobs that syncs into external calendar apps.
Vendor checks in on arrival at a job, capturing a timestamped on-site check-in that verifies presence and starts the work window.
Either side raises a dispute on a ticket invoice with a reason and note, opening a dispute status for resolution.
A suspended vendor submits an appeal for review rather than being locked out with no recourse.
Vendor dashboard listing incoming landlord connection requests with landlord details, message, and status to accept or decline.
Generates a vendor credentials and verification letter summarizing the vendor's on-file compliance documents.
Tenant-facing signing page that renders the lease PDF preview alongside signature and initial fields.
AI Shows an AI plain-English lease summary next to the document.
Tenant registers up to two vehicles for the property, optionally by uploading a photo that auto-fills the details.
AI Extracts make, model, color, and plate from a vehicle photo.
Tenant issues time-limited guest parking passes with a shareable public link and QR view, and can revoke them.
Neighborhood tab that maps nearby places by category around the tenant's home address on a Leaflet map with a typed sidebar list.
AI Gemini structured output returns real place markers, cached per lease and category, never fabricated.
Community marketplace where residents post and remove items for sale or giveaway within the property.
Tenant views insurance partner offers and their coverage compliance status (active, pending review, or rejected with a landlord reason) for the leased unit.
Role-scoped training libraries: a tenant Academy at /dashboard/renter/academy leading with the Tenant App track, and a vendor-role-gated Academy at /dashboard/vendor/academy leading with vendor onboarding. Both keep their CTAs inside the portal session.
Owner sees documents the property manager shared to them and streams or downloads each file, authorized strictly on owner_id so they see only their own docs.
An applicant's former landlord opens a token link and answers an 11-question rental-history questionnaire (tenancy dates, rent, on-time payment, NSF, violations, notice, condition, damage, would-rent-again, comments) with a name and attestation, no account needed. Captures responder IP and shows an expired-link error state on bad or stale tokens.
Anonymous upload page reached via a signed token so a tenant or applicant can submit a requested document (for example an insurance policy) without logging in.
A tenant's calendar shows their own events, not the portfolio's, so nobody sees another resident's inspection, showing or lease date.
Public marketing site
Roughly 100 pages that sell the product, educate, and give away useful AI tools.
Server-rendered homepage plus About, Contact, Trust, Operations, Pilot-mode, Security, Careers, Events, and get-the-app / download pages that pitch the product with SEO and JSON-LD. Roughly 100 public pages, structured markup throughout.
Conversion-optimized paid-ad landing variants including the /go homepage-ad page, /lp, and the /best-property-management-software SEO landing.
About 35 dedicated feature pages covering leasing, leasing-inbox, rent collection, screening, messaging, management, maintenance, vendors, vendor-payments, marketing, syndication, listing-protection, bank-feed, accounting, reporting, documents/e-sign, IoT, lease-audit, income-verification, expense-tracking, renters-insurance, custom-websites, and landlord-verification.
Marketing pages for the AI products: AI Operator (Mozart co-pilot), Tenant AI (Luna), Luna by voice, Ask-AI, and the /damage-detection page.
AI Showcases the Gemini co-pilot and voice AI features.
Vertical use-case pages for tools, listing, applications, screening, leasing, rent-collection, maintenance, eviction, accounting, and portfolio.
A /compare hub plus 22 /vs/{competitor} head-to-head pages against Buildium, DoorLoop, TurboTenant, AppFolio, and more.
An /alternatives hub and /alternatives/{slug} 'best alternative to X' SEO landing pages.
Keyword-targeted landing pages such as /property-management-software, /cloud-based-property-management-software, /tenant-background-check, /software-rankings-explained, and /reviews.
A Markets hub with per-market detail pages and a Cities hub with per-city rental guide pages, generated for local SEO.
An /answers hub and /answers/{slug} pages answering common landlord and renter questions for long-tail search.
Blog index, category pages, and posts, plus a news hub with per-article and news-media pages. Includes a personalized industry-news brief and a grounded reader Q&A assistant over blog content.
AI Gemini news summarization for the personalized brief and grounded blog/article Q&A.
50-state law pages (/state-laws, /laws/{state}, /renter/laws) with AI plain-English rewrites and a free-text state-law question box.
AI Gemini plain-English rewrites and grounded state-law Q&A.
Per-state lease-agreement landing pages at /lease-agreement/{state}.
A public /academy page showing the full lesson library grouped by category with a featured row, readable in full without signing in. Every lesson is a written walkthrough at /learn, so it loads instantly, is searchable, and can be skimmed or linked to a single step. Logged-out visitors get no deep-link CTAs so they are never bounced to sign-in.
A crawlable, server-rendered Help Center at /help grouping articles by persona and category with client-side tabs and search, plus per-article pages at /help/{slug}. Also covers the rental glossary, FAQ, and avoid-scams safety guide; /support and /support pages redirect here.
Grounded Q&A chat on the Privacy and Terms pages that answers questions from the actual policy text.
AI Gemini grounded policy Q&A.
A searchable, SEO-crawlable catalog of 182 landlord and tenant forms across 9 categories, with metadata rendered into the page so it is crawlable without JS. Each form has a per-page watermarked PNG viewer (no native PDF, no save/print) and a guided field-by-field fill flow, with old preview.pdf and download URLs redirecting in for back-compat.
A split-pane fill page for the roughly 55 v2 forms where typing debounces a render that updates watermarked PNG preview pages without reload, with values auto-formatted (currency, dates) and per-form derivers computing totals, deltas, and percentages. The completed form downloads as a watermarked, image-only PDF that requires login and validates required fields first.
A free-tools hub plus interactive calculators for ROI, security-deposit, late-fee, prorated-rent, and rent-affordability, each with SEO-friendly aliases.
A suite of anonymous, throttled AI demos: a deal analyzer (cap-rate, cash-on-cash, BRRRR verdict), a receipt-to-Schedule-E categorizer, a listing draft and multi-channel syndication simulator, a maintenance triage card, a vendor-match shortlist, and a draft-tenant-pitch email generator.
AI Gemini investment reasoning, vision receipt OCR, listing copy, maintenance triage, vendor matching, and email drafting.
On /damage-detection, upload a unit photo and get a chargeable-versus-normal-wear verdict with an estimated repair cost.
AI Gemini vision damage assessment.
A public tool at /lease-audit that runs an uploaded lease through an AI risk review, flagging issues, statute conflicts, and a score, with no account required.
AI Gemini opposing-attorney lease review.
A public scam-check tool that scores a suspicious rental listing or message, plus a report-listing endpoint for flagging scams, surfaced on /avoid-scams.
AI Gemini scam-risk analysis.
Renter-facing public listing search, individual listing detail pages, and a sample listing used for marketing screenshots.
An anonymous pre-qualification check against a listing's actual rent and criteria that returns plain-language reasons and informs the renter, never auto-declining.
AI Gemini-Flash pre-qualification reasoning.
Machine-readable Zillow and Apartments.com XML feeds of a landlord's published listings, plus per-channel XML/RSS listing feeds at /feed/{channel}.xml and a renter search endpoint.
Anyone can browse the Find a Local Vendor directory with filters for keyword, specialty, city, state, availability, max hourly rate, and insured-only, plus pagination.
A public vendor profile showing tagline, rates, gallery, and computed performance stats (completed jobs, average completion days, average landlord rating) from maintenance history, with a view counter. Logged-in landlords see Connect and Bookmark controls.
A product chatbot embedded on every public marketing page, open to logged-out visitors with rate limiting and length caps, answering grounded product questions.
AI Grounded Vertex AI chat with guardrails.
A host-resolved white-label public surface under a landlord's own domain or subdomain: branded home, blog index and posts, brand pages, and a brand-site contact form.
The public marketing site is intentionally English-only: the language switcher is removed and auto-translation disabled, so every public page renders in English regardless of locale cookie, query param, or Accept-Language header, while the authenticated tenant and vendor portals keep the real switcher.
A security and trust page exposing a live security-status snapshot plus AI triage and vulnerability-report intake endpoints.
AI Gemini report triage.
The demo page sends you the demo straight away instead of queueing you behind a salesperson. Fill in the short form and it arrives, rate-limited to one per address per day.
Accounts, roles and onboarding
Sign-up, identity, roles, white-label branding, billing, and the account lifecycle.
Multi-step account creation with password-policy enforcement, phone/email verification, promo/referral capture, and a Turnstile bot gate that creates the landlord account and boots them into the dashboard. During signup a user can upload a photo or PDF of an ID or business document to prefill the form fields.
AI Gemini vision extracts name and business fields from an ID or business document to prefill signup (rate-limited by IP).
A login landing page plus an account-first flow that checks whether an email already exists and can verify a code before asking for a password. A safe post-login redirect preserves deep links.
One sign-in for both consoles: your Rentari.ai credentials open Rentari IQ without a second account or a second password.
After a correct password the user enters a one-time code sent by SMS (email fallback) to finish login. A separate step-up flow requests and verifies a fresh code to re-confirm identity before a sensitive action. Dev bypass code is 000000.
Sign in or sign up with Google (authlib), preserving the intended post-login destination. Apple (stateless form_post OAuth) and Facebook tiles appear only when their respective provider credentials are configured.
Forgot-password via a signed, expiring email reset link, plus an alternative phone flow that sends an SMS OTP and lets the user reset with the code.
24-hour email-verification magic links with resend. Verification gates tenant-side reads of screening data, auto-provisioned accounts start unverified, and changing the email resets verified status.
Add or change a phone number and confirm ownership with a Twilio SMS code before it is trusted for 2FA.
Native app account creation plus Google and Apple sign-in that exchange a provider token for Rentari session tokens, with Bearer access and refresh tokens and device/push registration for the Expo/React-Native app.
Five roles: landlord, tenant, vendor, manager, and co-owner. Managers and co-owners scope to the parent portfolio and can countersign leases.
Every actionable row in the rail carries a live count of what is waiting behind it, and a collapsed group rolls its children's counts up, so nothing needing attention is hidden one click down.
Invite team members, accept by token, revoke invites, change roles, and remove members, all scoped to the parent portfolio.
Stripe Identity (government ID plus selfie) with auto-compare against application data and mismatch flagging.
AI Mismatch detection against application data.
Connect a Stripe payout account, complete onboarding (with prep email and return bridge), check connect status, view the Stripe dashboard link, and disconnect. Vendors have their own onboarding path.
Edit name, business profile fields, and account settings, and upload or remove a profile/avatar photo. From settings a landlord can upload a CP-575, LLC formation doc, business license, or ID to get proposed business-profile values, which are never written until the landlord clicks Update.
AI Gemini reads a business document and proposes business-profile field values (never auto-writes).
Tenants edit contact info, emergency contact, employment, and password, and manage SMS consent, notification, and locale settings.
Central settings page for business info, preferences, reminders, and auto-renewal, including landlord-level lease defaults applied to newly generated leases.
AI Settings advisor suggests reminder and auto-renewal preferences from a portfolio snapshot.
Track the things only your portfolio cares about, without waiting for them to be built in: the date a roof was replaced, an HOA gate code, which listing site a tenant came from. Define a field once and choose the record it belongs to (property, unit, lease, tenant or vendor) and what it holds: text, a number, money, a date, a dropdown of your own options, or a yes / no tick. An Additional details card then appears on every record of that type, and the field becomes a column you can add to a report, sort by, filter on, group by, and total or average when it holds money or a number. Retiring a field hides it without disturbing the reports that already use it, and a field a saved report still needs cannot be deleted by accident. Only you and your team see these; tenants and vendors never do.
Choose the account's market or vertical from a catalog to personalize product terminology, or clear it back to the general default.
An onboarding wizard with skip, business settings capture, and a path-to-first-rent checklist on the dashboard that reads your real portfolio to show what is left.
AI AI property prefill and entity-type suggestion.
A setup checklist in the help drawer (add a property, add a tenant, create a lease) whose done-state is computed from real portfolio signals, with a progress bar that hides once fully set up.
Book a live one-on-one setup call with the Rentari team from the dashboard, for landlords who would rather be walked through the first property than read about it.
An authenticated training center that renders the lesson grid and the written lessons inside the dashboard shell, with per-lesson 'Open this feature' deep links to the live product page. Each persona (landlord, tenant, vendor) has an ordered 'Start here' track that walks a new user from first login through running the product. Academy covers a single task in a few minutes; this handbook is the reference underneath it.
Interactive intro.js-style walkthroughs that highlight real on-screen elements step by step from a per-article selector map, listed in the drawer with Start/Replay and page-aware ordering. Completed-tour state syncs to the server so Start/Replay and the first-run hint follow the user across devices. Currently active in the landlord shell; tenant and vendor are planned.
A keyboard-driven jump to any page, record or action from anywhere in the dashboard, without hunting through the rail.
A dashboard API returns progress-gating setup tasks so a persistent banner nags until they are done: a tenant under an identity-requiring landlord must verify to unlock move-in rent and deposit, and an operating landlord must connect Stripe Connect payouts.
Invite property owners, manage an owner roster and equity via OwnerEntity, generate monthly owner statements (income, expenses, management fee, draw) gated behind acknowledgement, and share documents to owners. Invited owners get a tokenized page showing the property, their ownership percentage, and PM name, then accept as a matching user or register a new owner account, and manage a self-service owner profile with an AES-encrypted tax ID for 1099 purposes.
Run the whole app under your brand (logo, favicon, colors, CSS across the dashboard, resident and vendor portals, and sign-in) with branded tenant/vendor emails. Claim a free name.rentari.ai subdomain or connect a custom domain with verify/provision and automatic HTTPS, and deactivate branding.
AI Color-contrast guard on brand colors.
Property managers edit their branded public marketing site with a site-settings editor, custom-pages CRUD editor, and a blog-post editor scoped to their own white-label domain.
A landlord referral dashboard with a personal code, stats, and reward tracking, plus /ref/{code} attribution and an apply-a-code endpoint.
AI Gemini drafts referral invite messages.
An in-dashboard roadmap page where landlords request features and help shape the product.
Self-serve subscription in three flat annual tiers that scale to any portfolio size, per unit only above 50 units, with Stripe checkout and a billing portal. Prime takes a card at checkout and bills your first month there and then, so there is no trial clock to track and nothing to cancel before a surprise charge. Comped and coupon accounts get paid features with the billing UI hidden until the grant expires.
A read-only seeded portfolio for trying the product, toggle in and out, with all non-GET requests blocked while in demo.
Request account deletion (including self-service from the mobile app) with a grace window, feeding the deletion-and-restore lifecycle. A public check-email endpoint and an emailed-token restore link let the user recover the account within the window before permanent removal.
A self and team activity timeline (logins, signings, payment approvals, data access) for SOC 2 evidence requests.
Marks the first-visit welcome modal as seen and records or schedules the in-app app-store review prompt so neither reappears.
A wizard that proposes state-specific settings from the deterministic state-rules matrix for a new landlord, plus an AI empty-state nudge that suggests the next onboarding action.
AI Gemini proposal layered over deterministic state rules.
Confetti and toasts on milestones such as first property, first lease, and first tenant.
Subscribe from the iOS app through Apple in-app purchase. iOS has no continuous slider, so mobile plans are a tier ladder and a unit count rounds up to the next tier that covers it. Annual purchases cap at 50 units because of Apple's $999.99 price ceiling, and a larger annual selection falls back to the equivalent monthly product rather than quietly selling a tier you did not buy.
Ask for your data to be erased, opt out of the sale of personal information on the do-not-sell page, and set your cookie preferences.
Help, language, and privacy
Getting help inside the app, using Rentari in your language, and staying in control of your data.
A one-click language selector usable from any authenticated portal shell sets the sl_locale cookie for a year and returns to the referring page. It drives the UI across ~30 languages including four right-to-left scripts (Arabic, Urdu, Farsi, Hebrew), falling back to English on unknown locales.
Translates a batch of UI strings into the active locale for long-tail pages the static catalogs do not cover, caching every result in a shared translation_cache table so any string is translated only once per locale fleet-wide. It degrades to English on any model error and is per-IP rate limited with size caps as a denial-of-wallet guard.
AI Gemini Flash localizes UI strings, preserving interpolation tokens; results cached per locale.
Users set a preferred interface and communication language, and landlords pick a persistent dashboard chart theme (brand, glass, cinematic, aurora, and more) that saves per account.
An 80%, 90%, 100% display-size picker in Settings that scales the whole interface, not just the text, so more of a portfolio fits on one screen. It is offered identically in the landlord dashboard and the tenant and vendor portals, and the choice is remembered per browser.
A bottom-right Help FAB opens a slide-over drawer in every portal, searching one ranked index that folds curated how-to articles, real dashboard pages, and Academy lessons into step-by-step Action and Tip guides with screenshots. It is persona-scoped so a tenant never sees landlord-only content.
A version-controlled registry of about 96 self-contained help articles (25 core plus 71 auto-generated), each with persona, category, summary, keywords, the exact dashboard route it explains, an optional Academy lesson, and numbered steps. Served via single-article and persona-grouped list endpoints.
A helpful or not-helpful vote with an optional comment on any help article, from the public page or the in-app drawer. It works anonymously, captures the user id when signed in, and is best-effort so a write failure never breaks the widget.
Landlords submit and upvote product feature requests, and a match surfaces semantically similar existing requests to avoid duplicates.
AI Gemini semantic dedup matching.
A do-not-sell page, a cookie-preferences save endpoint, and a CCPA privacy opt-out endpoint.
The accounting back office
A solo landlord never needs this page. A property manager running three LLCs lives in it: a separate set of books per entity, a bills queue, a check register, deposit slips, and journal entries that carry an approval.
The legal entities you report on separately. You create one book per entity and assign each property to the entity that actually owns it, so a P&L, trial balance, or balance sheet runs for one entity instead of only for the whole portfolio. Creating a book seeds its chart of accounts, so a new entity starts with accounts already in place rather than a blank page. Property assignment is effective-dated.
A queue for what you owe: enter a bill, let it sit until you are ready, then settle several at once with batch Pay bills. Paying writes the expense ledger row in the same transaction, so the payment and its expense row land together and never one without the other. Paying can also record a check, taking the next number from the register so no two checks share one.
A managed next-check-number sequence, so the number comes from the register instead of from a note on your desk, with a printable check and stub.
Batch offline income rows (cash and paper checks) into one printable bank deposit slip, so what you carry to the bank matches one record instead of a dozen loose entries. Each slip freezes a snapshot of the items it contained at the time it was made.
A manual adjustment to the books moves through draft, then pending approval, then approved or rejected. An entry that changes the accounts carries a reviewer rather than landing on its own.
Each book carries its own chart, and you rename, re-parent, and deactivate accounts to match how your bookkeeper already works. Per-fee GL binding sends platform fees to the account you chose.
One merged, chronological, running-balance feed for a single vendor, tenant, owner, or chart account. A vendor's money arrives from three places (bills, checks, and payments), a tenant's from the ledger, an owner's from statements plus distributions. This is where one contact's whole story reads in order, with a balance that moves.
A grid for entering many bills at once instead of one form at a time. Each row takes the same details you would enter on a single bill, so nothing about the entry changes except the speed.
Reporting
Around 45 reports that are already written, a builder for the one nobody wrote, and a schedule so the right numbers reach the right inbox without you remembering.
Roughly 45 downloadable reports, grouped so you can find one without hunting. Financial covers the general ledger, trial balance, balance sheet, AR aging, delinquency, rent paid, income by unit or by charge type, 1099s, depreciation and security deposits. Leasing and operations covers lease details, current tenants, vacant units, work orders, open and completed tasks, screening usage, e-sign activity and the audit log. Per-vertical and HUD tiles, available for the portfolio types that use them, cover the HAP split, the recertification calendar, the CAM roster, senior-care billing, occupancy by bed, HOA dues, lot rent, storage occupancy and coworking memberships.
When no ready-made report answers your question, build your own: pick a dataset from the supported list, pick the columns you want, and preview the result (capped at 100 rows) before you commit to it. Save it and it is yours to rename, reconfigure, run again, or delete. Saved reports stay scoped to your own portfolio.
Put a report on a schedule and stop chasing it: choose what goes out, how often, and who receives it. Edit the schedule later, pause it in a quiet month, resume it, delete it, or send the report once right now without disturbing the recurring run.
Profit and loss (P&L), cash flow, rent roll and owner statement, each exportable as CSV or PDF, plus a columnar variant of the owner statement. Rentari can draft a plain-English narrative on the P&L and the owner statement, so the numbers arrive with an explanation of what moved and why.
Your expenses are mapped to their IRS Schedule E lines automatically, with an on-screen summary you can read long before tax season, a per-year view, and CSV or PDF export to hand to your accountant. The category matching is AI-assisted, and you can see exactly which line each expense landed on.
Chart-based reporting for the times you want the shape rather than the rows. Open one report on its own page or view them all together, both drawn from the same underlying data, with a theme switcher so the charts read well on whatever screen you are presenting from.
Connect your own tools
Your portfolio is your data. Pull it into your own systems over a REST API, have events pushed to you by webhook, or hand a key to your own AI assistant and ask it questions directly.
A documented REST API over your own portfolio: list and fetch properties, and list tenants, leases, maintenance tickets and payments. Requests are authenticated with a Bearer key and rate limited, and every list response is cursor paginated, so you can page through a large portfolio without skipping or repeating a record.
A live key can create properties and units and send a real applicant or tenant invite email. Every write accepts an Idempotency-Key, so when your integration sends one and then retries a request after a timeout or a dropped connection, you get the original result back instead of a duplicate property or a second invite going out to a real person.
Every key you mint is either test or live. A test key reads your real portfolio, so you can build against the true shape of your data, and is rejected on any write. Nothing you run with a test key can change your records.
Mint keys from your developer dashboard. The full key is shown once, at the moment you create it, and only a hashed version is stored, so copy it then: it cannot be read back later. You can list your keys and their details, revoke one the moment it leaks, and keep up to 10 active keys at a time.
Before keys are minted you submit a short access request: your company, what you plan to build, the volume you expect, and the kind of integration it is. You can check its status at any time, and key minting opens once the request is approved.
Instead of polling for changes, register your own endpoint and Rentari pushes events to it as properties, leases, tenants and payments change. Each endpoint is issued its own signing secret and every delivery is HMAC signed, so your server can verify a request genuinely came from Rentari before it acts on it. Register, list and delete endpoints yourself.
Paste an API key into the AI you already use (Claude, Cursor or ChatGPT) and it can pull your portfolio directly: your properties, tenants, leases, maintenance tickets and payments. It runs on the same key, the same authentication, the same portfolio scoping and the same rate limits as the REST API, so your assistant sees exactly what your integrations see and nothing more. No exports, no copy and paste, no separate credential to manage.
Your market
Rentari runs twelve specialized markets alongside standard residential. You pick yours once, and the product starts using your words: lots instead of units, residents instead of tenants, communities instead of properties. Each market gets its own dashboard, several add the calculator that market runs on, and most of them bill straight into the same ledger your residential rent already uses, so vertical revenue lands in the rent roll, the P&L and your owner statements rather than in a spreadsheet beside them. A few are calculators and trackers on purpose: the SCRA date math, the underwriting metrics and the critical-date tracker post no money, because that is not what they are for.
Picking your market
Choose your market from the catalog in settings, or clear it and go back to the general default at any time. It is purely personalization: it changes the words you read and puts your market's tool in the sidebar. Your properties, your data and your billing are untouched.
The three generic nouns the product leans on (tenant, property, unit) are remapped to the words your market actually uses, in the singular and the plural. A storage operator reads customers and facilities, a manufactured-housing operator reads residents and communities, a coworking operator reads members and locations.
Report column headers pick up your market's labels too. Only the headers change: the figures underneath are untouched, so a CSV export still reconciles line for line with the table on screen. With no market set, headers stay generic, which is the honest default.
Your market's dedicated tool appears in the navigation rail only when your account operates in that market, so nobody else carries a sidebar full of screens they will never open. Affordable housing and investment management each surface more than one.
A report that groups income by what it actually was (rent, care fees, association dues and special assessments, membership fees, CAM charges, housing assistance payments) with billed against collected, so your vertical billing lines stay visible instead of collapsing into a single rent line.
The governing statute name and citation for five non-residential markets (manufactured-home lots, self-storage lien law, assisted living, condo and HOA, student housing) across all 50 states plus DC, feeding the per-market documents behind these pages.
Student housing
At /dashboard/student-housing you break a unit into individually priced beds, each with its own rent, label and occupant, and see leased against available across the whole property with the rent each bed carries. A manager or co-owner sees the same beds you do, and nobody outside your portfolio can reach them.
One click posts this month's rent for every leased bed as a charge against that bed's resident, due on the first. Unleased beds are skipped. Run it twice and the second run skips anything already billed for that month, so a double click never double bills.
Every bed across your by-the-bed units in one export: occupant, leased or available, and per-bed rent, with leased against potential totals.
Military housing
At /dashboard/military-housing you enter the notice date and the lease's rent due day and get the termination and effective dates back. It follows the Servicemembers Civil Relief Act (50 U.S.C. 3955): a servicemember with PCS orders or deployment orders of 90 days or more may terminate, and for a lease with monthly rent the termination takes effect 30 days after the first rent due date that falls after proper written notice and a copy of the orders. It handles the awkward cases, such as a 31st due day in February. Guidance, not legal advice, and the page says so.
Protected tenants appear on the compliance dashboard alongside renewal windows and disclosure deadlines, and an active-duty self-attestation is captured at signing and kept in the audit trail. Nothing is billed from this screen: it is date math and a record.
Affordable housing
At /dashboard/affordable-housing, the core affordable computation, using the same line items as the HUD-50059 and citing 24 CFR 5.628 and 5.634. TTP is the greatest of 30 percent of monthly adjusted income, 10 percent of monthly gross income, the welfare rent where a state applies one, and the PHA minimum rent. From there it gives you tenant rent to owner (TTP less the utility allowance), a utility reimbursement when the allowance exceeds TTP, and the assistance payment (gross rent less TTP). Guidance, not a substitute for the housing authority's official calculation.
The effective-dated compliance record itself, and the spine of the whole affordable module. Approving a new certification supersedes the prior one for that unit and leaves the old one readable, so the question an auditor actually asks (what was in force on this date) has a real answer instead of whatever the field says today. A backdated income change computes what is genuinely owed rather than quietly rewriting history. Every figure is arithmetic, not an AI estimate.
Recertifications that are coming due, surfaced where you already work rather than in a separate reminder system, with the 120-day HUD annual recertification window flagged. A recertification calendar export lists upcoming recerts and inspections for your subsidized units, soonest first.
Vacancy loss, unpaid rent and tenant damages are claimable against the HAP contract, and most owners never file because nothing in their system reads a move-out, a written-off balance or a damage cost as a claimable event. The opportunities view walks your own ledger and lease history and surfaces the events that look claimable, showing the evidence it used. It is deliberately conservative: it proposes, it never files, and it never invents an amount it cannot evidence from a row you already have. Because claim windows vary by housing authority and by program, it reports the event and its age rather than asserting a deadline that may not be yours.
At /dashboard/hap-reconciliation, expected against received Housing Assistance Payments per voucher unit per month. Seed the expected rows for the month in one action, mark payments received so they post to the ledger, and read the gap on each side. The split matters because the remedy differs: a short tenant share is a dunning and late-fee question, a HAP shortfall is a dispute with the housing authority, and a late HAP is a follow-up with the caseworker and never an eviction posture against the tenant.
A shared, landlord-contributed directory of public housing authorities at /dashboard/phas, carrying payment standard, inspection cadence and HAP payment day. Link a subsidized unit to its authority and the downstream surfaces (the rent-reasonableness check, inspection cadence defaults, payment timing) read that authority's values instead of a generic assumption.
Walk a unit through the standard pre-inspection checklist before the real inspector arrives: record pass or fail per item with photos, then finalize the run. The result writes back to the unit, so the per-unit chip on the property page reflects your latest walk-through without you going and updating it.
Register a unit as subsidized with its program, voucher type, contract rent, payment standard and recertification dates, then generate a recertification document checklist and a caseworker export carrying roughly twelve months of HAP history, so the packet you hand over is already assembled.
Look up published HUD Fair Market Rent or Small Area FMR by ZIP and bedroom count, and gut-check an asking rent before you submit the Request for Tenancy Approval. The check follows 24 CFR 982.503(b): a payment standard sits between 90 and 110 percent of published FMR, with approved exceptions to 120 percent, and you get a pass, borderline or fail verdict rather than a raw number to interpret yourself.
Audit a lease against Housing Choice Voucher requirements (24 CFR 982) and splice the HUD Tenancy Addendum onto it. The audit is rule-based and deterministic, and it runs alongside the AI state-rule compliance check rather than replacing it.
Scan your marketing copy or lease text for phrasing that turns voucher holders away ("no Section 8" and its cousins), with findings rated against the jurisdiction, per property or per listing.
Two honest caveats on this module. The Fair Market Rent lookup calls HUD's own data service and needs a HUD API token, which is free to register for at huduser.gov; without one the lookup tells you it is not configured instead of guessing a number. And these screens are not on every landlord's sidebar by design: set your account's market to affordable housing and the affordable tools appear in the navigation rail, with /dashboard/affordable-housing linking on to HAP reconciliation, the PHA directory and the rent checks. The rest sit where the work already is, on the property, unit and lease pages themselves. If you run subsidized units and still cannot reach them, contact us.
Commercial
The signature commercial computation, at /dashboard/commercial. Your tenant's pro-rata share is their rentable square feet over the building's total, billable expenses are recoverable operating expenses less the base year or expense stop, and their base share is one times the other, plus an administrative fee. Against the monthly estimates already collected it tells you whether the tenant owes or is due a refund, and what next year's monthly estimate should be. It is a planning estimate, not a substitute for the exact CAM clause in your lease (caps, gross-up and exclusions all live there).
Save a billing plan per commercial tenant (suite, base rent, monthly CAM estimate, pro-rata share), then post the month in one action. Base rent posts as rent and the CAM estimate posts as its own separate line, so operating-expense recovery never disappears inside a single rent figure. Run it again and a tenant already billed for that month is skipped, and it tells you plainly that the month was already done.
An export of your commercial tenants' saved plans: base rent, estimated monthly CAM and pro-rata share. These are the planning estimates you are collecting against, not a completed year-end reconciliation, and the report says so.
Manufactured housing
At /dashboard/manufactured-housing a community breaks into lots, each with its lot rent, occupant, occupancy status, and whether the home on it is resident-owned (lot rent only) or community-owned (a full rental). The screen surfaces what operators actually run on: occupancy, vacancy rate, potential against actual lot rent, and the owned-to-rented home mix.
Post this month's lot rent for every occupied lot as a charge against that lot's resident, due on the first. Vacant lots are skipped, and running it again skips any resident already billed for that month, so lot rent shows up in the rent roll and P&L without any risk of billing a month twice.
Every lot across your communities in one export: occupant, home ownership, lot rent and occupancy, with occupied against potential rent.
Investment management
At /dashboard/investment-management, the underwriting metrics an investor checks on every deal, from a handful of inputs: net operating income, cap rate, annual cash flow, cash-on-cash return, gross rent multiplier, debt service coverage ratio and expense ratio. A ratio whose denominator is zero comes back empty rather than throwing an error at you. A planning estimate, and explicitly not investment advice.
Rather than a blank form, the calculator seeds from what you already have on file, per active property: purchase basis and closing costs, loans and debt service, and rent actually collected over the last twelve months. Anything you have not entered comes back marked as missing rather than as a convincing zero, and the portfolio roll-up agrees with the accounting view rather than drifting from it.
This market pairs the underwriting screen with monthly owner statements, since the people reading your returns are usually the people who need the statement. Each statement carries gross income, expenses, the management fee, ownership share and the net draw, and the owner acknowledges it in their own portal before the distribution is released.
Condo and HOA
At /dashboard/condo-hoa, the association's dues roll: each unit owner's regular monthly dues, any special assessment against them, the outstanding balance, and whether they are current or delinquent. It rolls up into the four numbers a board asks for: the dues roll itself, the delinquency rate, total outstanding, and total special assessments.
Post the month for the whole association at once. Regular dues and a special assessment are written as two separate itemized lines against the unit owner, never merged, so association money finally reaches the P&L and owner statements as what it actually is. Run it again and an owner already posted for that month is skipped rather than charged twice.
The full dues roll as an export: monthly dues, special assessments, balance owed and delinquency per unit owner.
Self-storage
At /dashboard/self-storage a facility breaks into units, each with its size, monthly rate, customer, and status (vacant, rented or delinquent). The screen gives you occupancy rate, potential against occupied monthly revenue, and the revenue currently at risk in delinquent units.
Post this month's rate for every occupied unit as a charge against that unit's customer, due on the first. Vacant units are skipped, and running it again skips any customer already billed for that month, so storage revenue lands in the rent roll and P&L rather than being tracked separately.
Your unit inventory as an export: size, rate, customer, and vacant, rented or delinquent status, with the at-risk revenue totalled.
Said plainly, because it matters when you are choosing software: this is the inventory, occupancy and billing layer. Gate and access control and lien auction handling are on the roadmap and are not shipped today.
Corporate occupier
Built for the other side of the table: if you are the corporate tenant doing lease administration rather than the owner, /dashboard/occupier tracks every space you lease and the dates that cost money when missed. Each lease carries a days-until counter to its expiration and to its renewal-option notice date, and leases entering the expiry or notice window are flagged before the window closes rather than after.
The lease list belongs to your account and only your account, and it is deliberately a tracker: nothing on this screen bills anybody, because as the occupier you are the one paying rent, not collecting it.
Social housing
At /dashboard/social-housing each scheme carries its waitlist: every household with a priority band, the date they applied, household size and current status. It surfaces waitlist depth, the status and priority mix, and how long the households still waiting have actually been waiting.
Set rent at a share of adjusted monthly household income (typically 30 percent), floored at a minimum rent and reduced by any tenant-paid utility allowance. It tells you which basis actually applied, income-based or minimum rent, so the number is explainable to the household. Confirm the ratio and any deductions against your housing authority's own rent scale.
The bridge from the waitlist into real money. Housing a household creates the resident and an active lease at the agreed RGI rent on a unit of that scheme, marks the applicant housed, and advances any matching lead, after which monthly rent bills exactly like any other lease. Overlapping dates on the same unit are caught before the lease is written, and you can invite the resident to the portal separately whenever you are ready.
Senior living
At /dashboard/senior-living, the monthly bill a community actually builds for a resident: base room and board, the assessed care-level fee, an optional second-occupant fee, and a-la-carte services, plus the one-time community fee. Work it out before you commit it to anyone's ledger.
Each resident sits on a suite with a saved care plan. Applying the month posts itemized charges (base rate, care level, second occupant, each service, and the community fee on the first apply) so the resident or their family pays through the normal payment flow, and every component stays visible in accounting and the rent roll instead of collapsing into one number. This is billing, and only billing: it is never a clinical or health record.
Each resident's monthly care billing (base rate, care level, second occupant, services) shown next to what was actually billed to their ledger this month, so the plan and the money can be checked against each other.
Coworking
At /dashboard/coworking each location carries its members: plan, monthly fee, seats taken and status. It gives you monthly recurring revenue, the annual run rate that implies, seats in use, and the mix across your plans.
Post this month's fee for every active member in one action, due on the first. Paused and cancelled members are skipped, and running it again skips any member already billed for that month, so membership revenue reaches the P&L on the same rails as rent.
Members by location as an export: plan, seats, monthly fee and status, with active monthly recurring revenue totalled.
This is the membership, capacity and revenue layer. Desk booking and door access control are on the roadmap and are not shipped today.
Your state
Rentari is a United States product, and in the United States a lease is fifty-one different documents. The deposit you may hold, the days you have to return it, the fee you may add when rent is late, the hours of warning before you enter, the days a tenant gets to cure before a filing is possible: every one of those is set by the state the property sits in, and several of them are set by the city on top of that. Rentari keeps those numbers in one library and writes them into your documents for you, with the statute they came from printed alongside.
One matrix, fifty-one jurisdictions
The numbers in this part come from Rentari's state rules library, covering 50 states plus the District of Columbia. It holds notice periods, late-fee ceilings, deposit-return windows, entry-notice hours, rent-increase caps, cure periods and the statute citation for each. When you generate a notice in Georgia and a lease in Oregon on the same afternoon, both read from that library, and both print the source behind the number.
The matrix is authoritative. If a help article, a template's boilerplate paragraph or an AI-written summary anywhere in the product ever disagrees with it, the matrix is the one that is right.
A 51-entry library (50 states plus DC) of notice periods, late-fee caps, deposit-return windows, entry-notice hours, rent-increase caps, cure periods and statute citations, injected into every generated notice, disclosure and lease render so the document shows your state's value and the cite it came from. The matrix wins over prose anywhere the two disagree.
Deposits: the cap, and the clock that starts at move-out
Two separate rules govern a security deposit, and they move independently. The first is how much you may hold. California and New York cap it at one month's rent, New Jersey at one and a half, Missouri at two. Texas, Florida and Illinois set no statewide ceiling on the amount at all, and the matrix does not invent one for them, because a limit the state never imposed is just as wrong as no limit at all.
The second is how long you have to return it once the tenant is out. That clock is shorter than most landlords assume and it is not uniform: New York gives you 14 days, California 21, most states 30, Maryland and Virginia 45. Rentari counts it from the lease end date and shows you the deadline rather than making you find it. Some states add a third rule on top, requiring the deposit sit in a separate account, requiring that account be at an in-state bank, or requiring you pay the tenant interest on it, which is why the Massachusetts security-deposit interest disclosure exists as its own attachable addendum.
Caps are enforced where the money actually moves. An over-configured application fee is brought down to the state-lawful amount before the applicant is charged, and the deposit and late-fee caps are checked on the actions that collect them. Where an override is available for a specific situation, the action asks for a typed confirmation rather than a checkbox, and the override is written to your audit trail.
Late fees, grace periods and application fees
Late-fee law splits into a percentage ceiling, a dollar ceiling, and the number of days that must pass before either applies. Some states set one, some set both, and where both exist the lower of the two governs. California allows up to 5 percent of rent with no dollar ceiling. New York allows 5 percent but not more than 50 dollars. Illinois caps the dollar figure lower still. Texas and Florida sit at the permissive end, 12 and 10 percent. The grace period underneath moves just as much: two days in Texas, three in California, five in New York, New Jersey and Illinois, thirty in Massachusetts.
Application fees follow the same pattern in a smaller way. California publishes a specific dollar figure that is adjusted over time, New York caps it at twenty dollars, and Massachusetts permits no separate application fee at all. Rentari charges the applicant the state-lawful amount rather than the number you happened to type, so an over-configured fee never reaches a prospect's card.
Notice before you knock
Entry notice is the rule landlords break most often, usually by habit rather than intent. Florida requires 12 hours for repairs. California, Iowa and Maine require 24. Alabama, Arizona, Delaware, Hawaii and Kentucky require 48. Several states, Colorado and Georgia among them, have no entry statute at all, and there the matrix says so honestly and treats 24 hours as the contract standard rather than pretending a citation exists.
An entry notice generated in Rentari carries the correct number of hours for the property's state, and the statute behind it where the state has one, so the tenant reading it can check the claim. Where the governing rule is municipal rather than statewide, as with the Chicago ordinance that sets 48 hours in a state with no statewide rule, that is what the notice says.
Cure periods and the day a filing becomes possible
Two different clocks matter before an eviction, and mixing them up is how a case gets dismissed. The pay-or-quit period governs unpaid rent: 3 days in California, 5 in Arizona and Illinois, 9 in Connecticut, 10 in Colorado, 30 in the District of Columbia. Florida's 3 days exclude Saturdays, Sundays and legal holidays, so a notice served on a Thursday does not expire on Sunday, and the notice Rentari generates says so on its face. The notice also names the court that hears the case in that state, which is a Superior Court in California, a Justice Court in Arizona, a Magistrate Court in Georgia and a Justice of the Peace Court in Delaware.
The cure period for a non-monetary breach is a separate number entirely: 3 days in California, 7 in Florida, 10 in New York, 15 in Pennsylvania for a tenancy under a year, 30 in Ohio. North Carolina provides no statutory cure period, and the matrix records that as zero rather than borrowing a neighbor's figure.
Before a filing, Rentari checks that your ledger actually shows an unpaid balance and that a pay-or-quit notice was logged at least your state's cure period ago, adds a fair-housing reminder, and returns blocking findings when either is missing.
Disclosures and addenda your state requires
A lease is not one document. It is a lease plus whatever your state and your building make mandatory. California triggers a Megan's Law disclosure, a bed-bug disclosure, a pest-control notice, a smoking-policy disclosure and, in a mapped flood area, a flood-hazard disclosure. New York triggers its own bed-bug form, and a New York City building adds the window-guards notice. Texas triggers a flood disclosure, Florida a radon gas notice, Illinois and Colorado radon awareness, Washington a mold disclosure and a smoke and carbon-monoxide alarm acknowledgment, Oregon its statewide rent-control notice, New Jersey the Truth-in-Renting statement and window guards. The federal lead-based paint disclosure is not a state rule at all: it turns on the building's year of construction, so Rentari raises it from the property's build year rather than from the state code, and never tells a landlord with a 2020 building that a pre-1978 form applies.
The generator stitches the applicable set onto the lease and records which ones it attached. A pre-flight check then compares what your state and property require against what was actually attached, and flags any required disclosure that is neither attached nor explicitly waived on the record, so an omission is a decision somebody made rather than something nobody noticed.
Renders a state-specific lease or a standalone document for any state straight from the rules matrix, with an optional-addenda picker, a pre-flight compliance check, a watermarked preview before you commit, and email delivery to the tenant.
Every state variant of a lease or notice carries a real state-law facts panel (deposit cap, notice period, late-fee ceiling) plus a link to the governing statute, pulled from the verified dataset rather than written by hand, so a prospect can check the number before signing up.
Rent increases
Most states cap nothing and require only that you give notice, usually 30 days. A handful do both. California limits an increase to 5 percent plus regional inflation with a hard 10 percent ceiling, and requires 60 days rather than 30 once the increase passes 10 percent. Oregon allows 7 percent plus inflation under the same 10 percent ceiling and requires 90 days. The District of Columbia works from inflation plus 2 percent with a 10 percent ceiling and lower limits for elderly and disabled tenants. Washington runs 7 percent plus inflation capped at 10 percent, on 60 days. New York sets no statewide percentage but scales the notice to how long the tenant has lived there, 30, 60 or 90 days, once the increase reaches 5 percent. Maryland requires 60 days statewide with county rules layered above it.
Where a state has no statewide cap, Rentari says exactly that instead of implying one, and flags that a local rent-control ordinance may still cover the property. City rent stabilization is not the same thing as a state cap, and the two are never merged into one number.
When the law changes
Housing law moves every legislative session, and the change that matters to you is usually the one filed in the state where you own three units, not the one making national news. Legislation Watch tracks state housing bills and connects them back to your actual portfolio, so a deposit bill in Colorado shows you the Colorado properties it would touch.
A dashboard tracking state housing bills across nine categories with per-state and per-category breakdowns, plus a page per bill covering status, impact, confidence, attorney-review flag, effective date, a link to the full text and related bills. Signed in, you can subscribe to status changes on a bill.
Each bill is tagged with how many of your properties sit in that state and rendered as per-property impact tiers built from the bill's category, your lease counts, deposit-holding leases and vacancies. One click queues the bill's drafted addendum against every active lease in that state as pending rows you still have to approve, and the addendum downloads as a Word file carrying a not-legal-advice disclaimer.
Past the apartment
Residential landlord-tenant law is not the only statute a property owner lives under, and a mobile-home lot or a storage facility is governed by an entirely different chapter of the code. Rentari carries the governing statute for those verticals as its own dataset, and where a state is not covered it says so rather than letting the gap pass for coverage.
Governing-statute name and citation for five non-residential verticals (manufactured-home lots, self-storage lien law, assisted living, condo and HOA, student housing) across 50 states plus DC, powering the per-vertical documents behind the market pages. Where a state is not covered, it says so rather than implying it is.
What this is, and what it is not
Rentari surfaces the rule and cites the statute it came from. It is not a law firm and none of this is legal advice. Every value in the library either carries the statute behind it, or says plainly that the state has no statute and the number is the contract standard, which is the point of printing the source on the document. For anything consequential (a contested eviction, an unusual deposit arrangement, a property under a local ordinance that overrides the state rule), confirm the current text with your own attorney before you act. Rentari is built to make that check quick, not to replace it.
How To Use It
Step-by-step walkthroughs for every major workflow, grounded in the real screens.
Market a vacant unit with AI
The Property Marketing Hub lets a landlord turn a vacant unit into a published, syndicated listing, using AI to draft the photos-based description and headline while the landlord reviews and approves before anything goes live. It combines rent optimization, photo upload, AI copy, and manual multi-network syndication on one page.
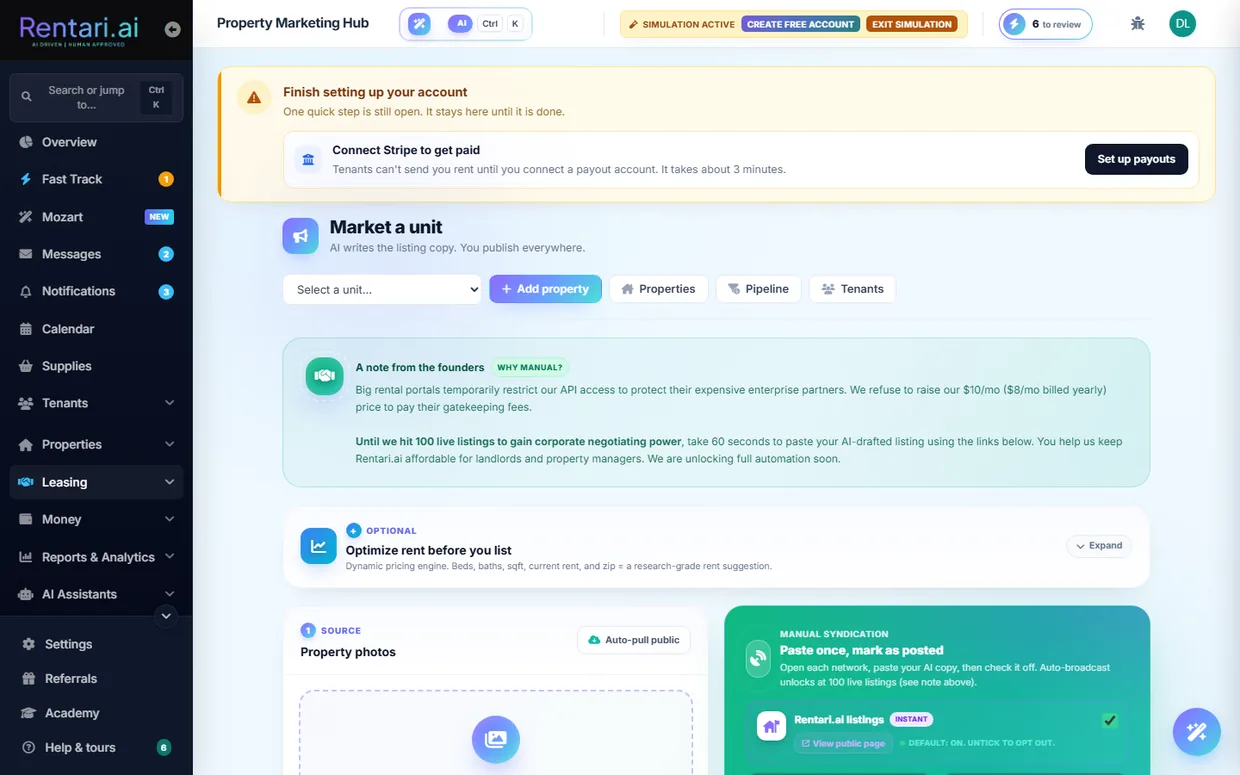
- 1Open the Marketing Hub. From the sidebar click Properties, then the Market a unit tab, or go to /dashboard/market, which redirects there and loads the Property Marketing Hub with the header "Market a unit".
- 2Pick the unit to list. Use the "Select unit to market" dropdown at the top; choosing a unit reloads the page for that unit and fills in its beds, baths, square footage, current rent, and neighborhood. If the unit already has a published listing or a draft, a status card appears in place of the publish form.
- 3Optimize rent before listing (optional). Expand the "Optimize rent before you list" pricing card, confirm the Beds, Baths, SqFt, Current rent, and Neighborhood fields, and run the pricing engine to get an AI rent suggestion you can accept before you advertise a price.
- 4Add property photos. In the Property photos panel, drag exterior and interior images into the dropzone (or click to browse), or click the auto-pull button to fetch public images like Street View. Saved photos show in the gallery and persist across refresh; a Public Record badge marks pulled Street View shots.
- 5Auto-write the description with AI. Click "Auto-write description with AI" to have the AI read your photos and draft an SEO listing Headline and Description. The generated text lands in the editable Headline and Description fields, which you review, tweak, or regenerate with a different tone before you use it. Nothing publishes at this stage.
- 6Clear the Fair Housing review. After generation, a Fair Housing review panel lists any wording the AI adjusted or flagged that it could not auto-fix. Read and resolve those items so the copy is compliant before you publish.
- 7Choose where to syndicate. In the Syndication card, Rentari.ai public listings is checked by default; tick the additional networks you want such as Zillow, Apartments.com, Realtor.com, Zumper, Rent.com, Redfin, Craigslist, or Facebook Marketplace. Most are Manual, meaning you open each site, paste your AI copy, then check it off to track it.
- 8Publish the listing. Click "Mark this listing as published", then in the review-and-publish dialog type PUBLISH to confirm. The listing goes live on your Rentari.ai listings page and records the networks you selected; only one live listing per unit is allowed at a time.
- The AI never publishes on its own. It only fills the editable Headline and Description fields, and you approve and can regenerate the copy before publishing.
- Only one live listing per unit is allowed, so if a unit already shows a published listing you must take it down or mark it rented before publishing a fresh one.
- Beyond Rentari.ai, most syndication networks are Manual: you paste the copy on each site yourself. Auto-broadcast unlocks at 100 live listings. In demo mode the page is read-only, so publishing and other non-GET actions are blocked.
Publish the listing and take showings
Turn a vacant unit into a live public listing on Rentari.ai, then let prospects book in-person tours through the showing scheduler. The landlord runs this end to end from the marketing hub.
- 1Open the marketing hub and pick the unit. Go to /dashboard/market. The bare page redirects you to the Market a unit tab on Properties to choose a unit, which opens /dashboard/properties?tab=marketing for that unit with its listing workspace titled around "AI writes the listing copy. You publish everywhere."
- 2Add photos. In the photo box, either click the upload area to select interior and exterior photos, or click the Auto-pull button (btn-fetch-images) to grab a street-view image. Photos unlock the Generate step.
- 3Generate the AI listing copy. Click Generate. Gemini vision returns a Fair Housing-safe headline and description with a Fair Housing review panel listing any phrases it rewrote or flagged. This is a draft proposal, so read the flags and edit the fields, or use the tone dropdown and click Regenerate, until you are happy.
- 4Choose where to publish. Tick the platform checkboxes. Rentari.ai (pub-rentari) is on by default and posts the unit to the public /listings directory; the other platforms (Zillow, Apartments.com, and more) are manual paste-and-tick networks.
- 5Publish the listing. Click "Mark this listing as published" (btn-publish). A gate requires a monthly rent above $0 and a description of at least 50 characters. On success the unit goes live at /listings and gets its own public listing page.
- 6Open the showing scheduler. Once the listing shows as published, the "Schedule Showing" button appears and opens the public booking page at /showing/{property_id}. Prospects pick a highlighted date, pick an open time, fill in name, email, and phone, then click "Book Showing" to reserve the slot.
- 7Let prospects apply or request a tour. On the public listing page, visitors click "Check eligibility for a tour" to run a quick pre-qual, then request a tour or start the application at /apply. Inquiries carry a Fair Housing acknowledgement before they send.
- 8Confirm or cancel booked showings. Each booked showing lands on your /dashboard/calendar as a showing event and in the leasing inbox. Open the booking to confirm it or cancel it; the linked calendar event updates to match.
- The AI copy is proposal-based. Nothing posts until you review the Fair Housing flags, edit or regenerate, and click publish yourself.
- A unit can hold only one live listing at a time. If it is already listed, take it down or mark it rented before publishing a new one.
- Demo accounts are read-only, so publishing a listing and confirming bookings are blocked (HTTP 403) until you are on a real landlord account.
Work the leads and leasing pipeline
The Leads Pipeline is where you move each prospective tenant from first inquiry to a sent lease, with the AI scoring and suggesting a next step for every one. As the landlord, you advance leads forward, send screening, and approve applicants before anything commits.
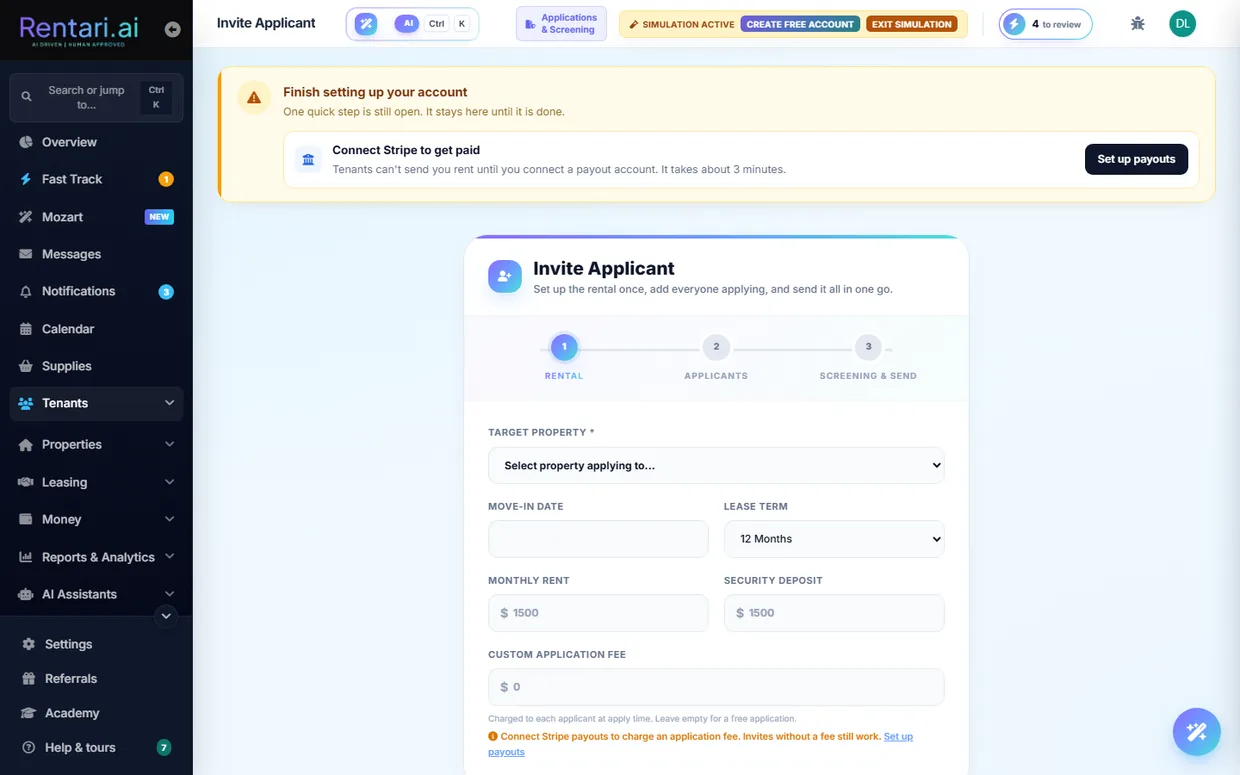
- 1Open the leads list. Go to /dashboard/leads to see every active lead as one row, in pipeline order: new inquiries, touring, applied, then lease sent. Filter chips above the list narrow it by stage and show a live count each, and a 'Waiting on you' chip picks out the enquiries nobody has replied to yet. On a phone each row stacks into a labelled card.
- 2Read each row's AI signals. Every row shows the applicant's name, email and phone, the full property address and unit, and AI chips: a shield trust score (or 'No AI score yet' until the Checkr report settles), a bullseye 'Fit' score for how well they match the unit, and their pre-screener answers. Co-signer and Co-applicant badges mark household members so a secondary is never mistaken for the primary.
- 3Advance a lead's stage. Each row has one next-step button for the stage it is in, and the three-dot menu moves a lead to any other stage under 'Move to'. The move calls /api/v1/leads/update-stage and shows a toast; if the server rejects it, nothing changes. Clicking the row opens the lead rather than moving it, so reading about somebody cannot change their stage by accident.
- 4Send or check screening. On an applied row, the button reads 'Start check' to open the package modal, or 'Resend ID link' / 'Resend payment' when the applicant still owes a step. Once the report lands it becomes 'View report', and 'Screening detail' in the row menu expands the breakdown underneath the row.
- 5Verify rental history (optional). Pick 'Verify rental history' from the row menu to open /dashboard/leads/{id}/verification, where you send no-login reference links to the applicant's prior landlords.
- 6Approve and draft the lease. Pick 'Approve & draft lease' from an applied row's menu to open the confirmation modal. If screening is not yet complete it warns you first, and you type to confirm before it POSTs /api/v1/leads/{id}/approve. Only after you confirm does it mark the applicant Approved, email both parties, and open E-Sign and Leases (Document Studio) to draft the lease.
- 7Invite a new applicant. Use the 'Invite applicant' button in the page header to jump to /dashboard/tenants?tab=screening, where you send a screening invite that adds the applicant back onto this pipeline once they apply.
- The AI only proposes: the trust score, fit score, and next-step chips are suggestions. Nothing is decided until you drag the card, click a screening action, or confirm the approve modal.
- The approve modal requires you to type a confirmation and warns when the background check has not returned, so you never accidentally approve an unscreened applicant.
- Demo sessions are read-only, so moves, screening, and approvals are blocked with a 403 in demo mode; use a real logged-in account to actually advance leads.
Screen an applicant
Background checks is the one place every check starts and every report lands. It opens on your report list, with a live status and an AI trust score for each person, and carries a Start a check section underneath for running a new one. Rentari suggests, you make the final call, and the FCRA decision itself is taken on the applicant's own record.
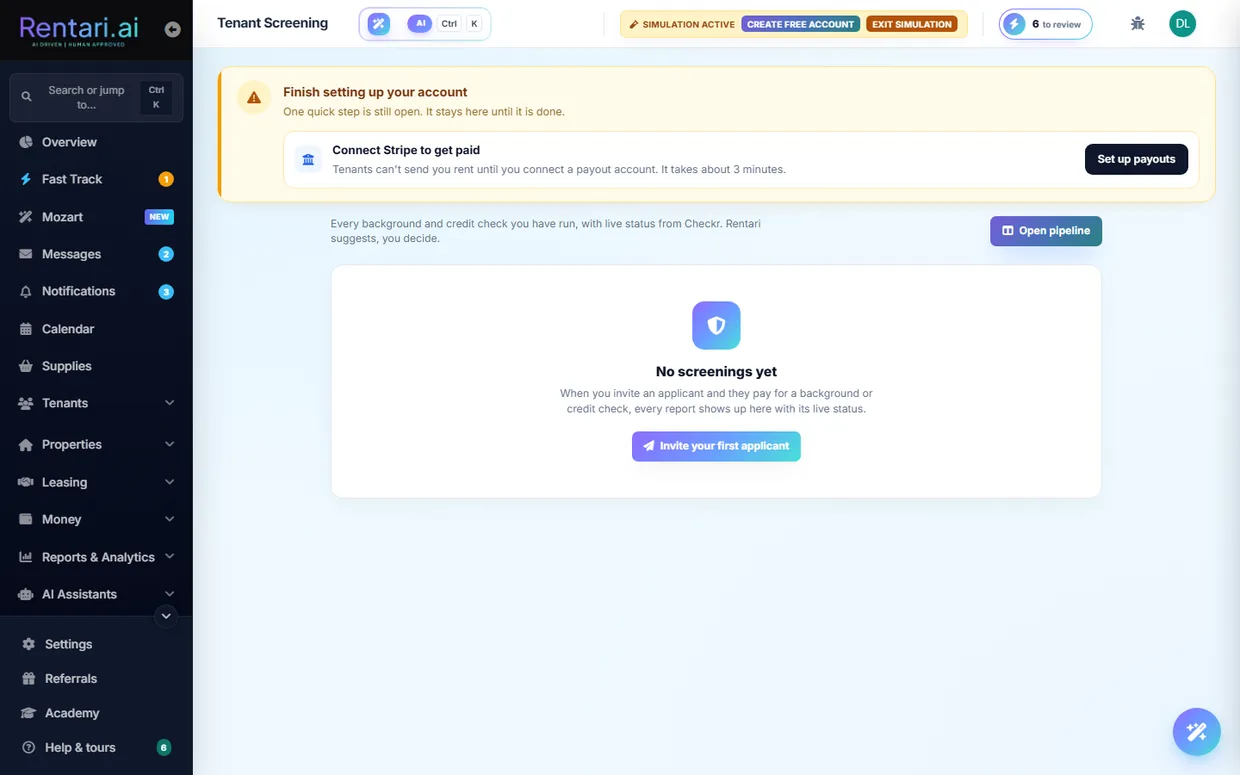
- 1Open Background checks. Go to /dashboard/background-checks, or open Tenants in the sidebar and click Background checks, which carries a live badge of how many checks are waiting on you. The page leads with your report list, and starting a new check sits below it. Three standing facts run under the title: FCRA and Fair Housing compliant, You never see the SSN, and Most reports back in minutes.
- 2Deal with what is waiting on you first. When a check needs your call, an amber strip sits above the list reading "1 check needs your decision. A report is back, or an applicant is blocked waiting on you." Click Show it (Show them, for more than one) to filter the list down to those and jump straight to them.
- 3Filter Your checks. The report panel is headed Your checks and carries four chips with live counts: All, Needs you, Running, and Completed. A check whose report is back but still needs your decision appears under both Completed and Needs you. When a filter empties a property of rows, that property's heading hides with them.
- 4Read a row. Rows are grouped under the property's full address, and each one gives the person and their email, the door (Unit 3B), the package and who paid for it, a status pill (Clear, Needs your review, Report running, Waiting on applicant, Declined, and so on), and the AI trust score out of 100: green at 75 and up, amber from 50, red below, or "Not yet" until the report comes back. On a phone the table stacks into cards so the status and the button stay on screen.
- 5Open the person. The button at the end of each row reads Review when that check is waiting on you and Open otherwise, and both jump to the applicant's own record with their full history. Once the PDF report is back, the button instead reads View report and opens the report itself in a new tab.
- 6Invite someone who is not in your system yet. Under Start a check, the first strip asks "Not in your pipeline yet? Invite them instead." Invite an applicant sends them a private link that expires on its own; they complete the full rental application, upload ID, give FCRA consent and pay, all in one go, and the screening runs automatically when they finish. SSN and consent are collected on Rentari's page, never on yours.
- 7Or run a check on someone you already have. "Run a check now" is three numbered steps. Step 1 is one dropdown listing your leads and your current tenants together, each with the whole address of their unit. Step 2 is a single package picker with two choices, each showing what it covers and how it is fulfilled: National Scan $55.00, selected for you, which is $45.00 to the renter while you are on a paid plan; and Income & Credit $70.00, which is $50.00 to the renter while you are on a paid plan and adds a full credit report and employment verification. A full credit report can also be added on top of the National Scan.
- 8Say who pays, certify, then run it. Step 3 is They pay or I pay, then the box certifying that the screening complies with the FCRA and the Fair Housing Act and that you have a permissible purpose to screen this person. The Run check button stays off until you have picked a person and ticked that box, and the line beneath it says exactly what happens next: "They will be emailed a secure link to consent and pay $64.99", or "You will be taken to checkout for $64.99" if you are paying. The button carries the running total too, so adding the credit report turns Run check $64.99 into Run check $122.98 before you commit to anything.
- 9Take the decision on the applicant's record. Declining, extending a conditional offer and running an individualized assessment are FCRA adverse-action steps, so they deliberately live on the applicant row with the full history rather than on this page. Review takes you there, and the row's menu holds Approve & draft lease, Pull report from Checkr, Extend conditional offer, Individualized assessment, and Decline (FCRA notice).
- 10Read Why this score before you decide. A screened applicant's card in the Leads pipeline carries View screening report, which opens the explainer at /dashboard/screening/{lead}/explain. It shows the trust score and credit score, an AI summary with a Regenerate button, the weighted plain-English reason codes the FCRA notice would cite (hover one for the evidence behind it), the live Checkr status, and an AI recommendation badge (Approve or Decline). Your decision sits at the bottom: a reason box, required if you are declining, then Approve & draft lease or Decline, which records the adverse-action notice.
- The AI only suggests. The trust score, the summary and the recommendation badge inform your call, but you approve or decline yourself, and your typed reason is stored in the audit log.
- Declining is irreversible and legally binding. It sends a real FCRA adverse-action notice citing the reason codes shown, so read them before you commit. Approving creates a draft lease in E-Sign & Leases, emails both of you, and soft-declines the other open applications for that unit.
- Old bookmarks still work. /dashboard/screening and /dashboard/applications-screening both land on /dashboard/background-checks, which is now the only place a check starts.
- In demo mode the page is read only. Browsing packages and reports works normally, but starting a check or sending an invite is turned off until you exit demo mode.
Build and send a lease
The Document Studio is where every lease, notice, disclosure and addendum is written. It walks a landlord through five steps, fills in the statutory defaults for the property's state, generates a compliant document, and hands off to send it out for e-signature.
- 1Open the Document Studio. Go to /dashboard/document-studio, or click "Create a lease" from your Overview or straight after adding a property. You land on "Create a document, or bring your own" with two choices: Create a new document to draft one, or I already have one to upload a lease you wrote elsewhere and have Rentari check and file it.
- 2Pick the form. Every form is on the page, grouped by category: Leases and Lifecycle, Specialty Leases, Vertical Leases, Notices, Disclosures, Addenda, Move In and Move Out, Money, Tax and Vendor, and Applications. Type what you need into the search box to narrow them in place, or use the category bar at the top to jump straight to a group. For a new tenancy pick Residential Lease, the standard 12-month lease with state-specific disclosures. Forms marked AI PREFILL can fill themselves from records Rentari already holds.
- 3Step 1, Document & Setup. Confirm the document type and the issuer, meaning which of your entities the lease is written under. This is also where the state gets set, and the state drives every statutory default that follows: late-fee caps, deposit limits, notice periods, and the disclosures your lease is required to carry. If you arrived from a link that already knew the answers, for example "Create a lease" on a tenant, a strip across the top shows what was filled in for you (document, jurisdiction, property and unit, and the signer) with a way to change any of them inline, so you are not asked again for something the link already settled.
- 4Step 2, Property Info. Choose the property and unit the lease is for. Picking the record rather than retyping the address is what keeps the lease, the ledger, and the tenant's portal pointing at the same unit. Arriving with a property already selected, for example from the next-steps tile after you add one, pre-selects it here.
- 5Step 3, Form Details. Fill in the financials and the specifics: monthly rent, security deposit, lease start and end dates, and the term. Compliance hints appear as you type, for example a deposit above your state's cap. The roughly twenty advanced compliance and operations settings below sit in a collapsed group, because every one of them already carries the default your state and the property record imply; open it only to override one. A running summary in the sidebar shows what the deal actually is as you type: due at move in, the term, and the deposit as a multiple of rent.
- 6Step 4, Rules & Terms. Set the house rules in one place: pets, smoking, parking, which utilities you pay, who handles lawn, snow and pest control, and any state-required or optional addendum the form offers. The pet policy lives here with the other rules rather than among the financials. Anything you leave alone falls back to the statutory default for the property's state.
- 7Step 5, Signers. Add each signer's full legal name and email. Every email becomes its own signing link, so name and email must be paired for every tenant, co-signer, and guarantor on the lease. Then generate the document. Nothing has been sent yet, so you review before anything goes out.
- 8Review and send for signature. You are taken to the "Prepare for signature" screen (/dashboard/sign). Confirm the signers, place a signature, initials, or date field for each tenant on the document, then click "Send for signature." Each tenant receives their own signing link. Only after you send does the lease leave your hands. The next walkthrough covers the rest of the signing lifecycle.
- The compliance hints are advisory and do not stop generation, so read them and fix values like an over-cap deposit before you generate.
- Send for signature will refuse to dispatch until every signer has at least one signature or initials field placed. A date field alone is not enough.
- Demo accounts are read-only, so generating and sending a real lease requires a live landlord account. Opening the studio from a property, unit, or applicant page saves retyping, since it pre-fills what Rentari already has on record.
- Already have a lease from a lawyer or a previous system? Use "I already have one" to upload it instead. It still gets checked, filed, and sent for signature.
E-sign, countersign, amend and renew a lease
This walkthrough covers the full signing lifecycle a landlord runs on a lease: adopting your own signature, sending it to the tenant, countersigning to execute it, and later amending or renewing it. You do the sending and countersigning from the signing page, and the tenant signs on their own linked page.
- 1Open the signing page. After generating the lease in Document Studio, open /dashboard/sign?document_id=<id> (also reached from the Lease Tracker). The lease renders in a paged viewport with a signing rail on the right, and the header reads Review and Sign.
- 2Adopt your signature. In the rail, use the Type tab to type your full legal name or the Draw tab to draw it on the pad, then set your initials in the adopt-initials box. This one signature and initials pair is reused for every anchor tab on the lease.
- 3Confirm signing order and send to the tenant. Leave Send to tenant first selected (the default, so the tenant signs first and you countersign last), then click Send to tenant for signature. A confirmation modal opens before dispatch; confirming sets the lease to pending_tenant_signature and emails the tenant a signing link.
- 4Let the tenant sign on their page. Each tenant or co-signer opens /tenant/sign/<id>, adopts their signature, checks I agree to electronically sign this lease, clicks through each anchor tab to place it, and confirms. The page opens with a plain-language summary of what they are agreeing to, the rent and when it is due, the home, the term, the deposit and the late fee, so nobody has to read eighteen pages to find the number. A bar pinned to the top of the signing panel keeps their progress visible and jumps them to the next field they still owe. The lease itself remains the agreement and governs. A tenant can instead request a change, which flips the lease to needs_revision for you to resolve.
- 5Countersign to execute. Once every signer has signed, the lease moves to pending_landlord_signature and you get a notification. Return to /dashboard/sign, where the banner now reads Countersign and Execute, and click Countersign & Execute. The lease becomes fully_executed and is filed in your Online Documents.
- 6Amend a signed lease. To change terms on an executed lease, open Document Studio and pick Lease Amendment. Add change rows manually or click Draft with AI, which drafts a clause and drops it in as a change for you to review and edit before sending. Both parties sign the amendment; the original lease stays intact, and on execution the change applies to the live lease and ledger.
- 7Renew the lease. From the Lease Tracker detail page, click Renew lease to open the renewal page for that unit. Set the new monthly rent (an AI rent suggestion is offered) and new end date, then send the offer; the tenant receives accept and decline links by email and in their inbox.
- AI only proposes, you approve. The amendment Draft with AI and the renewal rent suggestion just pre-fill fields; nothing is sent or signed until you review, edit, and click send.
- You countersign last, and only after every tenant and co-signer has signed. A lease that is still half-stamped will not flip to fully executed, so wait for the signers-signed count to complete before countersigning.
- Demo mode is read-only. On a demo_ account, dispatch and signing are blocked with HTTP 403, so use a real landlord account to actually send or execute a lease.
Collect rent, autopay, late fees and charges
The Rent collection page is where a landlord watches the current month's rent come in, records offline payments, adds one-off or recurring charges, and lets tenants set up autopay. Late fees and reminders on overdue balances are handled automatically once payouts are connected.
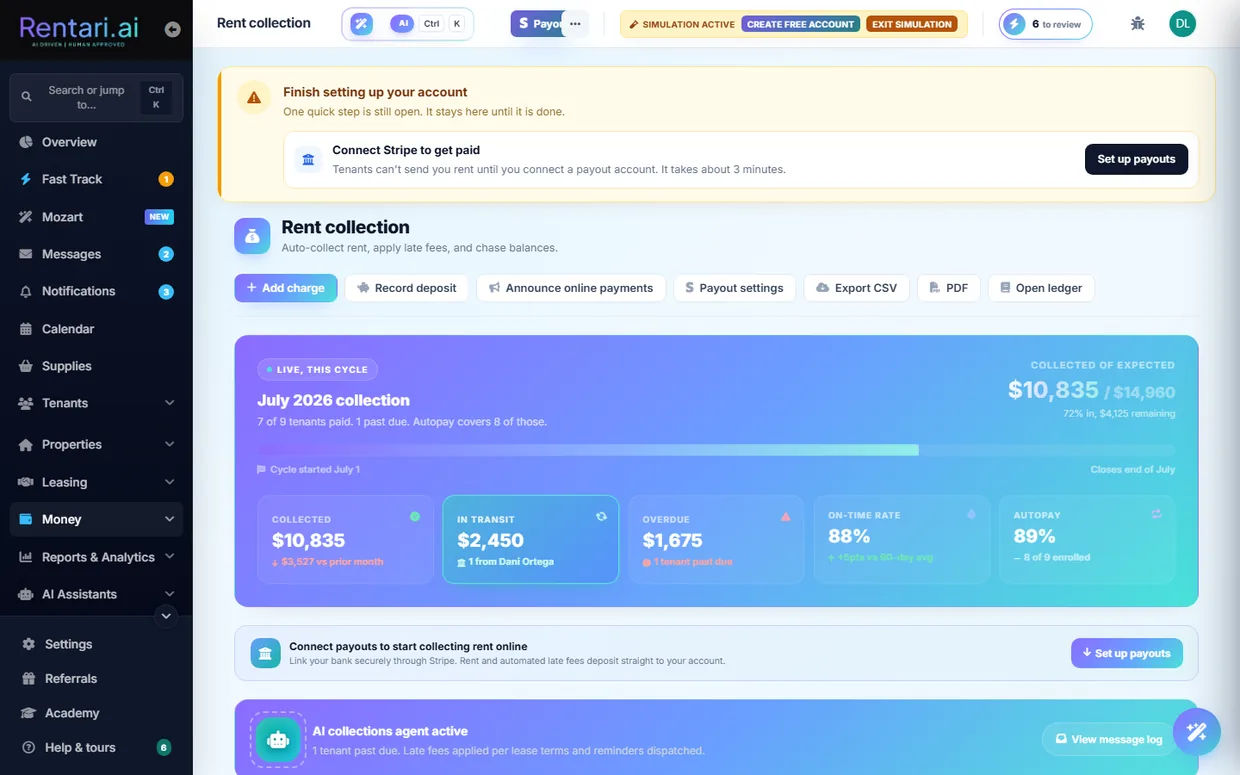
- 1Open Rent collection. Go to /dashboard/rent-collection. The hero shows this month's collected vs expected progress bar plus KPI tiles for Collected, Overdue, and Autopay enrollment, with the live rent roll listed below.
- 2Connect payouts through Stripe. If the blue "Connect payouts to start collecting rent online" banner shows, click Set up payouts or the Payout settings button to link your bank via Stripe. Until this is done tenants cannot pay online and automated late fees cannot deposit.
- 3Tell tenants how to pay online. Click Announce online payments in the hero to open the announce modal, which walks tenants through paying by ACH or card and turning on autopay, then broadcasts that message to your active tenants.
- 4Add a charge or late fee. Click Add charge to open the Add Manual Charge modal, pick the tenant and unit, enter an amount, choose a type such as Late fee, Returned payment (NSF) fee, Utility reimbursement, or Pet rent, add a description and due date, and click Send Bill to post it to the tenant's ledger. Flip "Make this a recurring monthly charge" to have it post automatically each month.
- 5Record an offline payment. For a tenant who paid by cash or check, click Record payment on their rent-roll row, confirm the amount, pick the payment method, add a note like the check number, and click Save Payment. It posts through /api/v1/payments/manual-rent and marks the row collected (undo is available within 24 hours).
- 6Invite a tenant to autopay. On a row that is not yet enrolled, click Send autopay invite to send the tenant a link to set up ACH auto-pay. Once they enroll the row shows "ACH autopay" and you can later click Cancel autopay to stop it. You enroll the invite, the tenant completes enrollment themselves.
- 7Chase overdue balances. When anyone is past due the AI collections agent banner appears and late fees are applied per each lease's terms with reminders dispatched automatically. Click Remind on a single row, or Send reminders to nudge the whole overdue queue at once.
- 8Draft a reminder with Mozart, then approve it. Click "Ask Mozart: draft a reminder" on an overdue row to have the AI compose the message in chat. Mozart shows you the draft first and nothing sends until you approve it.
- Late fees and reminders only fire on connected payouts and on the current month. Past months open read-only from the month picker, so reminders and payments there are disabled.
- The AI collections agent auto-applies late fees using each lease's own terms, not a global rule, so confirm your lease late-fee settings are correct before relying on it.
- In simulation mode the rent roll is populated with sample data and you can work it normally, including recording a payment. Nothing leaves Rentari.ai: no invite, reminder or receipt is sent, and no money moves. In the read-only demo those actions are blocked outright.
Handle maintenance end to end
The Maintenance board is where a landlord takes a repair from intake through vendor dispatch, quote comparison, work tracking, and final vendor payment. Everything runs on one Kanban board with AI triage and Mozart suggestions that you always approve before they commit.
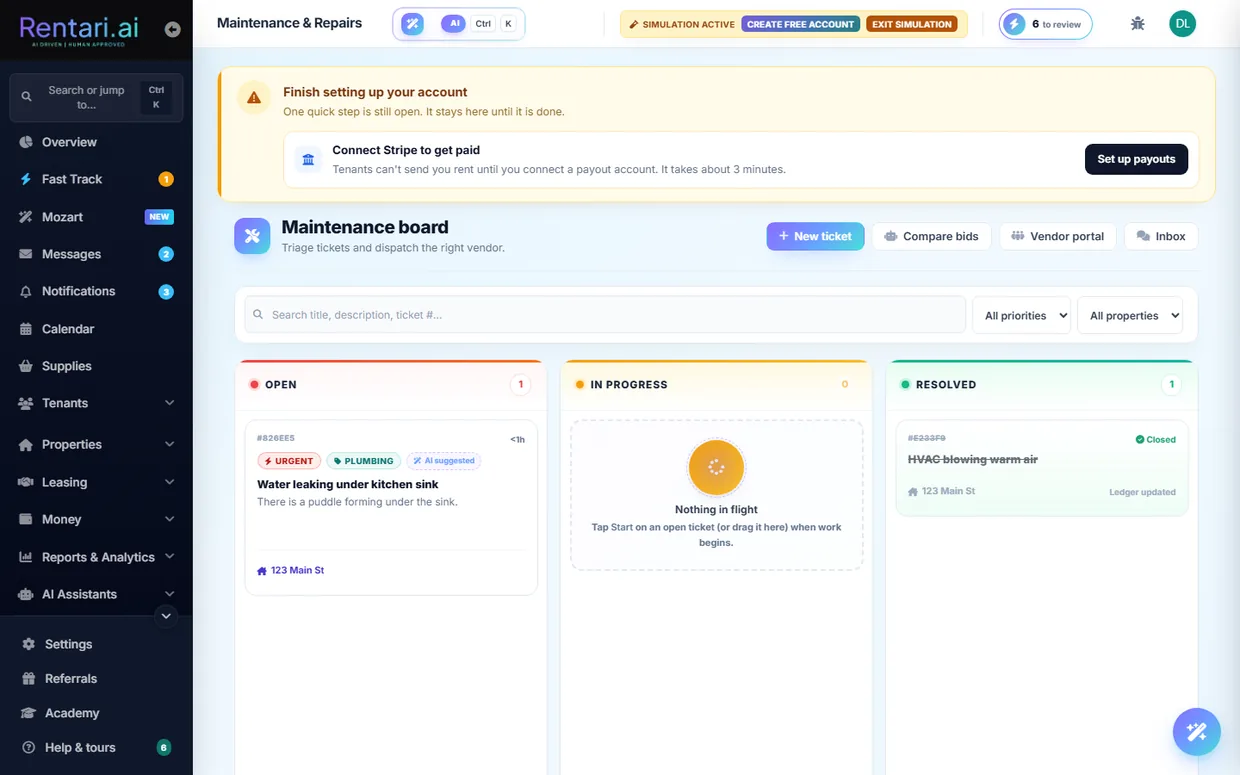
- 1Open the Maintenance board. Go to /dashboard/tickets to land on the "Maintenance board" Kanban, which has three columns: Open (new and needs-action tickets), In progress (scheduled work), and Resolved. Use the property filter dropdown at the top to narrow the board to one address.
- 2Log a new ticket (or let a tenant submit one). Click "New ticket" in the header to open /dashboard/maintenance/new, then pick the property/unit and category, describe the issue, attach photos, and set urgency. Tenant-submitted requests arrive on the board automatically in the Open column.
- 3Read the AI triage, then refine if needed. Each card shows a heuristic AI category and a priority bucket (urgent, normal, low) computed on load, plus a recurring-issue flag when a property has repeat problems. Click the small AI hint on a card to run "Refine with AI" (Gemini), which re-classifies severity and category in place for you to accept.
- 4Assign or dispatch a vendor. On an Open card click "Assign" to pick a contractor from your directory, or use the Ask Mozart link, which opens the co-pilot pre-filled to suggest a vendor for that ticket. Mozart only proposes the assignment and drafts the vendor nudge; you approve before anything is sent.
- 5Compare competing quotes. Click "Compare bids" in the header to open the quote-compare modal, drag in multiple PDF or image quotes, and hit "Analyze quotes" so the co-pilot extracts materials, labor, and totals into one matrix. Review the matrix and decide which vendor wins before committing.
- 6Move the ticket into progress. Once work is scheduled, click "Start" on the card (or drag it) to set the status to in_progress, moving it into the In progress column. Use the three-way thread button on any card to message the tenant and vendor together and track updates.
- 7Mark the work resolved. When the repair is done, click "Resolve" on the In progress card to move it to the Resolved column. The vendor's invoice and final cost flow in from the vendor portal, and the Resolved card exposes a Reopen button if the fix does not hold.
- 8Pay the vendor. On a Resolved card that has an assigned vendor, a final cost, and an unpaid invoice, click "Pay vendor" to open the typed-confirmation modal showing the amount and payee, then confirm to release the ACH payout to the vendor's connected Stripe account.
- Every AI or Mozart step is a proposal, not an action: triage refinement, vendor suggestions, and quote analysis all wait for your approval before anything is dispatched or paid.
- The "Pay vendor" button only appears once the vendor has an assigned final cost and the invoice is still unpaid, so if you do not see it the invoice has not been logged yet or is already paid.
- In demo mode the board is read-only; assigning, resolving, and paying all require a real landlord account since non-GET actions are blocked.
Run inspections and connect smart devices
Walk a unit with your phone so Rentari AI flags damage, prices every repair, and builds a signed deposit report, then connect smart locks to hand out time-boxed access codes. This is done by the landlord (or a manager with operational access).
- 1Open Inspections. Go to /dashboard/inspections to reach the Inspections workspace. This page is on a paid (prime) plan, so if you are on a lower tier you will be prompted to upgrade before it loads.
- 2Start a new inspection. Click New inspection in the header. In the modal, pick the unit from the dropdown and choose the type (Move-in, Move-out, or Routine), then submit to create the report and open its detail panel.
- 3Capture the walkthrough. With the inspection open, use Snap a photo to upload a damage photo, or Upload walkthrough to send a full video. Rentari AI analyzes each frame, detects damage, and logs a priced deduction row for every issue it finds.
- 4Review the AI findings. Read the AI-logged deductions in the Overview tab and use Time machine to compare against the move-in baseline. The AI proposes the damage and pricing, nothing is charged automatically, so you decide what stays.
- 5Resolve disputes. Open the Disputes tab (the badge shows how many need attention) and, for each contested item, click Waive to drop it to zero or Reject to keep it. The deposit refund total recalculates as you go.
- 6Generate the signed report. Click Generate PDF to produce the deposit report. It opens in a new tab so you can download it and route it for signature; the figures come straight from the deductions you approved.
- 7Route repairs or text the tenant (optional). Use Find a contractor on an item to create a real work order in Maintenance (no vendor is auto-dispatched, you pick one there), or use Mobile walkthrough to text the tenant a no-app capture link.
- 8Connect a smart lock. Go to /dashboard/iot-hub (Smart locks) and click Connect device. This opens the Seam Connect window where you link your lock brand and account; the hub then lists your connected locks.
- 9Issue and monitor temporary PINs. Click New temporary PIN, select the lock, set the Start and End access window, optionally enter a vendor phone to SMS the code, then Generate and Sync to Lock. Watch usage in Active codes and the AI Doorman log, and hit Revoke to kill any code.
- Inspections is a paid-plan feature; a free or lower tier will hit an upgrade prompt instead of the workspace.
- AI proposes, you approve: damage detection and pricing are suggestions until you accept or waive them, and generating the PDF only reflects the items you kept.
- You must connect at least one smart lock before the New temporary PIN form will let you issue a code.
- In demo mode the pages are read-only, so creating inspections, PINs, or reports is blocked until you use a real account.
Keep the books: ledger, receipts, Schedule E
Every rent payment and expense lands in one ledger already mapped to IRS Schedule E, so at tax time you export instead of reconstruct. This is the landlord's own bookkeeping surface, requiring a Prime plan.
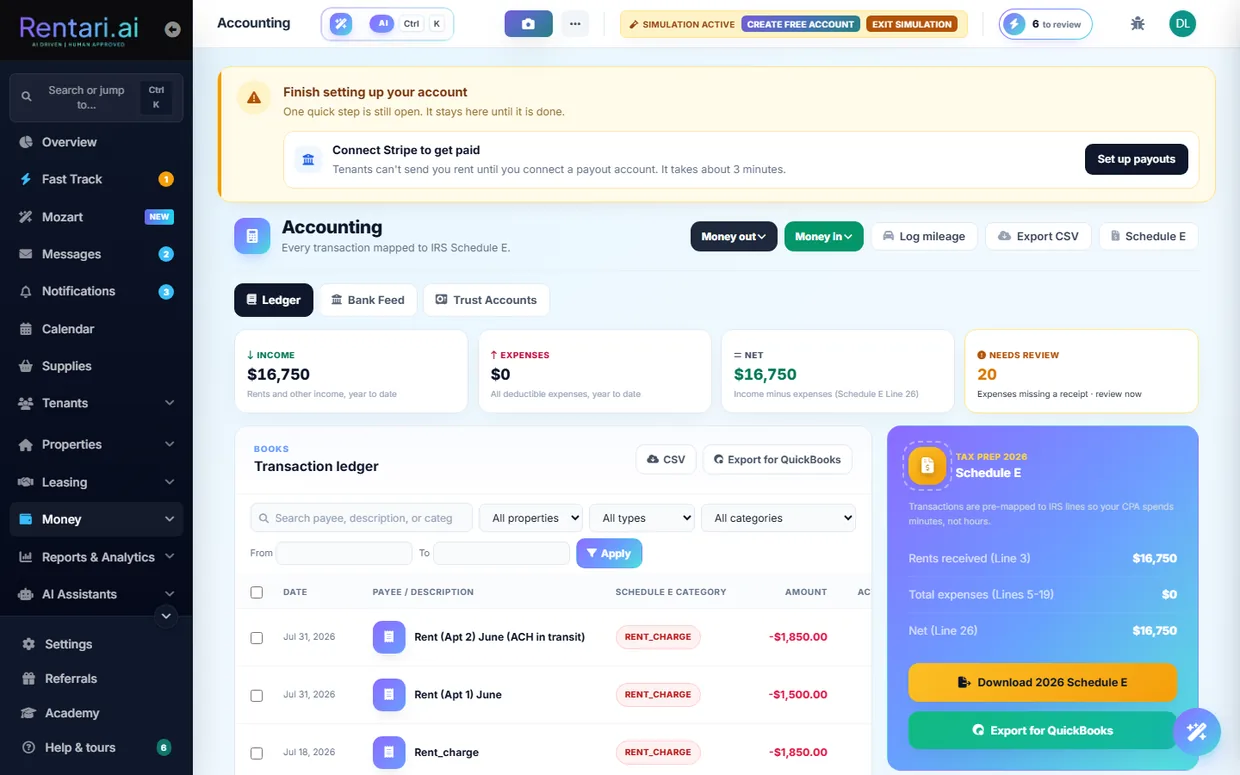
- 1Open the Ledger tab. Go to /dashboard/accounting. The Ledger tab is active by default, with Bank Feed and Trust Accounts as sibling tabs. The top KPI cards show YTD revenue, YTD expenses, net cash flow (Schedule E Line 26), and how many expenses still need a receipt.
- 2Scan a receipt with AI. Click Scan receipt (or the Money out menu, Scan a receipt), then tap the dropzone to upload or photograph a JPG, PNG, or PDF. The receipt posts to /api/v1/accounting/scan-receipt and AI extracts the merchant, date, total, and a suggested Schedule E category.
- 3Confirm before it lands. Review the extracted merchant, date, total, and Auto-Category the AI proposed. The panel states plainly that AI suggested it and you confirm before it lands in your books. Click Save to ledger to commit the expense; nothing is written until you do.
- 4Record an expense by hand. For anything without a receipt, click Manual entry (or Money out, Record an expense), pick Expense or Income, choose the property or Portfolio Level, type the vendor, and add one or more line items each with a Tax Category (for example Repairs Line 14) and amount. Click Save Transaction.
- 5Fix or assign a category. On any editable expense row, click the pencil or the Assign category pill to open the edit modal and set the Schedule E category and an optional sub-category like Plumbing or HVAC. Rows synced from Stripe are locked to category-only edits, and escrow or trust rows cannot be recategorized.
- 6Clear the needs-review pile. Use the Needs review KPI or the type filter set to review to find expenses missing a receipt. Attach a receipt or record the detail so each expense is backed up, which is what an audit expects.
- 7Export for taxes or your accountant. Use Export CSV for the full ledger, Export for QuickBooks for a journal-entry CSV, or the Schedule E button (and the Download 2026 Schedule E card) to pull /schedule-e/2026, a per-category CSV of the year's expenses ready to hand to your CPA.
- 8Check trust and deposits. Open the Trust Accounts tab for segregated escrow accounts holding tenant security deposits and prepaid rent. If your state requires it, set up a per-state account and Connect with Stripe there before collecting deposits. Rentari flags the states in your portfolio that need one.
- The AI only ever proposes. Both the receipt scanner and the bank feed put every extraction in front of you to confirm, and nothing hits your books until you click Save or Approve.
- Categories map to real IRS Schedule E lines (Repairs Line 14, Insurance Line 9, Utilities Line 17), so keeping them accurate all year is what makes the year-end export usable.
- In demo mode the page is read-only, so scanning and saving are blocked. Trust deposit collection is also refused for a state until that state's trust account is set up and connected to Stripe.
Reports, analytics and owner statements
Landlords use the Reports hub and Analytics pages to pull financial and operational reports, watch portfolio performance, export owner-ready PDF or CSV files, and ask the AI CFO plain-language questions about their numbers. Every report reconciles with the same ledger, so what you see on screen matches what you export.
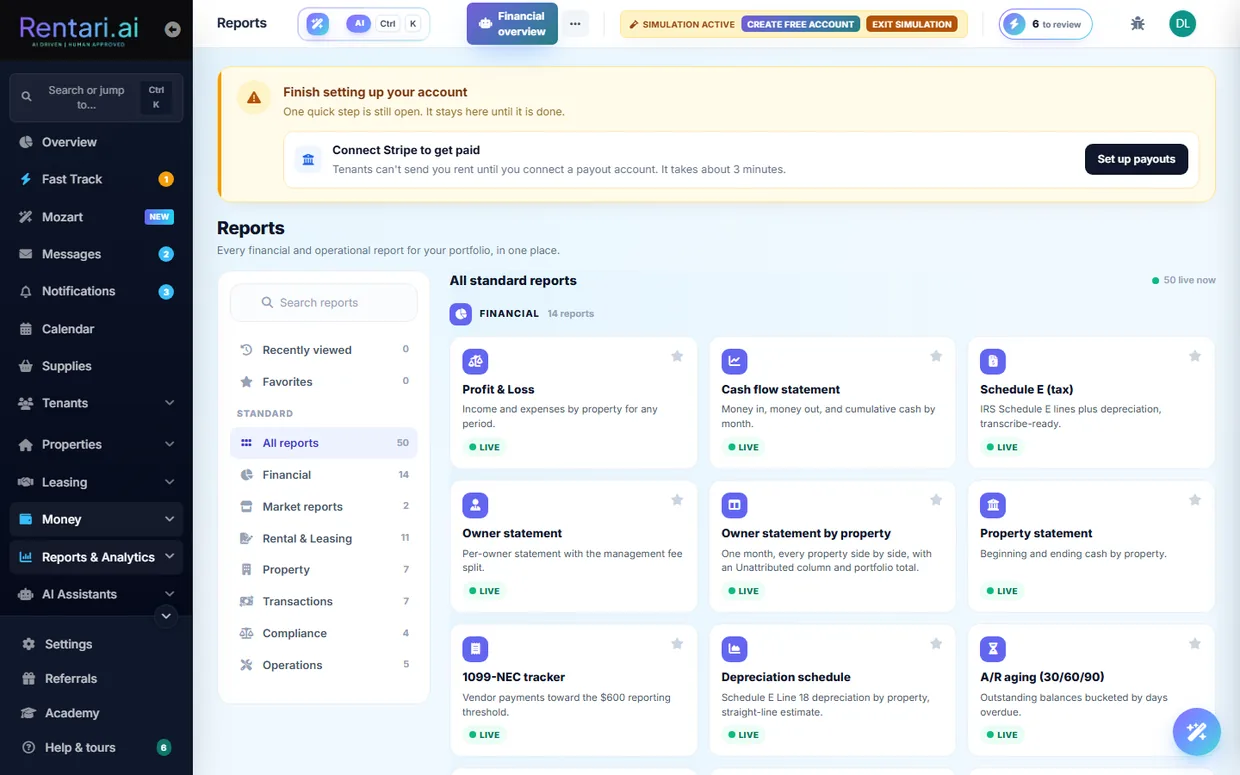
- 1Open the Reports hub. Go to /dashboard/reports. The hub shows every financial and operational report as tiles grouped by category (Financial, Rental & Leasing, Property, Transactions, Compliance, Operations), with a left rail to filter by category, Favorites, or Recently viewed, and a search box at the top. Tiles marked with a green Live chip open a report; a gray Coming soon tile is not built yet.
- 2Pick a report and set the filters. Click a Live tile (for example Profit & Loss, A/R aging, or Owner statement by property) to open the report viewer. At the top, choose a property from the building dropdown (or leave it on All properties), then click a date preset (This month, Quarter, YTD, Last year) or type From and To dates, and press Apply to refresh the table.
- 3Switch between table and chart. When a report has a chartable column, a Table / Chart toggle appears above the results. Click Chart to plot the same rows (bar, donut, pie, or line via the pill buttons), and click Table to go back. On the P&L and Schedule E, clicking a category or section-total row opens a drill panel listing the actual ledger rows behind that figure, each with a View link to the receipt.
- 4Export or print the report. Use the CSV button to download the report as a spreadsheet, the PDF button (shown on reports that support it) for a formatted file, or Print to print the current view. The export always carries the same property and date filters you have applied, so the downloaded file matches the on-screen table.
- 5Watch portfolio performance in Analytics. Open /dashboard/analytics for the performance view: a Portfolio pulse card (portfolio value, occupancy, cash flow per unit, renewal rate), a 6-month cash flow chart, and a Mozart noticed panel that flags items like lost revenue, high delinquency, or rising expenses. Expand the collapsible Deep dives for NOI and cap rate, delinquency aging, an expense breakdown, and the leasing funnel. Use Refresh to recompute from the latest ledger, and Export PDF or Export CSV to download a summary.
- 6Ask the AI CFO a question. Open /dashboard/analytics/financial and use the AI CFO panel on the right. Type a question in the Ask anything about your finances box (or click a starter chip like Summarize this month or Unusual expenses) and press send. It answers in plain language grounded in your ledger data and cites sources; it is read-only analysis and does not change or commit anything to your books.
- 7Generate an owner statement. For per-owner payouts, open /dashboard/owners (or use the Owner statement report tiles in the hub) to produce a statement per property with the management-fee split and an owner draw. Actually initiating an owner draw moves money and requires a typed confirmation and a verified bank account, so review the figures before you confirm.
- Demo accounts are read-only: you can open every report and export CSV or PDF, but money-moving actions like initiating an owner draw are blocked with a 403.
- Profit & Loss and Schedule E require financial access. A manager or co-owner without that role sees a Financial access required lock instead of the data, even though they can open the report page.
- Mozart insights and the AI CFO answers are suggestions and read-only analysis. Nothing is committed to your books until you take the action yourself, so treat them as a starting point to investigate.
Stay compliant and handle evictions
Compliance Autopilot watches state-specific deadlines across your whole portfolio and prepares each step before it becomes a problem, and the Evictions surface lets you open and track an unlawful-detainer case from first notice to outcome when a filing is genuinely the next step. A landlord (or a scoped manager) works both surfaces.
- 1Open Compliance Autopilot. Go to /dashboard/compliance. The status banner shows your pilot mode pill (Co-pilot, Mixed, or Autopilot), the last scan time, how many items are tracked, and how many await your approval.
- 2Read the three risk tiers. Below the banner, three tiles roll up the calendar: Tier 3 (action required, missed or due within 7 days), Tier 2 (recommended, due in 30 days), and Tier 1 (informational). The Autopilot activity feed under them lists what Rentari prepared, most recent first.
- 3Work a compliance item. In All upcoming items, use the category filter or Refresh, then on any row click the primary action (for example Draft renewal notice, Draft refund letter, or Schedule inspection), or use Acknowledge or Snooze 30d. Acknowledged items strike through with an Undo; snoozed items drop off until the date passes.
- 4Check the deeper Compliance overview. Click the Compliance overview link in the intro or banner to open /dashboard/compliance/overview, which surfaces at-risk recerts, voucher checks, insurance gaps, pending change requests, and stalled signing in one place.
- 5Start an eviction case when it is truly next. Only when a notice is the real next step, go to /dashboard/evictions and click Start a case. In the modal enter the Lease ID, pick a Reason (non-payment, lease violation, holdover, or nuisance), optionally set State and Amount past due, then type EVICT in the confirmation field to enable Open eviction case. Rentari drafts a state-specific first notice for your review, it does not file anything.
- 6Mark the notice served. On the case detail page (/dashboard/evictions/{id}), click Mark notice served and choose the service method (personal, posting, certified mail, email, or other) and date. This records the service and moves the case status to Notice served.
- 7Schedule the hearing. Click Schedule hearing, enter the court date, and confirm. The case status moves to Hearing scheduled and the date shows in the case summary.
- 8Record the outcome or hand off to an attorney. When the matter resolves, click Record outcome, pick the result (won possession, settled, dismissed, abandoned, or withdrawn), and type CLOSE to confirm, which locks the case. Use the Packet button on the list to download a consolidated evidence JSON (lease, ledger, notices, timeline) for attorney handoff.
- In Co-pilot mode (the default) nothing sends on its own, every drafted item waits for your approval; switch modes from Change mode / the autonomy tab only if you want low-risk reminders to run automatically.
- Starting a case (EVICT), recording an outcome (CLOSE), and withdrawing (CANCEL) each require typing the exact confirmation word, and the page warns that Rentari is not a law firm, so review notices with an attorney before service.
- Demo mode is read-only: acknowledging or snoozing an item, or any eviction write, returns a 403 and shows a read-only toast.
Communicate and use Mozart
Mozart is your portfolio-aware co-pilot that answers questions about rent, leases, and tickets and proposes actions you approve before anything runs. This walkthrough covers asking Mozart, approving its proposals, and messaging tenants from the Inbox.
- 1Open the Mozart workspace. Go to /dashboard/copilot. The hub opens on the Chat tab with the Mozart panel selected (the left rail has Chats, Mozart, and Context tabs), showing the "Ask away" greeting and starter prompt cards.
- 2Ask a question or pick a starter. Type into the "Message Mozart..." box at the bottom and press the up-arrow Send button, or click a prompt card or chip like "Who's overdue?", "Renewals 90d", or "Open tickets" to fill the question for you.
- 3Read the answer or the proposed action. Mozart replies inline. For a question it returns the numbers from a read-only portfolio snapshot; when you ask it to do something (a late notice, renewal offer, ticket, or tenant message) it renders an action card instead of acting.
- 4Review the plan before it runs. Multi-step work appears as a plan with per-step tier chips (read, sends outbound, etc.) and a "Nothing runs until you Approve" note. Nothing is executed yet at this point.
- 5Edit any fields, then approve. On an action card you can change the editable fields (or click "Write it for me" for a suggested message), then click "Approve plan" to run it or "Decline" to discard it. A low-confidence or high-risk step pauses and waits for a separate "Confirm step" click.
- 6Check Activity and Autonomy. The Activity tab logs every proposal and decision with a 7d/30d/90d/All filter and CSV export; the Autonomy tab lets you set Co-pilot (propose only) or Autopilot mode per recipe. Mozart never auto-mutates money-moving actions.
- 7Switch to the Inbox to message a tenant. Go to /dashboard/inbox, click a conversation in the left list (or the plus button to start a new one), and read the thread. Use the search box and the All / Unread filter pills to find the right conversation.
- 8Draft, insert, and send a reply. Click "Draft a reply" (the wand button) to have the Inbox Co-pilot write a reply, review it in the AI Copilot Draft box, click "Insert Draft" to drop it into the message field, edit as needed, then press the Send button. To reach every tenant at once, use the broadcast (bullhorn) button.
- Mozart proposes and you approve; it will abstain rather than invent a fact, and in Co-pilot mode nothing goes out without your click. Mozart never sends a renewal offer without your approval, in any mode.
- The "Also send as text (SMS)" toggle appears only on direct tenant threads where the recipient has a mobile on file and active TCPA consent, so it stays disabled otherwise.
- Demo mode is read-only, so approving a Mozart action or sending an Inbox message is blocked with a 403 until you are on a real account.
Configure settings, white-label branding, and billing
This is where a landlord or property manager sets up their profile and business details, white-labels the platform under their own brand, and manages their subscription and invoices. It runs across the Settings hub, the branding and site editors, and the billing center.
- 1Open Settings and pick a tab. Go to /dashboard/settings. Under the "Settings" heading, use the sticky tab row to move between Account, Automation, Notifications, Plan & Payouts, and Team & Brand. The Account tab is selected by default.
- 2Update your profile and business info. On the Account tab, upload a profile photo, then fill the Profile Information form and click "Update info". Below it, complete Business Information (legal name, entity type, business name, EIN) so documents and ownership checks use the right details.
- 3Review your plan and unit count. Click the "Plan & Payouts" tab to see your current plan and the inline "Change unit count" control, or open /dashboard/billing for the full billing center with your renewal date and next charge.
- 4Manage your subscription in Stripe. On /dashboard/billing, click "Manage subscription" (or "Update payment method") to open the Stripe customer portal, where you change your card, switch plan, or cancel. Returning shows a "changes reflected below" confirmation.
- 5Download past invoices. Still on the billing page, scroll to the invoice history and use the per-row download to save any invoice PDF. The list shows your most recent invoices, newest first.
- 6Open the branding editor. From the "Team & Brand" tab in Settings, click "Open branding" to reach /dashboard/settings/branding, where you white-label the platform for your tenants and vendors.
- 7Set your subdomain, logo, and colors. In the Brand configuration card, enter a Subdomain (like acme-pm) and Display name, upload a logo (URL or PNG/JPG/SVG up to 2MB), set Primary and Accent colors with the pickers, and add support contact details. The Live preview updates as you type, and nothing is applied until you click "Save".
- 8Claim your link or a custom domain. After saving, copy your branded link (your-name.rentari.ai) from "Your branded link", or in the Custom domain card enter a hostname like portal.acme-pm.com, click "Save", add the shown CNAME at your DNS host, then click "Verify" and finally "Set up HTTPS" once DNS turns green. Use "Open site" from Team & Brand to edit your public marketing home.
- White-label is a paid feature. On the Free plan the branding and custom-domain saves return an error, so upgrade first if the Save buttons are blocked.
- Demo mode is read-only. Every save (profile, branding, domain, billing change) is blocked with a 403, so use a real account to make changes.
- Managers and co-owners see the portfolio owner's plan and invoices, but only the account owner can change the subscription or unit count; the inline control hides for team members.
Operate a Section 8 / affordable-housing unit
Rentari's HUD suite walks a Housing Choice Voucher unit through the full compliance loop, from rent reasonableness and the tenant-share math to lease audit, HAP tracking, inspection, and recertification. Every figure is a planning estimate, not a substitute for your PHA's official certification.
- 1Open the HUD rent calculator hub. Go to /dashboard/affordable-housing (also reachable under Compliance & Legal in the sidebar, alongside Voucher rent check, HAP reconciliation, PHA directory, and SOI check). The page header reads 'HUD rent calculator (TTP)' and the 'Related HUD tools' card at the bottom links out to every other tool in the suite.
- 2Register the unit as a voucher unit on its property. The per-unit tools (recert prep, caseworker export, inspection due dates) only appear once the unit is tracked. Open the unit from /dashboard/properties, use the voucher/subsidized panel on the property detail page, type your housing authority into the PHA search to link it, fill contract rent, HAP amount, tenant share, payment standard, and inspection standard, then click Save. This creates the subsidized-unit record the rest of the suite reads.
- 3Check the asking rent against Fair Market Rent. Open /dashboard/voucher-rent-check (Voucher rent check). Enter the ZIP and bedroom count and the rent you want to charge. Rentari looks up the published HUD FMR or SAFMR and returns a rent-reasonableness verdict against the payment standard so you know whether the PHA is likely to approve the rent before you list. This lookup needs the HUD API token configured; if it is not, the tool cannot return live FMR.
- 4Calculate the Total Tenant Payment and HAP split. Back on /dashboard/affordable-housing, fill Monthly gross income, Monthly adjusted income, Contract rent, Utility allowance, PHA minimum rent (defaults to 50), and optional welfare rent, then click Calculate. The result panel shows the Total Tenant Payment (greatest of 30% adjusted income, 10% gross income, welfare rent, or PHA minimum per 24 CFR 5.628), plus gross rent, tenant rent to owner, any utility reimbursement, and the HAP subsidy amount.
- 5Audit the lease and attach the HUD Tenancy Addendum. Open the voucher lease from its lease detail page. The HCV panel runs a deterministic check against 24 CFR 982.308(d) for prohibited clauses and flags whether the HUD Tenancy Addendum (Form 52641-A) is present. Click 'Attach HUD Tenancy Addendum' to splice the required addendum onto the lease so it passes the PHA's RFTA review.
- 6Track the HAP deposit in reconciliation. Go to /dashboard/hap-reconciliation. Record or auto-generate the expected Housing Assistance Payment and compare it to what the PHA actually deposited. When a deposit matches, you click Post to ledger to commit it into your books; nothing posts to the ledger automatically, so review the amount first and approve that action yourself.
- 7Prep the HQS or NSPIRE inspection. Open the unit and choose "Run self-check" (also on Compliance, next to any unit due for inspection). Walk the standard HQS or NSPIRE checklist, marking each item pass or fail and attaching photos, then finalize to record the overall result. Use this to self-check the unit before the PHA inspector arrives.
- 8Prepare recertification and the caseworker handoff. When the annual recert is due, open /dashboard/recert-prep/{unit_id} for the unit (or find due units on the recert-due list). Rentari produces a recertification document checklist and a caseworker export sheet with roughly 12 months of HAP history that you can hand to the PHA.
- This entire HUD suite is an optional, import-gated module. If the Affordable housing and voucher pages are not visible in your build, the routers were not mounted; some tools (FMR lookup, rent reasonableness) also require the HUD_API_TOKEN before they return live data.
- Before you advertise a voucher unit, run the Source-of-income check at /dashboard/soi-check. It scans your listing or notice copy for prohibited phrasing like 'no Section 8' and rates each finding by jurisdiction, so you avoid a source-of-income discrimination problem.
- Keep your housing authorities current in the PHA directory at /dashboard/phas. Payment standards, inspection cadence, and caseworker contacts you save there flow into the voucher rent check and the per-unit tools automatically.
Apply for a rental
This walkthrough shows a prospective renter how to complete a rental application from the invite link, from personal details through FCRA consent and any screening fee. Applicants do this themselves on the public apply page, no login required.
- 1Open your apply link. Click the apply link from your invite email or text. The page loads the property and unit you were invited to and shows a 7-step progress bar (Step 1 of 7). If the landlord turned on a pre-screener, answer the short income, occupants, and pets questions first, then click Continue to application. A missing or expired link shows an invalid-invite notice instead of the form.
- 2Fill in Step 1: Personal. Choose how you are applying under I am applying as a... (Tenant, Co-tenant, or Co-signer), then enter your name, email, date of birth, and phone. If you arrived from a co-signer or co-applicant invite, the role is locked with a banner naming who you are attached to, and your name and email are pre-filled and read-only.
- 3Complete Steps 2 to 5: application details. Use Continue and Back to move through App Info, Residence, Employment, and General. Enter your monthly income, current and prior addresses, employer, and household details such as occupants, pets, vehicles, and any co-applicants or co-signers you want to invite. Each Continue validates the current step before advancing.
- 4Optionally let AI pre-fill from a document. Use Upload a paystub, ID, or bank statement to have the AI read it and fill matching fields for you. This is a draft only: the page tells you to verify before submitting, and nothing is sent until you review the pre-filled values, correct anything wrong, and finish the form yourself.
- 5Give FCRA consent and sign (Step 6: Authorization). Check the box acknowledging you received and read the FCRA Disclosure and Summary of Your Rights, check the box authorizing Rentari.ai and the owner or manager to obtain a consumer report from Checkr, then type your full legal name as your electronic signature. Both checkboxes and the typed signature are required; your date, time, and IP are recorded under the E-SIGN Act.
- 6Review the fee and submit (Step 7). The final step shows your account email, an optional password, a Terms and Privacy consent box, and Total Due Today. If a screening or application fee applies, the submit button reads Pay $X & Submit and sends you to secure Stripe checkout; if the landlord deferred or waived screening it reads Submit Application with nothing to pay.
- 7Confirm it went through. After submitting, the page shows an Application received confirmation. Reopening the same link later shows a status panel (your application is in, or an approved view with next steps) rather than a blank form, and you can still upload supporting documents such as pay stubs or ID from there.
- You cannot submit without checking both FCRA authorization boxes and typing your full legal name as an e-signature; this is a federal compliance gate, not optional.
- Total Due Today is set by the landlord and varies. It can be a screening fee, a custom application fee, or $0 when the landlord skips or waives screening.
- Invited co-signers and co-applicants get a link that locks the form to their role and pre-fills their name and email, so they never have to self-classify or re-enter who they are applying with.
Pay rent and set up autopay
This walkthrough shows a tenant how to pay their rent balance and turn on autopay from the renter portal, so rent is paid on time without manual steps each month. Everything happens on your Rent page after you add a bank account or card.
- 1Open your Rent page. Go to /dashboard/renter/finance (the Rent, or Money, item in your renter navigation). The page header reads Rent, payments, autopay, and protection, and it shows your total due, next due date, and a status pill such as Due Soon, Overdue, Processing, or Paid.
- 2Add a payment method. If you have not linked one yet, click the Add a payment method button (startPaymentSetup). Choose Bank account (ACH), which carries the lowest fees, or Credit or debit card, then complete the secure Stripe form. This takes about a minute and unlocks both one-time payments and autopay.
- 3Review what you owe. Check the itemized balance breakdown, where each line item (Rent, Utilities, Late fee, Parking, Pet rent, Security deposit, and so on) is listed with a plain-language reason so you can see exactly what makes up your total.
- 4Pay your balance now. Click the Pay now button (labeled Pay rent when a deposit is billed separately). A Confirm your payment modal opens listing what you are paying for, the subtotal, and your saved payment method. If your landlord accepts partial payments, a Pay a different amount field lets you pay less than the full balance.
- 5Confirm the one-time payment. Review the amount and the fee for your chosen method, then confirm. The charge posts through Stripe and the matching balance moves to Processing, then Paid once it clears. If autopay is already on and you pay manually, Rentari voids that cycle's pending automatic charge so you are not billed twice.
- 6Open the Autopay card. Scroll to the Autopay card. It shows whether autopay is currently active or inactive for your portion. Click Set up autopay (or Manage autopay if it is already on) to start the toggle flow.
- 7Turn on autopay and confirm. A Turn on autopay dialog explains that your saved method draws your rent automatically each month. Click Turn on autopay to confirm. The request posts to toggle-autopay, you see an Autopay updated success message, and the page reloads showing autopay active with your next scheduled draw amount and date.
- Autopay needs a saved bank account or card first. If none is on file when you tap Set up autopay, Rentari prompts you to add one, then returns you straight to the autopay confirm step.
- Autopay is not offered during move-in. The Autopay card is hidden while you have a deposit or prorated first-month charge, so pay those with the Pay now button; autopay appears once you are on regular monthly rent.
- ACH bank payments carry the lowest fee on a typical rent, a flat $6.00 against 3.49% on a card. You can cancel autopay anytime from the same Manage autopay button.
- You do not have to keep a login to pay. Every rent reminder carries a link that opens straight to what you owe, with no account and no password, and the autopay invite works the same way. Ask your landlord to send you one if you have lost yours.
- In a demo or read-only account, payment and autopay actions are blocked, so use a real tenant login to actually pay or enable autopay.
Request and track maintenance
As a tenant, you report a repair by describing it to Luna, the AI assistant, then watch every step and rate the work once it is done. Luna drafts the ticket for you and never sends anything until you approve it. If you would rather not sign in at all, scan the Rentari card your landlord left in your home, or text the code on it (it looks like RNT-K7M2QW) along with what is wrong, and the request reaches them the same way.
- 1Open the Maintenance page. Go to /dashboard/renter/maintenance from your renter dashboard. The header shows a context chip with your name, unit, and address, the ticket list sits on the left, and the Luna chat panel is on the right.
- 2Describe the issue to Luna. Type what needs fixing in the Luna composer at the bottom right (for example, the kitchen faucet drips), or tap a starter chip like Leaky faucet or No hot water. You can also add a photo with the camera button, attach a file with the paperclip, or dictate with the microphone.
- 3Answer Luna's questions. Luna asks a few grounded follow-up questions to pin down the problem and may suggest one safe self-fix step with That fixed it and Still broken buttons. It only proposes a ticket once it has enough detail, and it never files anything on its own.
- 4Approve and file the ticket. When Luna is ready it shows a proposal card reading I'll file this as ... File it now? Click File ticket to submit it to your manager, or Not yet to hold off. On confirm the ticket is created and the page reloads with your new request in the list.
- 5Track status on the timeline. Each ticket card shows a five-step timeline (Reported, Acknowledged, Scheduled, In progress, Completed) and a status pill. Use the All, Open, In progress, and Done filter pills above the list to narrow what you see.
- 6Open a ticket to read Luna's read and chat. Click a card to expand it. You see Luna's read (an AI diagnosis and a while-you-wait tip), the conversation thread loads, and you can type in the reply box to message your manager, and the vendor too once the shared thread is open.
- 7Rate the completed work. When a repair is finished, a Rate now nudge and a Rate button appear. Pick a star rating, add optional feedback, and click Submit rating, which records your sign-off and helps your landlord pick good vendors.
- 8Use the emergency path when it is dangerous. For gas, flooding, fire, or no heat, use the pinned red After-hours emergency block or the Call 911 button. If you type danger words to Luna, it shows a safety card steering you to call 911 or your manager before logging anything.
- Luna always proposes before it files. Nothing is sent to your manager until you click File ticket, so you stay in control of every request.
- On a demo or read-only account, filing a ticket, sending a reply, or saving a rating is blocked and Luna tells you it was not actually sent.
- The After-hours emergency block and 911 steer are for real dangers like gas leaks or flooding. Do not wait for ticket triage in those cases.
Move-in condition, move-out and deposit
Document your unit's condition on day one, then give formal notice and track your security deposit refund when you leave. As a tenant, you log pre-existing damage during your first 72 hours so it cannot be charged back to your deposit later, and at move-out you file your notice and watch the itemized settlement.
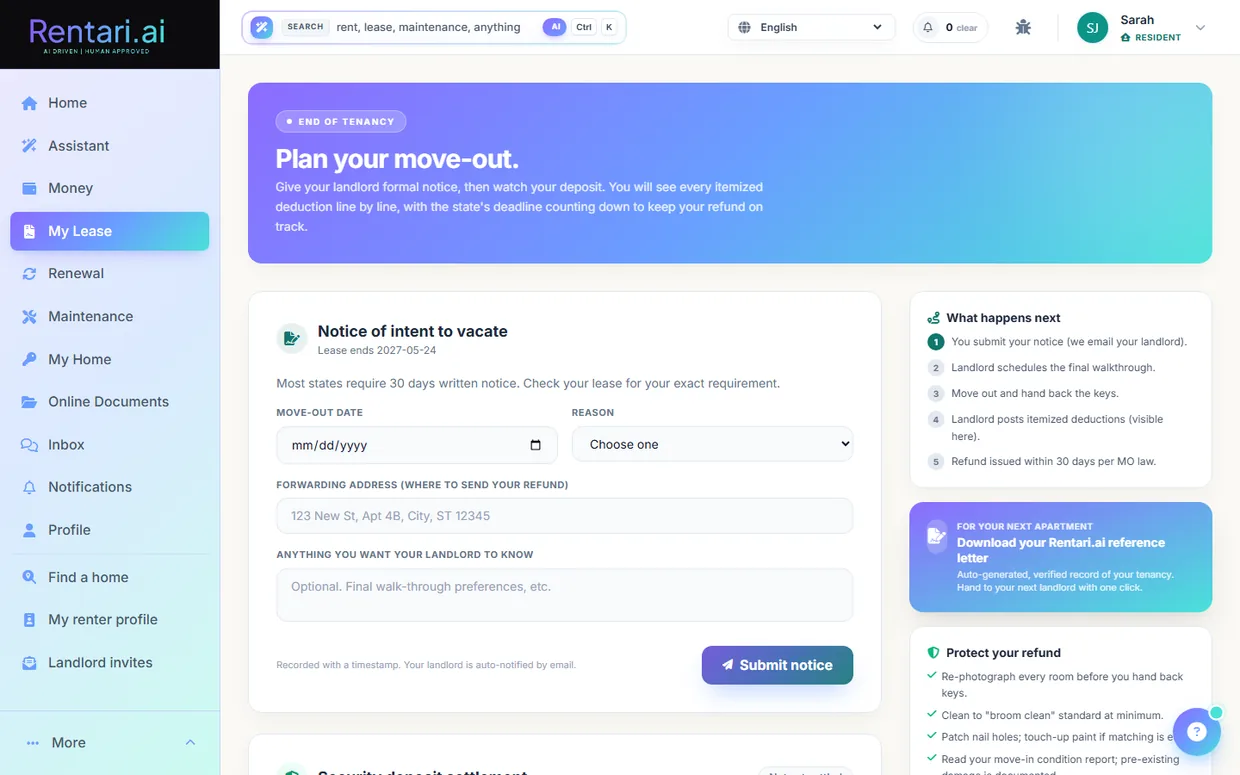
- 1Open your Move-In Condition Report. Go to /dashboard/renter/move-in. The purple header shows a countdown of the days remaining in your 72-hour reporting window; if the window has closed it shows a red 'Window closed' note and existing entries stay on record.
- 2Log a pre-existing condition. In the 'Log a pre-existing condition' card, pick a room from the 'Room or area' dropdown (Kitchen, Bathroom, Flooring, and so on), describe what you found in the 'What did you find' box, then tap the photo drop zone to attach a picture from your camera roll.
- 3Save the entry. Click 'Log entry'. The entry is timestamped, stored privately in your Online Documents, and appears instantly in the 'Your entries' list with its photo, room label, and count. Add as many entries as you need; most tenants log 2 to 5 small items.
- 4Remove an entry if needed. While your 72-hour window is open, use the trash icon on any entry row to remove it. A branded confirm dialog appears, and you can re-add the item any time before the window closes.
- 5Open the Move-Out Center when you plan to leave. Go to /dashboard/renter/move-out. The header shows your lease end date, and once a notice is on file it shows a deposit refund clock counting down the days your state gives the landlord to return your deposit.
- 6Submit your notice of intent to vacate. In the 'Notice of intent to vacate' card, pick your move-out date, choose a reason, add your forwarding address for the refund and any notes, then click 'Submit notice'. Your landlord is auto-notified by email and the notice shows an 'On file' badge with Edit and Withdraw options.
- 7Review your security deposit settlement. After you move out and the landlord posts the settlement, the 'Security deposit settlement' card shows your original deposit, total deductions, and refund amount, plus each itemized deduction line. Anything you logged in your day-one report cannot be charged here.
- 8Dispute a deduction you disagree with. On any deduction line, click 'Dispute' (or the 'Dispute a deduction' button), explain in at least one sentence why you disagree, and click 'File dispute'. The line gets a 'Disputed' badge and your landlord sees it on their dashboard to waive or uphold.
- The 72-hour move-in window is strict: it counts from your lease start date, so walk the unit and log damage on day one. After it closes you can no longer add entries.
- At move-out an AI walkthrough on the landlord's side compares your before-and-after photos, which is why your day-one photos directly protect your deposit. The landlord still reviews and posts the final deductions before anything is charged.
- In demo mode the pages are read-only, so submitting a condition entry, filing a notice, or disputing a line will be blocked until you are on a real account with an active lease.
My Home: documents, renewals, and Luna
The My Lease hub gives tenants one place to read their agreement, view every lease document, ask Luna questions grounded in the signed lease, and open renewal or move-related tools. This is your home base for anything about your tenancy.
- 1Open My Lease. Go to /dashboard/renter/lease. The header chip shows your name, unit, and address, and the lifecycle compass across the top marks where you are in the 7-stage journey from Applied to Move-out.
- 2Check your key terms. The summary strip and the Key terms tiles pull straight from your signed lease to show term dates, monthly rent and due day, security deposit, late fee, pet rent, NSF fee, and whether renters insurance is required.
- 3View a lease document. In the Lease documents card, each version lists its type, date, and status pill. Click the eye icon on a row to open that PDF in the in-app viewer in a new tab.
- 4Ask Luna about your lease. In the docked Luna panel on the right, tap an Instant answer row (rent, late fee, deposit) or a chip like Pets or Notice to move out, or type into the composer and press send. Luna answers only from your signed lease and points you to your property manager if the answer is not in it.
- 5Open the Renewal Center when a decision is due. In the Lease toolkit, click Renewal Center (it shows a Decision tag when an offer is pending). The AI copilot reads your rental record, payment history, and maintenance cooperation and drafts a polite renewal message.
- 6Review and approve before anything is sent. On the renewal page you can accept, counter, or decline the offer and edit the drafted message. Nothing goes to your landlord until you send it yourself, the AI never sends on your behalf.
- 7Use the other lease tools. From the toolkit tiles you can also open Mid-lease changes, Move-in condition, Move-out plan, Accommodations, VAWA protection, Rental history letter, and My pets, each deep-linking to its own page.
- Luna and the Key terms tiles read your actual signed lease, so figures like rent and deposit reflect your agreement, not a guess.
- The renewal copilot and Luna are advisory only. You always review and approve the message before it is sent to your landlord.
- To upload or store your own files (insurance, IDs, records), use the Documents page at /dashboard/renter/documents, which the old /vault link now redirects to.
Give property owners their own portal
If you manage property on behalf of other owners, Rentari gives each owner a private portal where they see their monthly statement, download a PDF, acknowledge it, and get their distribution paid straight to their own bank. You set up the ownership split and generate statements from the ledger; the owner reviews and connects their payout account.
- 1Open the owner workspace and pick a property. Go to /dashboard/owners. Use the Property dropdown at the top to choose the property whose owners you want to set up. The Owners roster and Statements table below reload for that property.
- 2Add each owner with their ownership share. In the Owners card, enter the owner's login email in Owner email (existing user) and their share in Ownership %, then click Add owner. Rentari validates that active shares never exceed 100%. The owner must already have a Rentari login; if they do not, they first register through the invite link at the owner portal, then you add them here.
- 3Generate the month's statements. In the Generate statements row, set Year, Month, and an optional Mgmt fee %, then click Generate statements. Rentari reads that property's income and expenses from the ledger for the month, withholds the management fee, and splits the net into one draft statement per owner by their share. This is a draft record only: nothing is sent to the owner and no money moves. Re-running a month leaves any already-sent statements unchanged.
- 4Let the statement reach the owner. Statements are published to owners at month close by Rentari's monthly owner-statement job, which flips the draft to Sent and emails the owner a link to their portal (a link, not the PDF). The owner then opens /dashboard/owner and sees the new statement under Statements with a Review badge.
- 5Owner reviews and downloads the PDF. On /dashboard/owner the owner clicks the statement row to open it, showing gross income, operating expenses, management fee, and their net draw for their share. They click Download PDF to save a clean copy of the statement for their records.
- 6Owner acknowledges the statement. On the statement detail page the owner clicks Acknowledge. The status changes to Reviewed and the acknowledgement is timestamped. This acknowledgement is what clears the statement for its distribution draw.
- 7Owner connects a payout bank via Stripe. The owner opens Bank & settings from their portal nav and clicks Connect with Stripe. Stripe's hosted onboarding collects their bank details directly (never shared with you), and the Started, Verified, Connected tracker fills in. Once Stripe verifies the account, payouts are enabled. They can also save legal name, entity type, and tax ID here for their year-end 1099.
- 8Release the owner's distribution draw. With the statement acknowledged and the owner's Stripe bank verified, the distribution can be released to that account. This is a Tier 3 money move: it requires the owner's verified bank and an exact typed confirmation phrase before the Stripe transfer is created, so nothing is sent until you deliberately confirm it. The statement moves to In transfer, then to Paid once the payout settles.
- The owner statement portal is an optional, flag-gated module. The automatic month-close send and email run only when OWNER_PORTAL_STATEMENTS_ENABLED is turned on for your account; until then your generated statements sit as drafts in the workspace and owners see nothing new. Ask Rentari to enable it if you want owner statements live.
- Draws are blocked until the owner finishes Stripe bank onboarding. If Verified is not yet lit on their Bank & settings tracker, the distribution cannot be released, so nudge owners to complete Connect with Stripe before you expect a payout.
- Ownership shares are validated to total at most 100% per property, and removing an owner soft-ends their share so past statements stay intact. Set each owner's percentage carefully before generating a month.
Onboard as a vendor
This walkthrough shows a contractor how to accept a landlord's invitation, create a Rentari vendor account, and finish onboarding by completing the compliance steps (identity, bank, W-9, and insurance) so they can start receiving work.
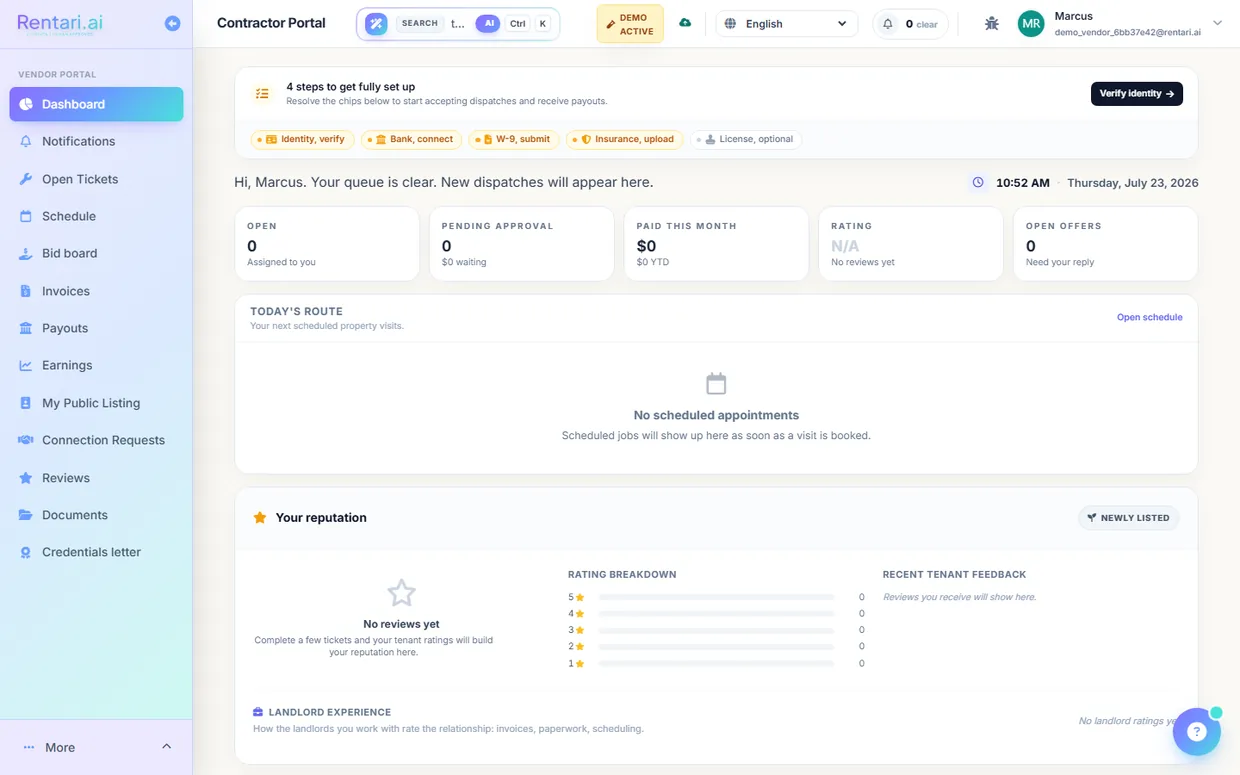
- 1Open your invite link. Click the invite link the landlord sent you, which opens the "You're invited / Join Rentari.ai" page showing the landlord's name and any personal message they added. If the link says the invite is not found or has expired (links are valid for 14 days), ask the landlord to resend.
- 2Set your name and password. Enter your First Name (required) and Last Name, then choose a Password of at least 8 characters. The Email field is pre-filled from the invitation and is locked, so your account stays tied to the address the landlord invited.
- 3Add your business details. Type your Company Name (required), pick a Specialty from the dropdown (Plumbing, Electrical, HVAC, General Handyman, and so on), and add your Phone number.
- 4Enter your service address. Fill in the Service Address fields (street, city, two-letter state, and ZIP). This is optional but helps Rentari match you with nearby properties, since the address is geocoded when you submit.
- 5Create your account. Click "Create Account and Accept Invite." Rentari creates your vendor account, logs you in automatically, notifies the landlord that you accepted, and drops you on your vendor dashboard at /dashboard/vendor.
- 6Review your compliance ribbon. At the top of the dashboard, the compliance ribbon shows five chips: Identity, Bank, W-9, Insurance, and License. Amber chips need action and tell you how many steps remain before you can accept dispatches and get paid.
- 7Verify identity and connect your bank. Click "Verify identity" to complete Stripe identity verification, then "Connect bank" to finish Stripe payout setup so approved invoices deposit straight to your account. Both open Stripe, and their chips turn green once Stripe reports them complete.
- 8Submit your W-9 and upload insurance. Click the amber "W-9, submit" and "Insurance, upload" chips to reach your listing page and add your W-9 and proof of liability coverage. When every required chip is green, the ribbon collapses to a single "All compliance current" line.
- The email on the signup form is read-only and bound to the address the landlord invited, so you cannot register the account under a different email.
- Identity and bank both run through Stripe, so their chips only flip to verified after Stripe confirms them. Use the Refresh control on the identity chip if it stays in review.
- License is marked optional, but most landlords require active insurance before assigning work, so upload your certificate to avoid being skipped.
Accept jobs, bid, invoice and get paid
This is how a vendor takes a dispatched or open work order all the way to payment, accepting or bidding on a job, advancing it through the work states, submitting an invoice, and tracking the payout. It runs entirely inside the vendor portal on your Rentari dashboard.
- 1Accept a dispatched job. On the vendor dashboard at /dashboard/vendor, dispatched tickets appear with Accept and Decline buttons. Click Accept to claim the job (this calls the vendor-accept action and stamps your acceptance time), or Decline to pass it back.
- 2Bid on open work orders. Open the Bid board at /dashboard/vendor/bids and stay on the Open tab. Under any card in 'Open for bid', fill the Total ($) field and optional Earliest start date, add optional notes, then click Submit bid. Only tickets from landlords you are connected to appear here.
- 3Track your bid outcome. Switch to the My bids tab to see each bid as Submitted, Shortlisted, Selected, or Not selected, plus your win rate. When the landlord selects your bid the job becomes an assigned ticket you can work.
- 4Advance the job through its states. Open the ticket from /dashboard/vendor/tickets, then use the 'Advance to...' button on the status bar to move through Accepted, En route, On site, Diagnosing, Awaiting parts, Repairing, and Complete. Each transition is logged and both buttons (top and bottom) stay in sync.
- 5Log materials and completion notes. In the Materials and cost card, add line items (item, qty, unit cost) and Save. In Completion notes, click 'AI draft from photos and notes' to have the AI propose a summary, then edit the text before it commits, since the landlord and tenant both see it.
- 6Submit the invoice. Go to Finance at /dashboard/vendor/finance and click 'Submit new invoice'. Pick a completed ticket, upload the PDF or image, then click 'Scan with AI'. Gemini extracts the grand total for you to review, then click 'Confirm & Submit'. You confirm the amount before the landlord is notified.
- 7Get paid and track payouts. After the landlord approves, watch the invoice move from Awaiting to In transit to Paid on the Finance list. Open /dashboard/vendor/payouts to see paid year-to-date, transfer count, next processing payout, and your payout bank last-4.
- The AI never sends anything on its own. It only drafts your completion notes and reads the invoice total, and you edit or confirm the number before the landlord ever sees it.
- You must mark a ticket completed before you can invoice it. The 'Submit new invoice' button stays disabled until you have at least one completed ticket awaiting an invoice.
- The demo account is read-only, so Accept, Submit bid, and Confirm & Submit will not save. Use a real vendor login to exercise the full flow.
Reference tables
Pricing
| Tier | Units | Price |
|---|---|---|
| Prime | Up to 10 units | $120 / year flat (list $150) |
| Portfolio | Up to 50 units | $279 / year flat (list $349) |
| Scale | Above 50 units, no cap | $8 / unit / year (list $10). 200 units is $1,600 a year |
| When you are billed | Any | Once a year, at checkout. Annual is the only cycle sold, and there is no free trial, so the first year is charged when you subscribe. Cancel any time |
| Free tier | Any | Unlimited properties and units, your listing published on your Rentari page, online applications, tenant screening (the applicant pays), one active lease, and unlimited maintenance tickets. Rent collection, the books, the AI operator and portal e-signature sends are paid |
Feature availability
Most of the platform is built and wired. Here is exactly what is not fully live today. This describes what the code does, not necessarily what is deployed at this moment.
| Status | Feature |
|---|---|
| Dormant | Bounded auto-dispatch (off by default), Double-entry journal projection (ships disabled behind a kill switch), New-law compliance alerts (not yet wired), AI state-setup wizard & empty-state nudge (flagged off), Simulation sandbox (built, flagged off in production today). |
| Gated | AI-triage supply recommendations card (needs catalog on), Bank feed (Stripe Financial Connections) (needs Stripe FC), AI listing description writer (premium plan), AI leasing inbox (needs inbound-email domain), HUD subsidized-unit tracker & recert prep (feature-gated module), Fair Market Rent lookup & rent reasonableness (needs HUD API token), HCV lease audit & tenancy addendum (feature-gated module), HAP reconciliation (feature-gated module), PHA directory (feature-gated module), HQS/NSPIRE inspection prep (feature-gated module), Source-of-income (SOI) guardrails (feature-gated module), Renters-insurance marketplace & upload (no live carrier). |
| Coming soon | Accounting sync providers (QuickBooks / Xero) (CSV export only). |